

Trend Micro Incorporated reserves the right to make changes to this document and to
the product described herein without notice. Before installing and using the product,
review the readme files, release notes, and/or the latest version of the applicable
documentation, which are available from the Trend Micro website at:
http://docs.trendmicro.com/en-us/enterprise/apex-one-(mac).aspx
Trend Micro, the Trend Micro t-ball logo, Trend Micro Apex One, Worry-Free, and
TrendLabs are trademarks or registered trademarks of Trend Micro Incorporated. All
other product or company names may be trademarks or registered trademarks of their
owners.
Copyright © 2019. Trend Micro Incorporated. All rights reserved.
Document Part No.: APEM08506/181016
Release Date: March 2019
Protected by U.S. Patent No.: Patents pending.

This documentation introduces the main features of the product and/or provides
installation instructions for a production environment. Read through the documentation
before installing or using the product.
Detailed information about how to use specific features within the product may be
available at the Trend Micro Online Help Center and/or the Trend Micro Knowledge
Base.
Trend Micro always seeks to improve its documentation. If you have questions,
comments, or suggestions about this or any Trend Micro document, please contact us at
docs@trendmicro.com.
Evaluate this documentation on the following site:
http://www.trendmicro.com/download/documentation/rating.asp

Privacy and Personal Data Collection Disclosure
Certain features available in Trend Micro products collect and send feedback regarding
product usage and detection information to Trend Micro. Some of this data is
considered personal in certain jurisdictions and under certain regulations. If you do not
want Trend Micro to collect personal data, you must ensure that you disable the related
features.
The following link outlines the types of data that Trend Micro Apex One (Mac) collects
and provides detailed instructions on how to disable the specific features that feedback
the information.
https://success.trendmicro.com/data-collection-disclosure
Data collected by Trend Micro is subject to the conditions stated in the Trend Micro
Privacy Policy:
https://www.trendmicro.com/en_us/about/legal/privacy-policy-product.html

i
Table of Contents
Preface
Preface ............................................................................................................... vii
Apex One (Mac) Documentation ................................................................. viii
Audience ........................................................................................................... viii
Document Conventions ................................................................................... ix
Terminology ....................................................................................................... ix
Chapter 1: Introducing Apex One (Mac)
About Trend Micro Apex One (Mac) ......................................................... 1-2
New in this Release ........................................................................................ 1-2
Key Features and Benefits ............................................................................. 1-3
The Apex One (Mac) Server ......................................................................... 1-5
The Apex One (Mac) Security Agent .......................................................... 1-6
Chapter 2: Installing the Server
Server Installation Requirements ................................................................. 2-2
Update Source ................................................................................................. 2-3
Installing the Apex One (Mac) Server ......................................................... 2-5
Activating the Product for the First Time .................................................. 2-6
Performing Post-installation Tasks on the Server ..................................... 2-6
Uninstalling the Apex One (Mac) Server .................................................... 2-7
Chapter 3: Getting Started
Getting Started Tasks ..................................................................................... 3-2
The Web Console ........................................................................................... 3-2
Opening the Web Console .................................................................... 3-3

Trend Micro Apex One™ (Mac) 2019 Administrator’s Guide
ii
Security Summary ........................................................................................... 3-3
The Agent Tree ............................................................................................... 3-5
Agent Tree General Tasks ..................................................................... 3-5
Agent Tree Specific Tasks ..................................................................... 3-6
Groups .............................................................................................................. 3-8
Adding a Group ...................................................................................... 3-8
Deleting a Group or Security Agent .................................................... 3-9
Renaming a Group ................................................................................. 3-9
Moving Security Agents ...................................................................... 3-10
Widgets ........................................................................................................... 3-12
Agent Connectivity (Mac) Widget ..................................................... 3-12
Agent Updates (Mac) Widget ............................................................. 3-14
Security Risk Detections (Mac) Widget ............................................ 3-15
Trend Micro Smart Protection ................................................................... 3-15
Smart Feedback .................................................................................... 3-18
Chapter 4: Installing the Security Agent
Agent Installation Requirements .................................................................. 4-2
Agent Installation Methods and Setup Files .............................................. 4-2
Installing on a Single Endpoint ............................................................ 4-4
Agent Post-installation ................................................................................. 4-10
Agent Uninstallation .................................................................................... 4-11
Chapter 5: Keeping Protection Up-to-Date
Components .................................................................................................... 5-2
Update Overview ............................................................................................ 5-3
Server Update .................................................................................................. 5-4
Configuring the Server Update Source ............................................... 5-5
Configuring Proxy Settings for Server Updates ................................ 5-6
Server Update Methods ......................................................................... 5-7
Agent Updates ................................................................................................. 5-8
Configuring Agent Automatic Update .............................................. 5-10
Configuring Agent Update Settings .................................................. 5-11

Table of Contents
iii
Launching Agent Update from the Summary Screen .................... 5-12
Launching Agent Update from the Agent Management Screen .. 5-13
Chapter 6: Protecting Endpoints from Security Risks
About Security Risks ...................................................................................... 6-2
Viruses and Malware .............................................................................. 6-2
Spyware and Grayware .......................................................................... 6-4
Scan Method Types ........................................................................................ 6-5
Default Scan Method ............................................................................. 6-5
Scan Methods Compared ...................................................................... 6-5
Changing the Scan Method ................................................................... 6-6
Switching from Smart Scan to Conventional Scan ........................... 6-7
Switching from Conventional Scan to Smart Scan ........................... 6-8
Scan Types ..................................................................................................... 6-11
Real-time Scan ....................................................................................... 6-12
Manual Scan .......................................................................................... 6-15
Scheduled Scan ..................................................................................... 6-18
Scan Now ............................................................................................... 6-23
Supported Compressed File Types ............................................................ 6-24
Scan Actions .................................................................................................. 6-24
Scan Exclusions ............................................................................................ 6-26
Configuring Scan Exclusion Lists ...................................................... 6-27
Cache Settings for Scans .............................................................................. 6-30
Configuring Cache Settings for Scans ............................................... 6-31
Trusted Program List ................................................................................... 6-32
Configuring the Trusted Program List ............................................. 6-33
Viewing Scan Operation Logs .................................................................... 6-34
Security Risk Notifications and Logs ........................................................ 6-35
Configuring Administrator Notification Settings ............................ 6-35
Configuring Security Risk Notifications for Administrators ......... 6-35
Configuring Outbreak Notifications for Administrators ............... 6-36
Viewing Security Risk Logs ................................................................ 6-38
Resetting Security Risk Count ............................................................ 6-41

Trend Micro Apex One™ (Mac) 2019 Administrator’s Guide
iv
Chapter 7: Protecting Endpoints from Web-based Threats
Web Threats ..................................................................................................... 7-2
Web Reputation ............................................................................................... 7-2
Configuring Web Reputation Settings ......................................................... 7-3
Configuring the Approved and Blocked URL Lists .................................. 7-5
Viewing Web Reputation Logs ..................................................................... 7-6
Chapter 8: Using Device Control
Device Control ................................................................................................ 8-2
Permissions for Storage Devices .................................................................. 8-2
Configuring Device Control Settings .......................................................... 8-3
Device List Tool ..................................................................................... 8-5
Viewing Device Control Logs ...................................................................... 8-6
Chapter 9: Managing the Server and Security Agents
Agent Self-protection ..................................................................................... 9-2
Configuring Agent Self-protection ...................................................... 9-2
Enabling Certified Safe Software Service ................................................... 9-3
Enabling Predictive Machine Learning ....................................................... 9-4
Upgrading the Server and Security Agents ................................................. 9-4
Upgrading the Server ............................................................................. 9-5
Upgrading Security Agents ................................................................... 9-6
Managing Logs ................................................................................................ 9-7
Managing Licenses .......................................................................................... 9-8
Backing Up the Server Database .................................................................. 9-9
Restoring the Server Database ................................................................... 9-10
Apex Central and Control Manager Integration in this Release ........... 9-11
Key Performance Indicators Widget ................................................. 9-12
Configuring Agent-Server Communication Settings .............................. 9-14

Table of Contents
v
Inactive Security Agents .............................................................................. 9-16
Automatically Removing Inactive Security Agents ......................... 9-16
Agent Icons ................................................................................................... 9-17
Chapter 10: Getting Help
Troubleshooting ............................................................................................ 10-2
Web Console Access ............................................................................ 10-2
Server Uninstallation ............................................................................ 10-4
Agent Installation ................................................................................. 10-5
General Agent Error ............................................................................ 10-6
Technical Support ......................................................................................... 10-7
Troubleshooting Resources ................................................................ 10-7
Contacting Trend Micro ...................................................................... 10-8
Sending Suspicious Content to Trend Micro ................................... 10-9
Other Resources ................................................................................. 10-10
Appendix A: IPv6 Support in Apex One (Mac)
IPv6 Support for Apex One (Mac) Server and Security Agents ............ A-2
Apex One (Mac) Security Agent IPv6 Requirements .............................. A-2
Pure IPv6 Server Limitations ....................................................................... A-2
Pure IPv6 Agent Limitations ....................................................................... A-3
Configuring IPv6 Addresses ........................................................................ A-4
Screens That Display IP Addresses ............................................................ A-5
Index
Index .............................................................................................................. IN-1

vii
Preface
Preface
Welcome to the Apex One (Mac) Administrator's Guide. This document discusses Apex
One (Mac) server and agent installation, getting started information, and server and
agent management.

Trend Micro Apex One™ (Mac) 2019 Administrator’s Guide
viii
Apex One (Mac) Documentation
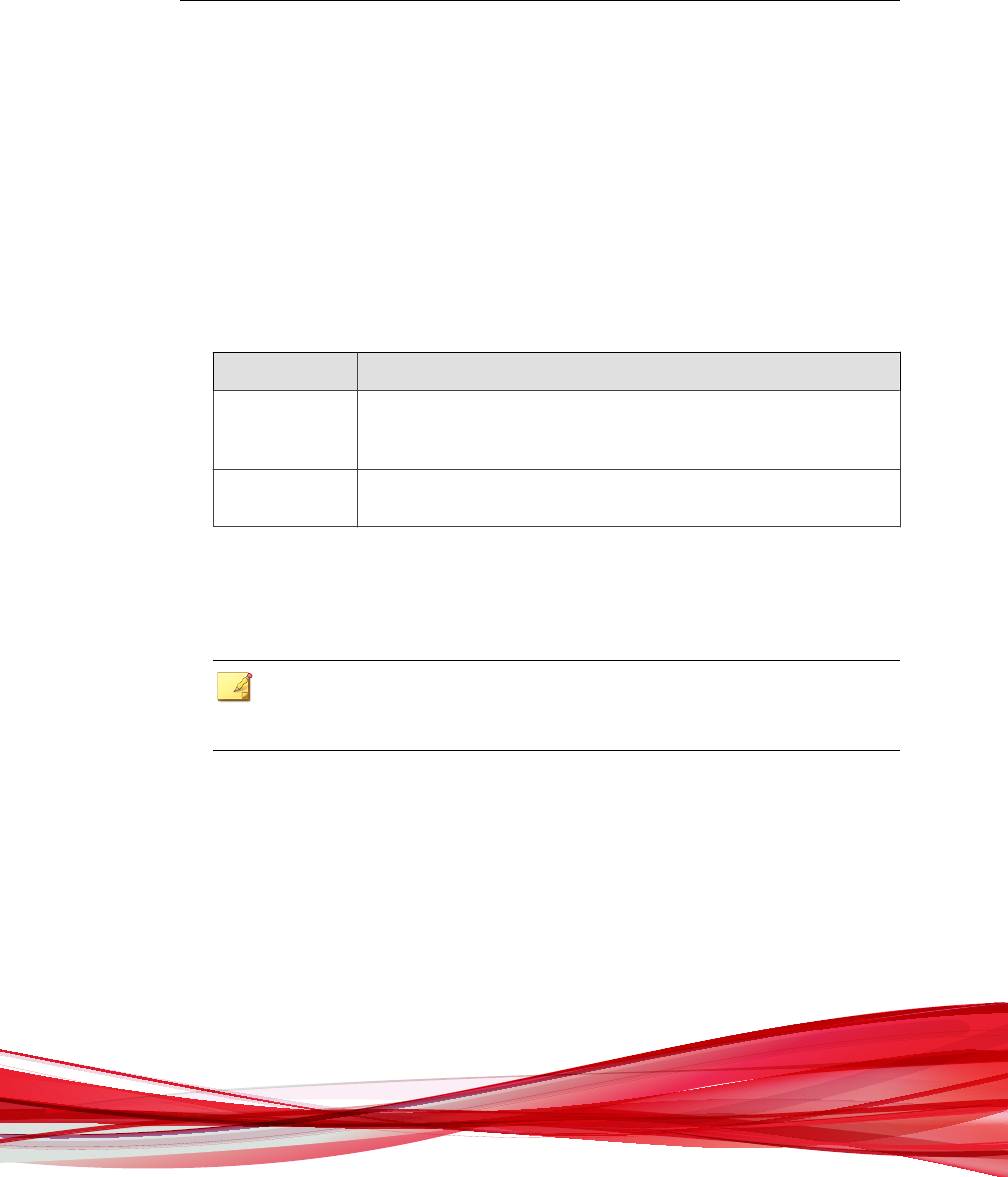
Apex One (Mac) documentation includes the following:
Documentation Description
Administrator's Guide A PDF document that discusses Apex One (Mac) server and
agent installation, getting started information, and server and
agent management
Help HTML files that provide "how to's", usage advice, and field-
specific information
Readme file Contains a list of known issues and basic installation steps. It
may also contain late-breaking product information not found
in the other documents.
Knowledge Base An online database of problem-solving and troubleshooting
information. It provides the latest information about known
product issues. To access the Knowledge Base, go to the
following website:
http://esupport.trendmicro.com
View and download product documentation at:
http://docs.trendmicro.com/en-us/enterprise/apex-one-(mac).aspx
Audience
Apex One (Mac) documentation is intended for the following users:
• Apex One (Mac) administrators: Responsible for Apex One (Mac) management,
including server and Security Agent installation and management. These users are
expected to have advanced networking and server management knowledge.
• End users: Users who have the Apex One (Mac) Security Agent installed on their
endpoints. The computer skill level of these individuals ranges from beginner to
power user.

Preface
ix
Document Conventions
To help you locate and interpret information easily, the Apex One (Mac) documentation
uses the following conventions:
Table 1. Document Conventions
Convention Description
ALL CAPITALS Acronyms, abbreviations, and names of certain commands
and keys on the keyboard
Bold Menus and menu commands, command buttons, tabs,
options, and tasks
Italics References to other documentation or new technology
components
<Text> Indicates that the text inside the angle brackets should be
replaced by actual data. For example, C:\Program Files
\<file_name> can be C:\Program Files\sample.jpg.
Note
Provides configuration notes or recommendations
Tip
Provides best practice information and Trend Micro
recommendations
WARNING!
Provides warnings about activities that may harm endpoints
on your network
Terminology
The following table provides the official terminology used throughout the Apex One
(Mac) documentation:

Trend Micro Apex One™ (Mac) 2019 Administrator’s Guide
x
Terminology Description
Agent or Security Agent The Apex One (Mac) Security Agent program installed on
an endpoint
Endpoint The computer where the Security Agent is installed
Agent user (or user) The person managing the Security Agent on the endpoint
Server The Apex One (Mac) server program
Server computer The computer where the Apex One (Mac) server is
installed
Administrator (or Apex One
(Mac) administrator)
The person managing the Apex One (Mac) server
Console The user interface for configuring and managing Apex
One (Mac) server and Security Agent settings
The console for the server program is called "web
console", while the console for the Security Agent
program is called "agent console".
Security risk The collective term for virus/malware, spyware/grayware,
and web threats
Product service The Apex One (Mac) service, which is managed from the
Microsoft Management Console (MMC)
Components Responsible for scanning, detecting, and taking actions
against security risks
Agent installation
folder
The folder on the endpoint that contains the Security
Agent files
/Library/Application Support/TrendMicro

Preface
xi
Terminology Description
Server installation
folder
The folder on the server computer that contains the Apex
One (Mac) server files. After installing Apex One (Mac)
server, the folder is created on the same Apex One server
directory.
If you accept the default settings during Apex One server
installation, you will find the server installation folder at
any of the following locations:
• C:\Program Files\Trend Micro\OfficeScan
\Addon\TMSM
• C:\Program Files\Trend Micro\Apex One\Addon
\TMSM
• C:\Program Files (x86)\Trend Micro
\OfficeScan\Addon\TMSM
• C:\Program Files (x86)\Trend Micro\Apex One
\Addon\TMSM
Dual-stack
An entity that has both IPv4 and IPv6 addresses. For
example:
• A dual-stack endpoint is an endpoint with both IPv4
and IPv6 addresses.
• A dual-stack agent refers to an agent installed on a
dual-stack endpoint.
• A dual-stack proxy server, such as DeleGate, can
convert between IPv4 and IPv6 addresses.
Pure IPv4 An entity that only has an IPv4 address
Pure IPv6 An entity that only has an IPv6 address

1-1
Chapter 1
Introducing Apex One (Mac)
This chapter introduces Trend Micro Apex One™ (Mac) and provides an overview of
its features and capabilities.

Trend Micro Apex One™ (Mac) 2019 Administrator’s Guide
1-2
About Trend Micro Apex One (Mac)
Trend Micro Apex One™ (Mac) provides the latest endpoint protection against security
risks, blended threats, and platform independent web-based attacks.
The Apex One (Mac) server is a plug-in program integrated with Trend Micro products
such as Apex One and Worry-free Business Security and installed through the Plug-in
Manager framework. The Apex One (Mac) server deploys Security Agents to endpoints.
New in this Release
Apex One (Mac) includes the following new features and enhancements:
Feature/
Enhancement
Description
Predictive Machine
Learning
The Predictive Machine Learning engine can protect your network
from new, previously unidentified, or unknown threats through
advanced file feature analysis. Predictive Machine Learning can
ascertain the probability that a threat exists in a file and the
probable threat type, protecting you from zero-day attacks.
Device Control Device Control regulates access to external storage devices and
network resources connected to computers. Device Control helps
prevent data loss and leakage and, combined with file scanning,
helps guard against security risks.
Trusted Program
List
The Trusted Program List contains programs that Apex One
(Mac) excludes from Real-time Scan and event recording.
Enhanced Smart
Scan
The Smart Scan feature has been enhanced to improve malware
detection on endpoints.
Enhanced Apex
One (Mac) server
web console
The Apex One (Mac) server web console interface has been
enhanced to provide an easier and more streamlined and modern
experience. All the features available in the previous Apex One
(Mac) server version are still available in the updated version.

Introducing Apex One (Mac)
1-3
Feature/
Enhancement
Description
Trend Micro Apex
Central integration
Apex One (Mac) integrates with Apex Central, which provides
new policy settings for the Endpoint Sensor, Device Control, and
Trusted Program List features.
Key Features and Benefits
Apex One (Mac) provides the following features and benefits:
Table 1-1. Key Features and Benefits
Feature Benefits
Smart Scan Apex One (Mac) uses smart scan to make the scanning process
more efficient. This technology works by off-loading a large
number of signatures previously stored on the local endpoint to
Smart Protection Sources. Using this approach, the system and
network impact of the ever-increasing volume of signature
updates to endpoint systems is significantly reduced.
For information about smart scan and how to deploy it to Security
Agents, see Scan Method Types on page 6-5.

Trend Micro Apex One™ (Mac) 2019 Administrator’s Guide
1-4
Feature Benefits
Damage Cleanup
Services
Damage Cleanup Services™ cleans computers of file-based and
network viruses, and virus and worm remnants (Trojans, viral
files) through a fully-automated process. To address the threats
and nuisances posed by Trojans, Damage Cleanup Services does
the following:
• Detects and removes live Trojans
• Kills processes that Trojans create
• Repairs system files that Trojans modify
• Deletes files and applications that Trojans drop
Because Damage Cleanup Services runs automatically in the
background, it is not necessary to configure it. Users are not even
aware when it runs. However, Apex One (Mac) may sometimes
notify users to restart their endpoints to complete the process of
removing a Trojan.
Security Risk
Protection
Apex One (Mac) protects endpoints from security risks by
scanning files and then performing a specific action on each
security risk detected. An overwhelming number of security risks
detected over a short period of time signals an outbreak. Apex
One (Mac) notifies you of any outbreak so you can take
immediate action, such as cleaning infected endpoints and
isolating them until they are completely risk-free.
Web Reputation Web Reputation technology proactively protects endpoints within
or outside the corporate network from malicious and potentially
dangerous websites. Web Reputation breaks the infection chain
and prevents downloading of malicious code.
Verify the credibility of websites and pages by integrating Apex
One with the Smart Protection Server or the Trend Micro Smart
Protection Network.
Centralized
Management
A web-based management console gives administrators
transparent access to all Security Agents on the network. The
web console coordinates automatic deployment of security
policies, pattern files, and software updates on every Security
Agent. Administrators can perform remote administration and
configure settings for individual agents or agent groups.

Introducing Apex One (Mac)
1-5
The Apex One (Mac) Server
The Apex One (Mac) server is the central repository for all Security Agent
configurations, security risk logs, and updates.
The server performs two important functions:
• Monitors and manages Security Agents
• Downloads components needed by Security Agents. By default, the Apex One
(Mac) server downloads components from the Trend Micro ActiveUpdate server
and then distributes them to Security Agents.
Figure 1-1. How the Apex One (Mac) server works

Trend Micro Apex One™ (Mac) 2019 Administrator’s Guide
1-6
Apex One (Mac) provides real-time, bidirectional communication between the server
and Security Agents. Manage the Security Agents from a browser-based web console,
which you can access from virtually anywhere on the network. The server communicates
with the Security Agents through the ActiveMQ™ protocol.
The Apex One (Mac) Security Agent
Protect endpoints from security risks by installing the Apex One (Mac) Security Agent
on each endpoint. The Security Agent provides three scan types:
• Real-time Scan
• Scheduled Scan
• Manual Scan
The Security Agent reports to the parent Apex One (Mac) server from which it was
installed. The Security Agent sends events and status information to the server in real
time. Security Agents communicate with the server through the ActiveMQ protocol.

2-1
Chapter 2
Installing the Server
This chapter describes system requirements and the installation procedure for Apex One
(Mac) server.

Trend Micro Apex One™ (Mac) 2019 Administrator’s Guide
2-2
Server Installation Requirements
The following are the requirements for installing the Apex One (Mac) server:
Table 2-1. Server Installation Requirements
Resource Requirements
Apex One server 2019 or later
OfficeScan server XG or later
Plug-in Manager 2.0 and higher
RAM 1GB minimum, 2GB recommended
Available disk space • 7GB minimum if the OfficeScan server is installed on the
system drive (usually, C: drive)
• 5GB minimum if the Apex One server is installed on the
system drive (usually, C: drive)
• If the OfficeScan or Apex One server is not installed on
the system drive:
• 7GB minimum on the drive where the OfficeScan
server is installed. The Apex One (Mac) server will be
installed on this drive.
• 5GB minimum on the drive where the Apex One
server is installed. The Apex One (Mac) server will be
installed on this drive.
• 7GB minimum on the system drive. Third-party
programs used by the Apex One (Mac) server will be
installed on this drive.

Installing the Server
2-3
Resource Requirements
Others • Microsoft™ .NET Framework 3.5 and 4.6.1
• Microsoft Windows™ Installer 3.1 and above
• The following third-party programs will be installed
automatically, if it does not exist:
• Microsoft SQL Server 2008 R2 Express, 2016
Express, or 2016 SP1 Express
• Apache™ ActiveMQ 5.15.4
• Microsoft Visual C++ 2017 Redistributable
Note
• Java runtime environment (JRE) installation is
required when you install Apex One (Mac) on an
OfficeScan server.
• For best performance, install JRE 1.8 or later.
Install JRE for Windows x86 or JRE for Windows
x64, depending on the operating system of the host
machine.
Update Source
Before installing the Apex One (Mac) server, check the Plug-in Manager update source
by navigating to Updates > Server > Update Source on the OfficeScan or Apex One
web console. The update source can be any of the following:

Trend Micro Apex One™ (Mac) 2019 Administrator’s Guide
2-4
Table 2-2. Possible Update Sources
Update Source
Selected
Description and Instructions
ActiveUpdate Server The Trend Micro ActiveUpdate server is the default update
source. Internet connection is required to connect to this
server.
If the server computer connects to the Internet through a
proxy server, ensure that Internet connection can be
established using the proxy settings.
Other Update Source If you have specified multiple update sources:
• Ensure the server computer can connect to the first
update source on the list. If the server computer cannot
connect to the first update source, it does not attempt to
connect to the other update sources.
• Check if the first update source contains the latest
version of the Plug-in Manager component list
(OSCE_AOS_COMP_LIST.xml) and the Apex One (Mac)
installation package.
For assistance in setting up an update source, contact your
support provider.
Intranet Location
Containing a Copy of
the Current File
If the update source is an intranet location:
• Check if there is functional connection between the
server computer and the update source.
• Check if the update source contains the latest version of
the Plug-in Manager component list
(OSCE_AOS_COMP_LIST.xml) and the Apex One (Mac)
installation package.
For assistance in setting up the intranet source, contact your
support provider.

Installing the Server
2-5
Installing the Apex One (Mac) Server
Procedure
1. Do the following ONLY if you are installing Apex One (Mac) on a server with a
domain controller role:
a. Go to the <server installation folder>\PCCSRV\Admin
\Utility\SQL folder.
b. Open the InstallCfgFile.ini file using a text editor.
c. Change the SQLSVCACCOUNT value setting from NT AUTHORITY\NETWORK
SERVICE to NT AUTHORITY\SYSTEM.
d. Save the file.
2. Open the Apex One or OfficeScan web console and click Plug-ins on the main
menu.
3. Go to the Apex One (Mac) section and click Download.
The size of the file to be downloaded displays beside the Download button.
Plug-in Manager downloads the package to <server installation folder>
\PCCSRV\Download.
<server installation folder> is typically C:\Program Files\Trend
Micro\OfficeScan or C:\Program Files\Trend Micro\Apex One.
4. Monitor the download progress.
You can navigate away from the screen during the download.
If you encounter problems downloading the package, check the server update logs
on the Apex One or OfficeScan web console. On the main menu, click Logs >
Server Updates.
5. After the download process is complete, click Install to install Apex One (Mac).
6. Read the license agreement and accept the terms by clicking Agree.
The installation starts.

Trend Micro Apex One™ (Mac) 2019 Administrator’s Guide
2-6
7. Monitor the installation progress. After the installation, the Plug-in Manager screen
reloads.
Activating the Product for the First Time
Procedure
1. Open the Apex One or OfficeScan web console and click Plug-ins on the main
menu.
2. Go to the Apex One (Mac) section and click Manage Program.
3. Type the Activation Code for the product and click Save. The Activation Code is
case-sensitive.
If you do not have the Activation Code, click the register online link to access the
Trend Micro registration website. After you complete the registration, Trend Micro
sends an email with the Activation Code. You can then continue with activation.
If you have activated an evaluation version license, ensure that you upgrade to the
full version before the license expires.
4. In the License Details screen that appears, click Launch to open the web console.
5. Click Launch to open the web console.
Performing Post-installation Tasks on the
Server
Procedure
1. Verify that the following services display on the Microsoft Management Console:
• ActiveMQ for Apex One (Mac)

Installing the Server
2-7
• Apex One (Mac) Main Service
2. Verify that the following process is running on Windows Task Manager:
TMSMMainService.exe
3. Verify that the following registry key exists in Registry Editor:
HKEY_LOCAL_MACHINE\Software\TrendMicro\OfficeScan\service
\AoS\OSCE_ADDON_TMSM
4. Verify that the Apex One (Mac) server files are found under the <Server installation
folder>.
Uninstalling the Apex One (Mac) Server
Procedure
1. Open the Apex One or OfficeScan web console and click Plug-ins on the main
menu.
2. Go to the Apex One (Mac) section and click Uninstall.
3. Monitor the uninstallation progress. You can navigate away from the screen during
the uninstallation. After the uninstallation is complete, the Apex One (Mac) server
is again available for installation.
Note
The uninstallation package does not remove Java runtime environment (JRE) used by
Apex One (Mac). You can remove JRE if no other application is using it.

3-1
Chapter 3
Getting Started
This chapter describes how to get started with Apex One (Mac) and initial configuration
settings.

Trend Micro Apex One™ (Mac) 2019 Administrator’s Guide
3-2
Getting Started Tasks
Getting Started Tasks provides a high-level overview of procedures required to get Apex
One (Mac) up and running as quickly as possible.
Procedure
1. Configure agent-server communication settings.
For more information, see Configuring Agent-Server Communication Settings on page
9-14.
2. If a firewall is in use on the computer where you installed the Trend Micro Apex
One (Mac) server, verify that the firewall does not block traffic through the
listening port for agent-server communication.
If the Apex One Security Agent firewall has been enabled on the computer, add a
policy exception that allows incoming and outgoing traffic through the listening
port.
3. Install the Apex One (Mac) Security Agent on endpoints.
For more information, see Installing the Security Agent on page 4-1.
The Web Console
The web console is the central point for monitoring Security Agents and configuring
settings to be deployed to Security Agents. The console comes with a set of default
settings and values that you can configure based on your security requirements and
specifications.
Use the web console to do the following:
• Manage Security Agents installed on endpoints
• Organize Security Agents into logical groups for simultaneous configuration and
management

Getting Started
3-3
• Set scan configurations and initiate scanning on a single or multiple endpoints
• Configure security risk notifications and view logs sent by Security Agents
• Configure outbreak criteria and notifications
Opening the Web Console
Before you begin
Open the web console from any endpoint on the network that has the following
resources:
• Monitor that supports 1024 x 768 resolution at 256 colors or higher
• Web browser:
• Microsoft Internet Explorer 10, Microsoft Edge, or later versions
• Firefox
• Chrome
• Safari
Procedure
1. On a web browser, type the Apex One or OfficeScan server URL.
2. Type the user name and password to log on to the Apex One or OfficeScan server.
3. On the main menu, click Plug-ins.
4. Go to the Apex One (Mac) section and click Manage Program.
Security Summary
The Summary screen appears when you open the Apex One (Mac) web console or
click Summary in the main menu.

Trend Micro Apex One™ (Mac) 2019 Administrator’s Guide
3-4
Tip
Refresh the screen periodically to get the latest information.
Agents
The Agents section displays the following information:
• The connection status of all Security Agents with the Apex One (Mac) server.
Clicking a link opens the agent tree where you can configure settings for the
Security Agents.
• The number of detected security risks and web threats
• The number of endpoints with detected security risks and web threats. Clicking a
number opens the agent tree displaying a list of endpoints with security risks or
web threats. In the agent tree, perform the following tasks:
• Select one or several Security Agents, click Logs > Security Risk Logs, and
then specify the log criteria. In the screen that displays, check the Results
column to see if the scan actions on the security risks were successfully carried
out.
For a list of scan results, see Scan Results on page 6-39.
• Select one or several Security Agents, click Logs > Web Reputation Logs,
and then specify the log criteria. In the screen that displays, check the list of
blocked websites. You can add websites you do not want blocked to the list of
approved URLs.
For details, see Configuring the Approved and Blocked URL Lists on page 7-5.
Detection Status
The Detection Status table displays the total number of detections for security risks
and web threats, and the number of affected endpoints.
Update Status
The Update Status table contains information about Apex One (Mac) components and
the Security Agent program that protects endpoints from security risks.
Tasks in this table:

Getting Started
3-5
• Update outdated components immediately.
For details, see Launching Agent Update from the Summary Screen on page 5-12.
• Upgrade Security Agents to the latest program version or build if you recently
upgraded the server.
For agent upgrade instructions, see Upgrading the Server and Security Agents on page
9-4.
The Agent Tree
The Apex One (Mac) agent tree displays all the Security Agents that the server currently
manages. All Security Agents belong to a certain group. Use the menu items above the
agent tree to simultaneously configure, manage, and apply the same configuration to all
Security Agents belonging to a group.
Agent Tree General Tasks
Below are the general tasks you can perform when the agent tree displays:
Procedure
• Click the root icon (
) to select all groups and agents. When you select the root
icon and then choose a task above the agent tree, a screen for configuring settings
displays. On the screen, choose from the following general options:
• Apply to All Agents: Applies settings to all existing agents and to any new
agent added to an existing/future group. Future groups are groups not yet
created at the time you configure the settings.
• Apply to Future Groups Only: Applies settings only to agents added to
future groups. This option will not apply settings to new agents added to an
existing group.
• To select multiple adjacent groups or agents, click the first group or agent in the
range, hold down the SHIFT key, and then click the last group or agent in the
range.

Trend Micro Apex One™ (Mac) 2019 Administrator’s Guide
3-6
• To select a range of non-contiguous groups or agents, hold down the CTRL key
and then click the groups or agents that you want to select.
• Search for an agent to manage by specifying a full or partial endpoint name in the
Search for endpoints text box. A list of matching agent names will appear in the
agent tree.
• Sort agents based on column information by clicking the column name.
• View the total number of agents below the agent tree.
• Click the Export button ( ) to export the list and status for agents from
the agent tree, in a csv. format.
Agent Tree Specific Tasks
Above the agent tree are menu items that allow you perform the following tasks:
Menu Button Task
Tasks • Update agent components.
For details, see Agent Updates on page 5-8.
• Run Scan Now on endpoints.
For details, see Scan Now on page 6-23.

Getting Started
3-7
Menu Button Task
Settings • Configure the scan method.
For details, see Scan Method Types on page 6-5.
• Configure scan settings.
• Manual Scan on page 6-15
• Real-time Scan on page 6-12
• Scheduled Scan on page 6-18
• Scan Exclusions on page 6-26
• Cache Settings for Scans on page 6-30
• Configure Web Reputation settings.
For details, see Configuring Web Reputation Settings on page
7-3.
• Configure agent self-protection.
For details, see Configuring Agent Self-protection on page 9-2.
• Configure device control settings
For details, see Configuring Device Control Settings on page
8-3.
• Configure update settings.
For details, see Configuring Agent Update Settings on page
5-11.
Logs
View logs and reset statistics.
• Viewing Security Risk Logs on page 6-38
• Viewing Web Reputation Logs on page 7-6
• Viewing Scan Operation Logs on page 6-34
• Viewing Device Control Logs on page 8-6
• Resetting Security Risk Count on page 6-41

Trend Micro Apex One™ (Mac) 2019 Administrator’s Guide
3-8
Menu Button Task
Manage Agent
Tree
Manage Apex One (Mac) groups.
For details, see Groups on page 3-8.
Groups
A group in Apex One (Mac) is a set of agents that share the same configuration and run
the same tasks. By organizing agents into groups, you can simultaneously configure,
manage, and apply the same configuration to all agents belonging to the groups.
For ease of management, group agents based on their departments or the functions they
perform. You can also group agents that are at a greater risk of infection to apply a more
secure configuration to all of them. You can add or rename groups, move agents to a
different group, move agents to another server, or remove agents permanently. An agent
removed from the agent tree is not automatically uninstalled from the endpoint. The
agent can still perform server-dependent tasks, such as updating components. However,
the server is unaware of the existence of the agent and therefore cannot send
configurations or notifications to the agent.
If the agent has been uninstalled from the endpoint, it is not automatically removed
from the agent tree and its connection status is "Offline". Manually remove the agent
from the agent tree.
Adding a Group
Procedure
1. Navigate to Agent Management.
2. Click Manage Agent Tree > Add Group.
3. Type a name for the group you want to add.
4. Click Add.

Getting Started
3-9
The new group appears in the agent tree.
Deleting a Group or Security Agent
Before you begin
Before deleting a group, check if there are Security Agents that belong to the group and
then move the Security Agents to another group.
For details about moving agents, see Moving Agents to Another Group on page 3-10.
Procedure
1. Navigate to Agent Management.
2. In the agent tree, select specific groups or Security Agents.
3. Click Manage Agent Tree > Remove Group/Agent.
4. Click OK to confirm the deletion.
Renaming a Group
Procedure
1. Navigate to Agent Management.
2. In the agent tree, select the group to rename.
3. Click Manage Agent Tree > Rename Group.
4. Type a new name for the group.
5. Click Rename.
The new group name appears in the agent tree.

Trend Micro Apex One™ (Mac) 2019 Administrator’s Guide
3-10
Moving Security Agents
You can move Security Agents to another agent group or Apex One (Mac) server.
Moving Agents to Another Group
Procedure
1. Navigate to Agent Management.
2. In the agent tree, select one or several agents.
3. Click Manage Agent Tree > Move Agent.
4. Select Move selected agent(s) to another group.
5. Select the group from the drop-down list.
6. Decide whether to apply the settings of the new group to the agents.
Tip
Alternatively, you can drag and drop the agents to another group in the agent tree.
7. Click Move.

Getting Started
3-11
Moving an Agent to Another Server
Note
• You can move agents only to another Trend Micro Apex One (Mac) server of the
same version or later.
• If you are moving agents from an on-premises Trend Micro Apex One (Mac) server
to a Server as a Service (SaaS) server (or vice versa), ensure that Trend Micro Apex
One (Mac) Security Agents can communicate with the server through the listening
port and that no application is using the same port on the Security Agent endpoints.
The following table shows the listening ports.
Table 3-1. Agent-server listeing ports
Server Type Listening Port
On-premises 61617
SaaS 8443
For more information, see Configuring Agent-Server Communication Settings on page 9-14.
Procedure
1. Navigate to Agent Management.
2. In the agent tree, select one or more agents.
3. Click Manage Agent Tree > Move Agent.
4. Select Move selected agent(s) to another server.
5. Type the server name or address and port number.
6. Select Force move offline agents to move offline agents to the specified server.
Note
If an offline agent is not online after 7 days, the offline agent remains on the original
server and is not moved to the specified server.

Trend Micro Apex One™ (Mac) 2019 Administrator’s Guide
3-12
7. Click Move.
Widgets
Manage Apex One (Mac) widgets on the Apex One dashboard. The widgets are
available after activating Apex One (Mac).
For details on working with widgets, see the Apex One documentation.
Agent Connectivity (Mac) Widget
The Agent Connectivity (Mac) widget shows the connection status of agents with the
Apex One (Mac) server. Data displays in a table and pie chart. You can switch between
the table and pie chart by clicking the display icons (
).
Agent Connectivity (Mac) Widget Presented as a Table
Figure 3-1. Agent Connectivity (Mac) widget displaying a table
If the number of agents for a particular status is 1 or more, you can click the number to
view the agents in the Apex One (Mac) agent tree. You can initiate tasks on these agents
or change their settings.
Getting Started
3-13
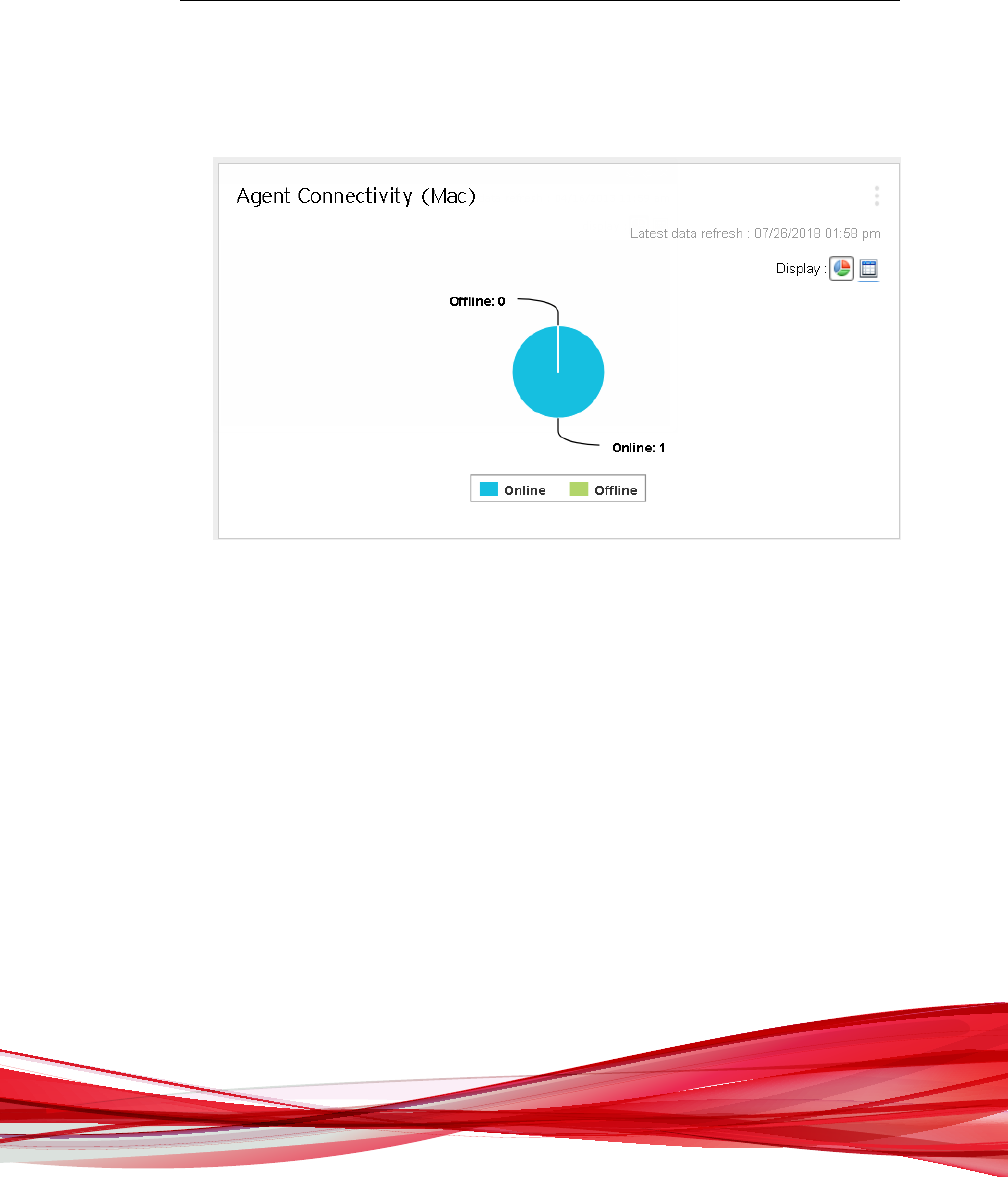
Agent Connectivity (Mac) Widget Presented as a Pie Chart
Figure 3-2. Agent Connectivity (Mac) widget displaying a pie chart
The pie chart shows the number of agents for each status but does not provide links to
the Apex One (Mac) agent tree. Clicking a status separates it from, or re-connects it to,
the rest of the pie.

Trend Micro Apex One™ (Mac) 2019 Administrator’s Guide
3-14
Agent Updates (Mac) Widget
The Agent Updates (Mac) widget shows components and programs that protect
endpoints from security risks.
Figure 3-3. Agent Updates (Mac) widget
In this widget, you can:
• View the current version for each component.
• View the number of agents with outdated components under the Outdated
column. If there are agents that need to be updated, click the number link to start
the update.
• For the agent program, view the agents that have not been upgraded by clicking the
number link.

Getting Started
3-15
Note
The links open the Apex One (Mac) server console, where you can perform
additional tasks.
Security Risk Detections (Mac) Widget
The Security Risk Detections (Mac) widget shows the number of security risks and web
threats.
Figure 3-4. Security Risk Detections (Mac) widget
If the number of infected endpoints is 1 or more, you can click the number to view the
agents in the Apex One (Mac) agent tree. You can initiate tasks on these agents or
change their settings.
Trend Micro Smart Protection
Trend Micro™smart protection is a next-generation cloud-client content security
infrastructure designed to protect customers from security risks and web threats. It
powers both local and hosted solutions to protect users whether they are on the
network, at home, or on the go, using light-weight agents to access its unique in-the-
cloud correlation of email, web and file reputation technologies, as well as threat
databases. Customers’ protection is automatically updated and strengthened as more
products, services, and users access the network, creating a real-time neighborhood
watch protection service for its users.

Trend Micro Apex One™ (Mac) 2019 Administrator’s Guide
3-16
By incorporating in-the-cloud reputation, scanning, and correlation technologies, the
Trend Micro smart protection solutions reduce reliance on conventional pattern file
downloads and eliminate the delays commonly associated with desktop updates.
Smart Protection Services
Smart protection services include:
• File Reputation Services: File Reputation Services off-loads a large number of
anti-malware signatures that were previously stored on agent endpoints to smart
protection sources.
• Web Reputation Services: Web Reputation Services allows local smart protection
sources to host URL reputation data that were previously hosted solely by Trend
Micro. Both technologies ensure smaller bandwidth consumption when updating
patterns or checking a URL's validity.
For details, see Web Reputation on page 7-2.
• Smart Feedback: Trend Micro continues to harvest information anonymously
sent from Trend Micro products worldwide to proactively determine each new
threat.
For details, see Smart Feedback on page 3-18.
Smart Protection Sources
File Reputation Services and Web Reputation Services are delivered through smart
protection sources, namely, Trend Micro Smart Protection Network and Smart
Protection Servers.
Trend Micro Smart Protection Network is a globally scaled, Internet-based,
infrastructure and is intended for users who do not have immediate access to their
corporate network.
Smart Protection Servers are for users who have access to their local corporate network.
Local servers localize smart protection services to the corporate network to optimize
efficiency.
Smart Protection Source for External Security Agents
External agents, which are Security Agents that are unable to maintain a functional
connection with the Apex One (Mac) or OfficeScan server, send Web Reputation
Getting Started
3-17
queries to Smart Protection Network. Internet connection is required to send queries
successfully.
Go to the Web Reputation Services screen and enable Web Reputation policy for
external agents. For the detailed steps, see Configuring Web Reputation Settings on page 7-3.
Smart Protection Sources for Internal Security Agents
Internal agents, which are Security Agents that maintain a functional connection with
the Apex One (Mac) or OfficeScan server, can send queries to either Smart Protection
Server or Smart Protection Network.
Source Details
Smart Protection
Servers
Configure Smart Protection Servers as source if you have privacy
concerns and want to keep Web Reputation queries within the
corporate network.
Smart Protection
Network
Configure Smart Protection Network as source if you do not have the
resources required to set up and maintain Smart Protection Servers.
Smart Protection Servers as Source for Internal Security Agents
With this option, Apex One (Mac) Security Agents send queries to Smart Protection
Servers configured for Apex One or OfficeScan Security Agents.
Note
If your Apex One (Mac) server is installed with OfficeScan, upgrade OfficeScan to Apex
One version 2019 or later.
If your OfficeScan version is XG or later, read the following guidelines to allow Security
Agents to send queries to Smart Protection Servers successfully:
1. Set up the smart protection environment, if you have not done so. For instructions
and guidelines on setting up the environment, refer to the OfficeScan
documentation.
2. On the web console for the OfficeScan server, go to the Web Reputation Settings
screen and enable the option Send queries to Smart Protection Servers. For the
detailed steps, see Configuring Web Reputation Settings on page 7-3.

Trend Micro Apex One™ (Mac) 2019 Administrator’s Guide
3-18
Important
If this option is enabled from Apex Central or Control Manager Policy Management
and then deployed to Apex One (Mac) server installed with OfficeScan, the setting
will not take effect and the option will remain disabled.
3. Be sure that Smart Protection Servers are available. If all Smart Protection Servers
are unavailable, agents do not send queries to Smart Protection Network, leaving
endpoints vulnerable to threats.
4. Be sure to update Smart Protection Servers regularly so that protection remains
current.
Smart Protection Network as Source for Internal Agents
Internet connection is required to send queries to Smart Protection Network
successfully.
To configure Smart Protection Network as source for internal agents, go to the Web
Reputation Services screen and enable Web Reputation policy for internal agents. Be
sure not to select the option Send queries to Smart Protection Servers. For the
detailed steps, see Configuring Web Reputation Settings on page 7-3.
Smart Feedback
Trend Micro Smart Feedback provides continuous communication between Trend
Micro products and its 24/7 threat research centers and technologies. Each new threat
identified through every single customer's routine reputation check automatically
updates all Trend Micro threat databases, blocking any subsequent customer encounters
of a given threat.
By continuously processing the threat intelligence gathered through its extensive global
network of customers and partners, Trend Micro delivers automatic, real-time protection
against the latest threats and provides "better together" security, much like an automated
neighborhood watch that involves the community in the protection of others. Because
the gathered threat information is based on the reputation of the communication source,
not on the content of the specific communication, the privacy of a customer's personal
or business information is always protected.
Samples of information sent to Trend Micro:

Getting Started
3-19
• File checksums
• File information, including sizes and paths
• Names of executable files
You can terminate your participation to the program anytime from the web console.
Tip
You do not need to participate in Smart Feedback to protect your endpoints. Your
participation is optional and you may opt out at any time. Trend Micro recommends that
you participate in Smart Feedback to help provide better overall protection for all Trend
Micro customers.
For more information on the Smart Protection Network, visit:
http://www.smartprotectionnetwork.com


Trend Micro Apex One™ (Mac) 2019 Administrator’s Guide
4-2
Agent Installation Requirements
The following are the requirements for installing the Security Agent on an endpoint.
Table 4-1. Security Agent installation requirements
Resource Requirement
Operating system • macOS™ Catalina 10.15
• macOS™ Mojave 10.14
• macOS™ High Sierra 10.13
• macOS™ Sierra 10.12
• OS X™ El Capitan 10.11
• OS X™ Yosemite 10.10
• OS X™ Mavericks 10.9.5
Hardware • Processor: Intel® Core™ processor
• RAM: 2GB minimum
• Available disk space: 512MB minimum
Server-agent
communication
• 61617
• SSL port (Used by the Endpoint Sensor feature. The same
SSL port number configured on the Apex One server.)
Others • Access to *.trendmicro.com
• If required, proxy server settings for Internet connection
Agent Installation Methods and Setup Files
You can install the Security Agent using one of the following ways:
• Install on a single endpoint by launching the installation package
(tmsminstall.zip) on the endpoint

Installing the Security Agent
4-3
• Install on several endpoints by deploying an operating system image that includes
the Security Agent. After installation, the Security Agent automatically registers to
the Apex One (Mac) server.
Important
Include the TMMakeGoldenImage tool in the master operating system image to
resolve the issue of duplicate Security Agent IDs on the Apex One (Mac) server.
Obtain the tool and follow the procedure on the following web site:
https://success.trendmicro.com/solution/1107539
Note
To upgrade Security Agents, see Upgrading the Server and Security Agents on page 9-4.
Obtain the necessary agent installation package from the Apex One (Mac) server and
copy it to the endpoint.
There are several ways to obtain the package:
• On the Apex One (Mac) web console, navigate to Agents > Agent Setup Files
and click a link under Agent Installation File.
Note
The links to the Security Agent uninstallation packages are also available on this
screen. Use these packages to remove the Security Agent program from endpoints.
Choose the package according to the version of the Security Agent program that you
wish to remove.
For information on uninstalling the Apex One (Mac) Security Agent, see Agent
Uninstallation on page 4-11.
• Navigate to <Server installation folder>TMSM_HTML\ActiveUpdate
\ClientInstall\.
• From the Apex Central web console
For more information, see the Trend Micro Apex Central Administrator's Guide.

Trend Micro Apex One™ (Mac) 2019 Administrator’s Guide
4-4
Installing on a Single Endpoint
The process of installing the Apex One (Mac) Security Agent on a single endpoint is
similar to the installation process for other Mac software.
During the installation, users may be prompted to allow connections to iCoreService,
which is used to register the Security Agent to the server. Instruct users to allow the
connection when prompted.
Procedure
1. Check for and uninstall any security software on the endpoint.
2. Obtain the agent installation package tmsminstall.zip.
For information on obtaining the package, see Agent Installation Methods and Setup
Files on page 4-2.
3. Copy tmsminstall.zip on the endpoint and then launch it using a built-in
archiving tool, such as Archive Utility.
WARNING!
The files on tmsminstall.zip may become corrupted if users launch it using
archiving tools not built-in on the Mac.
To launch tmsminstall.zip from Terminal, use the following command:
ditto –xk <tmsminstall.zip file path> <destination folder>
For example:
ditto –xk users/mac/Desktop/tmsminstall.zip users/mac/Desktop
Launching tmsminstall.zip creates a new folder tmsminstall.
4. Open the tmsminstall folder and launch tmsminstall.pkg.
5. When a message prompting you to continue with installation displays, click
Continue.

Installing the Security Agent
4-5
6. On the Introduction screen, click Continue to proceed.

Trend Micro Apex One™ (Mac) 2019 Administrator’s Guide
4-6
7. Read the reminders and click Continue.

Installing the Security Agent
4-7
8. On the Installation Type screen, click Install.

Trend Micro Apex One™ (Mac) 2019 Administrator’s Guide
4-8
9. Fill in the Name and Password fields to begin the installation process.
Note
Specify the name and password for an account with administrative rights on the
endpoint.

Installing the Security Agent
4-9
10. If the installation was successful, click Close to finish the installation process.

Trend Micro Apex One™ (Mac) 2019 Administrator’s Guide
4-10
The Security Agent automatically registers to the server where the agent installation
package was obtained. The Security Agent also updates for the first time.
What to do next
Perform agent post-installation tasks. For details, see Agent Post-installation on page 4-10.
Agent Post-installation
Procedure
1. Verify the following:
• The Security Agent icon ( ) displays on the menu bar of the endpoint.
• The Apex One (Mac) Security Agent files are found under the <Agent
installation folder>.
• The Security Agent appears on the web console’s agent tree. To access the
agent tree, click Agent Management on the main menu.
2. Update Apex One (Mac) components by clicking Update on the agent console.
The Security Agent downloads components from the Apex One (Mac) server. See
Agent Updates on page 5-8 for details.

Installing the Security Agent
4-11
If the Security Agent cannot connect to the server, it downloads directly from the
Trend Micro ActiveUpdate server. Internet connection is required to connect to
the ActiveUpdate server.
3. Start a manual scan on the endpoint.
What to do next
If there are problems with the Security Agent after installation, try uninstalling and then
reinstalling the Security Agent.
Agent Uninstallation
Uninstall the Security Agent program only if you encounter problems with the program.
Reinstall it immediately to keep the endpoint protected from security risks.

Trend Micro Apex One™ (Mac) 2019 Administrator’s Guide
4-12
Procedure
1. Obtain the Security Agent uninstallation package (tmsmuninstall.zip) from
the Apex One (Mac) server. On the Apex One (Mac) web console, navigate to
Agents > Agent Setup Files and click the link under Agent Uninstallation File.
2. Copy and then launch the package on the endpoint.
3. Fill in the Name and Password fields to begin the uninstallation process.
Note
Specify the name and password for an account with administrative rights on the
endpoint.
4. If the uninstallation was successful, click Close to finish the uninstallation process.
What to do next
Unregister the Security Agent from the server.
1. On the web console, click Agent Management and select the Security Agent that
was uninstalled.
2. Click Manage Agent Tree > Remove Group/Agent.

5-1
Chapter 5
Keeping Protection Up-to-Date
This chapter describes Apex One (Mac) components and update procedures.

Trend Micro Apex One™ (Mac) 2019 Administrator’s Guide
5-2
Components
Apex One (Mac) makes use of components to keep endpoints protected from the latest
security risks. Keep these components up-to-date by running manual or scheduled
updates.
In addition to the components, Security Agents also receive updated configuration files
from the Apex One (Mac) server. Security Agents need the configuration files to apply
new settings. Each time you modify Apex One (Mac) settings through the web console,
the configuration files change.
Component Description
Agent Program The Security Agent program provides the actual
protection from security risks.
Damage Cleanup Engine (64-bit) The Damage Cleanup Engine scans for and
removes Trojans and Trojan processes.
Damage Cleanup Template The Damage Cleanup Template is used by the
Damage Cleanup Engine to identify Trojan files and
processes so the engine can eliminate them.
Mac Heuristic Pattern The Mac Heuristic Pattern is used by Smart Scan to
identify malware targeting Mac platforms.
Smart Scan Agent Pattern The pattern file that the Security Agent uses to
identify threats. This pattern file is stored on the
agent endpoint.
Spyware Active-monitoring
Pattern
The Spyware Active-monitoring Pattern contains
information that helps Apex One (Mac) identify
spyware and grayware.

Keeping Protection Up-to-Date
5-3
Component Description
Virus Scan Engine (32-bit/64-bit) At the heart of all Trend Micro products lies the scan
engine, which was originally developed in response
to early file-based computer viruses. The scan
engine today is exceptionally sophisticated and
capable of detecting different types of security risks,
including spyware. The scan engine also detects
controlled viruses that are developed and used for
research.
By storing the most time-sensitive information about
security risks in the pattern files, Trend Micro
minimizes the number of scan engine updates while
keeping protection up-to-date. Nevertheless, Trend
Micro periodically makes new scan engine versions
available. Trend Micro releases new engines under
the following circumstances:
• Incorporation of new scanning and detection
technologies into the software
• Discovery of a new, potentially harmful security
risk that the scan engine cannot handle
• Enhancement of the scanning performance
• Addition of file formats, scripting languages,
encoding, and/or compression formats
Virus Pattern
The Virus Pattern contains information that helps
Apex One (Mac) identify the latest virus/malware
and mixed threat attack. Trend Micro creates and
releases new versions of the Virus Pattern several
times a week, and any time after the discovery of a
particularly damaging virus/malware.
Update Overview
All component updates originate from the Trend Micro ActiveUpdate server. When
updates are available, the Apex One (Mac) server downloads the updated components.

Trend Micro Apex One™ (Mac) 2019 Administrator’s Guide
5-4
You can configure the Apex One (Mac) server to update from a source other than the
Trend Micro ActiveUpdate server. To do this, you need to set up a custom update
source. For assistance in setting up this update source, contact your support provider.
The following table describes the different component update options for the Apex One
(Mac) server and Security Agents:
Table 5-1. Server-Agent Update Options
Update Option Description
ActiveUpdate server
Apex One (Mac) server
Security Agents
The Apex One (Mac) server receives updated
components from the Trend Micro ActiveUpdate
server (or another update source if a custom source
has been set up) and then deploys the components
to Security Agents.
ActiveUpdate server
Security Agents
Security Agents receive updated components
directly from the ActiveUpdate server if they cannot
connect to the Apex One (Mac) server.
Server Update
The Apex One (Mac) server downloads the following components and deploys them to
Security Agents:
• Virus Pattern
• Spyware Active-monitoring Pattern
• Virus Scan Engine (32-bit/64-bit)
• Damage Cleanup Engine (64-bit)

Keeping Protection Up-to-Date
5-5
• Damage Cleanup Template
• Smart Scan Agent Pattern
• Apex One (Mac) Security Agent
• Mac Heuristic Pattern
View the current versions of components on the web console's Summary screen, and
determine the number of Security Agents with updated and outdated components.
If you use a proxy server to connect to the Internet, use the correct proxy settings to
download updates successfully.
Configuring the Server Update Source
Configure the Apex One (Mac) server to download components from the Trend Micro
ActiveUpdate server or from another source.
Note
If the server only has an IPv6 address, read the IPv6 limitations for server updates in Pure
IPv6 Server Limitations on page A-2.
After the server downloads any available updates, it automatically notifies Security
Agents to update their components. If the component update is critical, let the server
notify the Security Agents at once by navigating to Agents > Agent Management >
Tasks > Update.
Procedure
1. Navigate to Updates > Update Source.
2. Select the location from where you want to download component updates.
• If you choose ActiveUpdate server:
• Ensure that the Apex One (Mac) server has Internet connection.
• If you are using a proxy server, test if Internet connection can be
established using the proxy settings.

Trend Micro Apex One™ (Mac) 2019 Administrator’s Guide
5-6
For details, see Configuring Proxy Settings for Server Updates on page 5-6.
• If you choose a custom update source:
• Set up the appropriate environment and update resources for this update
source.
• Ensure that there is functional connection between the server computer
and this update source. For assistance in setting up an update source,
contact your support provider.
• You can obtain updates from Apex Central by typing the Apex Central
server address.
3. Click Save.
Configuring Proxy Settings for Server Updates
Configure the Apex One (Mac) server to use proxy settings when downloading updates
from the Trend Micro ActiveUpdate server.
Note
If the server only has an IPv6 address, read the IPv6 limitations for proxy settings in Pure
IPv6 Server Limitations on page A-2.
Procedure
1. Navigate to Administration > External Proxy Settings.
2. Select the check box to enable the use of a proxy server.
3. Specify the proxy server name or IPv4/IPv6 address and port number.
4. If the proxy server requires authentication, type the user name and password in the
fields provided.
5. Click Save.

Keeping Protection Up-to-Date
5-7
Server Update Methods
Update Apex One (Mac) server components manually or by configuring an update
schedule.
• Manual update: When an update is critical, perform manual update so the server
can obtain the updates immediately. See Manually Updating the Server on page 5-8 for
details.
• Scheduled update: The Apex One (Mac) server connects to the update source
during the scheduled day and time to obtain the latest components. See Scheduling
Updates for the Server on page 5-7 for details.
After the server finishes an update, it immediately notifies agents to update.
Scheduling Updates for the Server
Configure the Apex One (Mac) server to regularly check its update source and
automatically download any available updates. Using scheduled update is an easy and
effective way of ensuring that protection against security risks is always current.
After the server finishes an update, it notifies agents to update.
Procedure
1. Navigate to Updates > Scheduled Update.
2. Select the components to update.
3. Specify the update schedule.
For daily, weekly, and monthly updates, the period of time is the number of hours
during which Apex One (Mac) will perform the update. Apex One (Mac) updates
at any given time during this time period.
For monthly updates, if you selected the 29th, 30th, or 31st day and a month does
not have this day, Apex One (Mac) runs the update on the last day of the month.
4. Click Save.

Trend Micro Apex One™ (Mac) 2019 Administrator’s Guide
5-8
Manually Updating the Server
Manually update the components on the Apex One (Mac) server after installing or
upgrading the server and whenever there is an outbreak.
Procedure
1. Navigate to Updates > Manual Update.
2. Select the components to update.
3. Click Update.
The server downloads the updated components.
After the server finishes an update, it immediately notifies agents to update.
Agent Updates
To ensure that Security Agents stay protected from the latest security risks, update agent
components regularly. Also update Security Agents with severely out-of-date
components and whenever there is an outbreak. Components become severely out-of-
date when the Security Agent is unable to update from the Apex One (Mac) server or
the ActiveUpdate server for an extended period of time.
Agent Update Methods
There are several ways to update Security Agents.

Keeping Protection Up-to-Date
5-9
Update Method Description
Administrator-initiated
manual update
Initiate an update from the following web console screens:
• Agent Management screen.
For details, see Launching Agent Update from the Agent
Management Screen on page 5-13.
• Summary screen.
For details, see Launching Agent Update from the
Summary Screen on page 5-12.
Automatic update • After the server finishes an update, it immediately
notifies Security Agents to update.
For details, see Configuring Agent Automatic Update on
page 5-10.
• Updates can run according to the schedule that you
configured. You can configure a schedule that applies to
one or several Security Agents and domains, or to all the
Security Agents that the server manages.
For details, see Configuring Agent Update Settings on
page 5-11.
User-initiated manual
update
Users launch the update from their endpoints.
Agent Update Source
By default, Security Agents download components from the Apex One (Mac) server. In
addition to components, Security Agents also receive updated configuration files when
updating from the Apex One (Mac) server. Security Agents need the configuration files
to apply new settings. Each time you modify Apex One (Mac) settings on the web
console, the configuration files change.
Before updating the Security Agents, check if the Apex One (Mac) server has the latest
components.
For information on how to update the Apex One (Mac) server, see Server Update on page
5-4.

Trend Micro Apex One™ (Mac) 2019 Administrator’s Guide
5-10
Configure one, several, or all Security Agents to download from the Trend Micro
ActiveUpdate server if the Apex One (Mac) server is unavailable.
For details, see Configuring Agent Update Settings on page 5-11.
Note
If a Security Agent only has an IPv6 address, read the IPv6 limitations for agent updates in
Pure IPv6 Agent Limitations on page A-3.
Agent Update Notes and Reminders
• Security Agents can use proxy settings during an update. Proxy settings are
configured on the agent console.
• During an update, the Security Agent icon on the menu bar of the endpoint
indicates that the product is updating. If an upgrade to the Security Agent program
is available, Security Agents update and then upgrade to the latest program version
or build. Users cannot run any task from the console until the update is complete.
• Access the Summary screen to check if all Security Agents have been updated.
Configuring Agent Automatic Update
Automatic update relieves you of the burden of notifying all Security Agents to update
and eliminates the risk of endpoints not having up-to-date components.
In addition to components, Apex One (Mac) Security Agents also receive updated
configuration files during automatic update. Security Agents need the configuration files
to apply new settings. Each time you modify Apex One (Mac) settings through the web
console, the configuration files change.
The Apex One (Mac) server can notify online Security Agents to update components
after it downloads the latest components, and offline Security Agents when they restart
and then connect to the server. Optionally initiate Scan Now (manual scan) on Trend
Micro Apex One (Mac) Security Agent endpoints after the update.
1. Click Updates > Agent Automatic Update.
2. Select the options.

Keeping Protection Up-to-Date
5-11
Table 5-2. Event-triggered Update
Option Description
Initiate component update
on agents immediately
after the server
downloads a new
component
The Apex One (Mac) server notifies Security Agents to
update as soon as it completes an update.
Let agents initiate
component update after
restarting and connecting
to the server
Any Security Agent that missed an update immediately
downloads components when it establishes connection
with the server. The Security Agent may miss an
update if it is offline or if the endpoint where it is
installed is not up and running.
Note
By default, update notifications are retained on the Trend Micro Apex One (Mac)
server for up to seven days. Offline Security Agents will receive update notifications if
the Security Agents are online within the seven-day period.
3. Click Save.
Configuring Agent Update Settings
For a detailed explanation of agent updates, see Agent Updates on page 5-8.
Procedure
1. Navigate to Agent Management.
2. In the agent tree, click the root icon ( ) to include all Security Agents or select
specific groups or Security Agents.
3. Click Settings > Update Settings.
4. Select Agents download updates from the Trend Micro ActiveUpdate server
when unable to connect to the Apex One (Mac) server to allow external
Security Agents to download updates from the Trend Micro ActiveUpdate server.

Trend Micro Apex One™ (Mac) 2019 Administrator’s Guide
5-12
Note
If a Security Agent only has an IPv6 address, read the IPv6 limitations for agent
updates in Pure IPv6 Agent Limitations on page A-3.
5. Select Agents can update the components but not upgrade the agent
program or install hot fixes to allow component updates to proceed but prevents
Apex One (Mac) Security Agent upgrade.
6. To set up scheduled updates, complete the following steps:
a. Select Enable scheduled update.
b. Configure the schedule.
c. If you select Daily or Weekly, specify the time of the update and the time
period the Apex One (Mac) server will notify Security Agents to update
components. For example, if the start time is 12pm and the time period is 2
hours, the server randomly notifies all online Security Agents to update
components from 12pm until 2pm. This setting prevents all online Security
Agents from simultaneously connecting to the server at the specified start
time, significantly reducing the amount of traffic directed to the server.
7. If you selected one or more groups or Security Agents on the agent tree, click Save
to apply settings to the groups or Security Agents. If you selected the root icon
(
), choose from the following options:
• Apply to All Agents: Applies settings to all existing Security Agents and to
any new agent added to an existing/future group. Future groups are groups
not yet created at the time you configure the settings.
• Apply to Future Groups Only: Applies settings only to Security Agents
added to future groups. This option will not apply settings to new Security
Agents added to an existing group.
Launching Agent Update from the Summary Screen
For other agent update methods, see Agent Updates on page 5-8.

Keeping Protection Up-to-Date
5-13
Procedure
1. Click Summary in the main menu.
2. Go to the Update Status section and click the link under the Outdated column.
The agent tree opens, showing all the Security Agents that require an update.
3. Select the Security Agents that you want to update.
4. Click Tasks > Update.
Security Agents that receive the notification start to update. On endpoints, the
Apex One (Mac) icon on the menu bar indicates that the product is updating. Users
cannot run any task from the console until the update is complete.
Launching Agent Update from the Agent Management
Screen
For other agent update methods, see Agent Updates on page 5-8.
Procedure
1. Navigate to Agent Management.
2. In the agent tree, click the root domain icon ( ) to include all Security Agents or
select specific groups or Security Agents.
3. Click Tasks > Update.
Security Agents that receive the notification start to update. On endpoints, the
Apex One (Mac) icon on the menu bar indicates that the product is updating. Users
cannot run any task from the console until the update is complete.

6-1
Chapter 6
Protecting Endpoints from Security
Risks
This chapter describes how to protect endpoints from security risks using file-based
scanning.

Trend Micro Apex One™ (Mac) 2019 Administrator’s Guide
6-2
About Security Risks
Security risk includes viruses, malware, spyware, and grayware. Apex One (Mac) protects
endpoints from security risks by scanning files and then performing a specific action for
each security risk detected. An overwhelming number of security risks detected over a
short period of time signals an outbreak, which Apex One (Mac) can help contain by
enforcing outbreak prevention policies and isolating infected endpoints until they are
completely risk-free. Notifications and logs help you keep track of security risks and
alert you if you need to take immediate action.
Viruses and Malware
Tens of thousands of virus/malware exist, with more being created each day. Endpoint
viruses today can cause a great amount of damage by exploiting vulnerabilities in
corporate networks, email systems and websites.
Apex One (Mac) protects endpoints from the following virus/malware types:
Virus/Malware
Types
Description
Joke program A joke program is a virus-like program that often manipulates the
appearance of things on an endpoint monitor.
Trojan horse
program
A Trojan horse is an executable program that does not replicate
but instead resides on endpoints to perform malicious acts, such
as opening ports for hackers to enter. This program often uses
Trojan ports to gain access to endpoints. An application that
claims to rid an endpoint of viruses when it actually introduces
viruses to the endpoint is an example of a Trojan program.

Protecting Endpoints from Security Risks
6-3
Virus/Malware
Types
Description
Virus A virus is a program that replicates. To do so, the virus needs to
attach itself to other program files and execute whenever the host
program executes.
• Boot sector virus: A virus that infects the boot sector of a
partition or a disk
• Java malicious code: Operating system-independent virus
code written or embedded in Java
• Macro virus: A virus encoded as an application macro and
often included in a document
• VBScript, JavaScript, or HTML virus: A virus that resides
on web pages and downloads through a browser
• Worm: A self-contained program or set of programs able to
spread functional copies of itself or its segments to other
endpoints, often through email
Test virus
A test virus is an inert file that is detectable by virus scanning
software. Use test viruses, such as the EICAR test script, to verify
that the antivirus installation scans properly.
Packer Packers are compressed and/or encrypted Windows or Linux™
executable programs, often a Trojan horse program. Compressing
executables makes packers more difficult for antivirus products to
detect.
Probable virus/
malware
Suspicious files that have some of the characteristics of virus/
malware are categorized under this virus/malware type. For
details about probable virus/malware, see the following page on
the Trend Micro online Virus Encyclopedia:
http://www.trendmicro.com/vinfo/virusencyclo/
Others "Others" include viruses/malware not categorized under any of the
virus/malware types.

Trend Micro Apex One™ (Mac) 2019 Administrator’s Guide
6-4
Spyware and Grayware
Spyware and grayware refer to applications or files not classified as viruses or malware,
but can still negatively affect the performance of the endpoints on the network. Spyware
and grayware introduce significant security, confidentiality, and legal risks to an
organization. Spyware/Grayware often performs a variety of undesired and threatening
actions such as irritating users with pop-up windows, logging user keystrokes, and
exposing endpoint vulnerabilities to attack.
Apex One (Mac) protects endpoints from the following spyware/grayware types:
Spyware/
Grayware Types
Description
Spyware Spyware gathers data, such as account user names, passwords,
credit card numbers, and other confidential information, and
transmits it to third parties.
Adware Adware displays advertisements and gathers data, such as web
surfing preferences, used for targeting future advertising at the
user.
Dialer A dialer changes client Internet settings and can force an endpoint
to dial pre-configured phone numbers through a modem. These
are often pay-per-call or international numbers that can result in a
significant expense for an organization.
Hacking tool A hacking tool helps hackers enter an endpoint.
Remote access tool A remote access tool helps hackers remotely access and control
an endpoint.
Password cracking
application
This type of application helps decipher account user names and
passwords.
Others "Others" include potentially malicious programs not categorized
under any of the spyware/grayware types.

Protecting Endpoints from Security Risks
6-5
Scan Method Types
Apex One (Mac) Security Agents can use one of two scan methods when scanning for
security risks. The scan methods are smart scan and conventional scan.
• Smart Scan
Security Agents that use smart scan are referred to as “smart scan agents” in this
document. Smart scan agents benefit from local scans and in-the-cloud queries
provided by File Reputation Services.
• Conventional Scan
Security Agents that do not use smart scan are called “conventional scan agents”. A
conventional scan agent stores all Apex One (Mac) components on the agent
endpoint and scans all files locally.
Default Scan Method
The default scan method for fresh Apex One (Mac) server installations is smart scan.
Scan Methods Compared
The following table provides a comparison between the two scan methods.
Table 6-1. Conventional Scan and Smart Scan Compared
Basis of
Comparison
Conventional Scan Smart Scan
Availability Available in this Apex One
(Mac) version.
Available in this Apex One (Mac)
version.

Trend Micro Apex One™ (Mac) 2019 Administrator’s Guide
6-6
Basis of
Comparison
Conventional Scan Smart Scan
Scanning behavior The conventional scan
agent performs scanning
on the local endpoint.
• The smart scan agent performs
scanning on the local endpoint.
• If the Security Agent cannot
determine the risk of the file
during the scan, the Security
Agent verifies the risk by
sending a scan query to a smart
protection source.
• The Security Agent "caches" the
scan query result to improve the
scan performance.
Components in use
and updated
All components available
on the update source,
except the Mac Heuristic
Pattern and Smart Scan
Agent Pattern.
All components available on the
update source, except the Virus
Pattern and Spyware Active-
monitoring Pattern.
Typical update
source
Apex One (Mac) server Apex One (Mac) server
Changing the Scan Method
Procedure
1. Go to Agents > Agent Management.
2. In the agent tree, click the root icon (
) to include all Security Agents or select
specific groups or Security Agents.
3. Click Settings > Scan Methods.
4. Select Conventional scan or Smart scan.
5. If you selected one or more groups or Security Agent in the agent tree, click Save.
If you clicked the root icon, choose from the following options:

Protecting Endpoints from Security Risks
6-7
• Apply to All Agents: Applies settings to all existing Security Agents and to
any new Security Agent added to an existing/future group. Future groups are
groups not yet created at the time you configured the settings.
• Apply to Future Groups Only: Applies settings only to Security Agents
added to future groups. This option will not apply settings to new Security
Agent added to an existing group.
Switching from Smart Scan to Conventional Scan
The following table provides other considerations when switching Security Agents to
conventional scan.
Table 6-2. Considerations When Switching to Conventional Scan
Consideration Details
Number of Security
Agents to switch
Switching a relatively small number of Security Agents at a
time allows efficient use of the Trend Micro Apex One (Mac)
server and Smart Protection Server resources. These servers
can perform other critical tasks while Security Agents change
their scan methods.
Timing When switching back to conventional scan, Security Agents
will likely download the full version of the Virus Pattern and
Spyware-active Monitoring Pattern from the Trend Micro
Apex One (Mac) server. These pattern files are only used by
conventional scan agents.
Consider switching during off-peak hours to ensure the
download process finishes within a short amount of time.
Also consider switching when no Security Agent is scheduled
to update from the server.

Trend Micro Apex One™ (Mac) 2019 Administrator’s Guide
6-8
Consideration Details
Agent tree settings Scan method is a granular setting that can be set on the root,
domain, or individual Security Agent level. When switching to
conventional scan, you can:
• Create a new group and assign conventional scan as its
scan method. Any Security Agent you move to this group
will use conventional scan. When you move the Security
Agent, enable the setting Apply settings of new group
to selected agent(s).
• Select a group and configure it to use conventional scan.
Smart scan agents belonging to the group will switch to
conventional scan.
• Select one or several smart scan agents from a group
and then switch them to conventional scan.
Note
Any changes to the group's scan method overrides the
scan method you have configured for individual
Security Agents.
Switching from Conventional Scan to Smart Scan
If you are switching Security Agents from conventional scan to smart scan, ensure that
you have set up Smart Protection Services on the Apex One server. For details, see the
Apex One documentation.
The following table provides other considerations when switching Security Agent to
smart scan.

Protecting Endpoints from Security Risks
6-9
Table 6-3. Considerations When Switching to Smart Scan
Consideration Details
Product license To use smart scan, ensure that you have activated the
licenses for the following services on the Apex One server and
that the licenses are not expired:
• Antivirus
• Web Reputation and Anti-spyware
Apex One (Mac) server Ensure that Security Agents can connect to the Apex One
(Mac) server. Only online Security Agents will be notified to
switch to smart scan. Offline Security Agents get notified when
they become online. Roaming Security Agents are notified
when they become online or, if the Security Agent has
scheduled update privileges, when scheduled update runs.
Also verify that the Trend Micro Apex One (Mac) server has
the latest components because smart scan agents need to
download the Mac Heuristic Pattern and Smart Scan Agent
Pattern from the server. To update components, see Server
Update on page 5-4.
Number of Security
Agents to switch
Switching a relatively small number of Security Agents at a
time allows efficient use of Apex One (Mac) server resources.
The Apex One (Mac) server can perform other critical tasks
while Security Agents change their scan methods.
Timing When switching to smart scan for the first time, Security
Agents need to download the full version of the Mac Heuristic
Pattern and Smart Scan Agent Pattern from the Apex One
(Mac) server. The Smart Scan Pattern is only used by smart
scan agents.
Consider switching during off-peak hours to ensure the
download process finishes within a short amount of time. Also
consider switching when no Security Agent is scheduled to
update from the server.

Trend Micro Apex One™ (Mac) 2019 Administrator’s Guide
6-10
Consideration Details
Agent tree settings Scan method is a granular setting that can be set on the root,
group, or individual agent level. When switching to smart scan,
you can:
• Create a new group and assign smart scan as its scan
method. Any Security Agent you move to this group will
use smart scan. When you move the Security Agent,
enable the setting Apply settings of new group to
selected agent(s).
• Select a group and configure it to use smart scan.
Conventional scan agents belonging to the group will
switch to smart scan.
• Select one or several conventional scan agents from a
group and then switch them to smart scan.
Note
Any changes to the group's scan method overrides the
scan method you have configured for individual Security
Agents.

Protecting Endpoints from Security Risks
6-11
Consideration Details
IPv6 support Smart scan agents send scan queries to smart protection
sources.
A pure IPv6 smart scan agent cannot send queries directly to
pure IPv4 sources, such as:
• Smart Protection Server 3.0 (integrated or standalone)
Note
IPv6 support for Smart Protection Server starts in
version 2.5.
• Trend Micro Smart Protection Network
Similarly, a pure IPv4 smart scan agent cannot send queries
to pure IPv6 Smart Protection Servers.
A dual-stack proxy server that can convert IP addresses, such
as DeleGate, is required to allow smart scan agents to
connect to the sources.
Scan Types
Apex One (Mac) provides the following scan types to protect endpoints from security
risks:
Scan Type Description
Real-time Scan Automatically scans a file on the endpoint as it is received, opened,
downloaded, copied, or modified
See Real-time Scan on page 6-12.
Manual Scan A user-initiated scan that scans a file or a set of files requested by
the user
See Manual Scan on page 6-15.

Trend Micro Apex One™ (Mac) 2019 Administrator’s Guide
6-12
Scan Type Description
Scheduled Scan Automatically scans files on the endpoint based on the schedule
configured by the administrator
See Scheduled Scan on page 6-18.
Scan Now An administrator-initiated scan that scans files on one or several
target endpoints
See Scan Now on page 6-23.
Real-time Scan
Real-time Scan is a persistent and ongoing scan. Each time a file is received, opened,
downloaded, copied, or modified, Real-time Scan scans the file for security risks. If Apex
One (Mac) does not detect a security risk, the file remains in its location and users can
proceed to access the file. If Apex One (Mac) detects a security risk, it displays a
notification message, showing the name of the infected file and the specific security risk.
Configure and apply Real-time Scan settings to one or several Security Agents and
groups, or to all Security Agents that the server manages.
Configuring Real-time Scan Settings
Procedure
1. Navigate to Agent Management.
2. In the agent tree, click the root icon (
) to include all Security Agents or select
specific groups or Security Agents.
3. Click Settings > Real-time Scan Settings.
4. Select the check box to enable Real-time Scan.
5. Click the Target tab to configure file activities and scan settings.
For more information, see Real-time Scan: Target Tab on page 6-13.

Protecting Endpoints from Security Risks
6-13
6. Click the Action tab to configure the scan actions Apex One (Mac) performs on
detected security threats.
For more information, see Real-time Scan: Action Tab on page 6-14.
7. If you selected one or more groups or Security Agents on the agent tree, click Save
to apply settings to the groups or Security Agents. If you selected the root icon
( ), choose from the following options:
• Apply to All Agents: Applies settings to all existing Security Agents and to
any new Security Agent added to an existing/future group. Future groups are
groups not yet created at the time you configure the settings.
• Apply to Future Groups Only: Applies settings only to Security Agents
added to future groups. This option will not apply settings to new Security
Agents added to an existing group.
Real-time Scan: Target Tab
Procedure
1. Under User Activity on Files, choose activities on files that will trigger Real-time
Scan. Select from the following options:
• Scan files being created/modified: Scan new files introduced into the
endpoint (for example, after downloading a file) or files being modified
• Scan files being retrieved/executed: Scan files as they are opened
• Scan files being created/modified and retrieved/executed
• Scan files being created/modified/executed
For example, if the third option is selected, a new file downloaded to the endpoint
will be scanned and stays in its current location if no security risk is detected. The
same file will be scanned when a user opens the file and, if the user modified the
file, before the modifications are saved.
2. Under Scan Settings, select one or more from the following options:

Trend Micro Apex One™ (Mac) 2019 Administrator’s Guide
6-14
• Scan compressed files: Scan individual files within an archive file
For more information, see Supported Compressed File Types on page 6-24.
• Scan network drive: Scan directories physically located on other endpoints,
but mapped to the local endpoint
Real-time Scan: Action Tab
On the Actions tab, configure the scan actions Apex One (Mac) performs on detected
security threats.
Procedure
1. Under Action, specify the scan actions.
Option Description
Use ActiveAction ActiveAction is a set of pre-configured scan
actions for different types of security risks. If you
are unsure which scan action is suitable for a
certain type of security risk, Trend Micro
recommends using ActiveAction.
ActiveAction settings are constantly updated in
the pattern files to protect endpoints against the
latest security risks and the latest methods of
attacks.
Use the same action for all
security risk types
Select this option if you want the same action
performed on all types of security risks, except
probable virus/malware. For Probable Virus/
Malware, the action is always "Pass".
If you choose "Clean" as the first action, select a
second action that Apex One (Mac) performs if
cleaning is unsuccessful. If the first action is not
"Clean", no second action is configurable.
For details about scan actions, see Scan Actions
on page 6-24.

Protecting Endpoints from Security Risks
6-15
2. Select Display a notification message on the agent endpoint when virus/
malware is detected to display a notification message when Apex One (Mac)
detects a security risk during Real-time Scan.
Manual Scan
Manual Scan is an on-demand scan and starts immediately after a user runs the scan on
the agent console. The time it takes to complete scanning depends on the number of
files to scan and the endpoint's hardware resources.
Configure and apply Manual Scan settings to one or several Security Agents and groups,
or to all Security Agents that the server manages.
Configuring Manual Scan Settings
Procedure
1. Navigate to Agent Management.
2. In the agent tree, click the root icon (
) to include all Security Agents or select
specific groups or Security Agents.
3. Click Settings > Manual Scan Settings.
4. Click the Target tab to configure the general scan and CPU usage settings.
For more information, see Manual Scan: Target Tab on page 6-16.
5. Click the Action tab to configure the scan actions Apex One (Mac) performs on
detected security threats.
For more information, see Manual Scan: Action Tab on page 6-17.
6. If you selected one or more groups or Security Agents on the agent tree, click Save
to apply settings to the groups or Security Agents. If you selected the root icon
( ), choose from the following options:

Trend Micro Apex One™ (Mac) 2019 Administrator’s Guide
6-16
• Apply to All Agents: Applies settings to all existing Security Agents and to
any new Security Agent added to an existing/future group. Future groups are
groups not yet created at the time you configure the settings.
• Apply to Future Groups Only: Applies settings only to Security Agents
added to future groups. This option will not apply settings to new Security
Agents added to an existing group.
Manual Scan: Target Tab
Procedure
1. In the Files to Scan section, select from the following:
• All scannable files: Includes all scannable files. Unscannable files are
password protected files, encrypted files, or files that exceed the user-defined
scanning restrictions.
Note
Scanning every file requires a lot of time and resources and might be redundant
in some situations. Therefore, you might want to limit the amount of files the
Security Agent includes in the scan.
• Scan only Mach-O files: Only scan Mach-O files on endpoints. Apex One
(Mac) Security Agents do not scan other file types for malware.
Note
If you select this option, you must enable the smart scan feature to ensure
protection against the latest malware attacks targeting OS X and macOS
platforms.
2. Under Scan Settings, select one or more from the following options:
• Scan compressed files: Scan individual files within an archive file
For more information, see Supported Compressed File Types on page 6-24.

Protecting Endpoints from Security Risks
6-17
• Scan network drive: Scan directories physically located on other endpoints,
but mapped to the local endpoint
• Scan Time Machine: Only scan files on Time Machine drives
Note
After enabling the Scan Time Machine option for Manual and Scheduled
Scan, Apex One (Mac) can only detect malware threats but not take any action
(clean, quarantine, or delete) due to a permission limitation in Mac OS.
Configured scan actions display as unsuccessful in the product logs.
3. In the CPU Usage section, configure the required settings.
• High: No pausing between scans
• Low: Pause between file scans if CPU consumption is higher than 20%, and
do not pause if 20% or lower
Manual Scan: Action Tab
On the Actions tab, configure the scan actions Apex One (Mac) performs on detected
security threats.
Option Description
Use ActiveAction ActiveAction is a set of pre-configured scan actions
for different types of security risks. If you are unsure
which scan action is suitable for a certain type of
security risk, Trend Micro recommends using
ActiveAction.
ActiveAction settings are constantly updated in the
pattern files to protect endpoints against the latest
security risks and the latest methods of attacks.

Trend Micro Apex One™ (Mac) 2019 Administrator’s Guide
6-18
Option Description
Use the same action for all
security risk types
Select this option if you want the same action
performed on all types of security risks, except
probable virus/malware. For Probable Virus/
Malware, the action is always "Pass".
If you choose "Clean" as the first action, select a
second action that Apex One (Mac) performs if
cleaning is unsuccessful. If the first action is not
"Clean", no second action is configurable.
For details about scan actions, see Scan Actions on
page 6-24.
Scheduled Scan
Scheduled Scan runs automatically on the appointed date and time. Use Scheduled Scan
to automate routine scans on the Security Agent and improve scan management
efficiency.
Configure and apply Scheduled Scan settings to one or several Security Agents and
groups, or to all Security Agents that the server manages.
Configuring Scheduled Scan Settings
Procedure
1. Navigate to Agent Management.
2. In the agent tree, click the root icon ( ) to include all Security Agents or select
specific groups or Security Agents.
3. Click Settings > Scheduled Scan Settings.
4. Select the check box to enable Scheduled Scan.
5. Click the Target tab to configure the general scan and CPU usage settings, and the
scan schedule.
For more information, see Scheduled Scan: Target Tab on page 6-19.

Protecting Endpoints from Security Risks
6-19
6. Click the Action tab to configure the scan actions Apex One (Mac) performs on
detected security threats.
For more information, see Scheduled Scan: Action Tab on page 6-20.
7. If you selected one or more groups or Security Agents on the agent tree, click Save
to apply settings to the groups or Security Agents. If you selected the root icon
( ), choose from the following options:
• Apply to All Agents: Applies settings to all existing Security Agents and to
any new Security Agent added to an existing/future group. Future groups are
groups not yet created at the time you configure the settings.
• Apply to Future Groups Only: Applies settings only to Security Agents
added to future groups. This option will not apply settings to new Security
Agents added to an existing group.
Scheduled Scan: Target Tab
Procedure
1. Under Schedule, configure how often (daily, weekly, or monthly) and what time
Scheduled Scan will run.
For monthly Scheduled Scans, if you selected the 29th, 30th, or 31st day and a
month does not have this day, Apex One (Mac) runs Scheduled Scan on the last
day of the month.
2. In the Files to Scan section, select from the following:
• All scannable files: Includes all scannable files. Unscannable files are
password protected files, encrypted files, or files that exceed the user-defined
scanning restrictions.
Note
Scanning every file requires a lot of time and resources and might be redundant
in some situations. Therefore, you might want to limit the amount of files the
Security Agent includes in the scan.

Trend Micro Apex One™ (Mac) 2019 Administrator’s Guide
6-20
• File types scanned by IntelliScan: Only scan files known to potentially
harbor malicious code, including files disguised by a harmless extension name.
• Specify path or full path : Manually specify the files or directories to scan.
For example, /Shared/Files/mytext.txt or /Shared/Files.
3. Under Scan Settings, select one or more from the following options:
• Scan compressed files: Scan individual files within an archive file
For more information, see Supported Compressed File Types on page 6-24.
• Scan Time Machine: Only scan files on Time Machine drives
Note
After enabling the Scan Time Machine option for Manual and Scheduled
Scan, Apex One (Mac) can only detect malware threats but not take any action
(clean, quarantine, or delete) due to a permission limitation in Mac OS.
Configured scan actions display as unsuccessful in the product logs.
4. In the CPU Usage section, configure the required settings.
• High: No pausing between scans
• Low: Pause between file scans if CPU consumption is higher than 20%, and
do not pause if 20% or lower
Scheduled Scan: Action Tab
On the Actions tab, configure the scan actions Apex One (Mac) performs on detected
security threats.
Procedure
1. Under Action, specify the scan actions.

Protecting Endpoints from Security Risks
6-21
Option Description
Use ActiveAction ActiveAction is a set of pre-configured scan
actions for different types of security risks. If you
are unsure which scan action is suitable for a
certain type of security risk, Trend Micro
recommends using ActiveAction.
ActiveAction settings are constantly updated in
the pattern files to protect endpoints against the
latest security risks and the latest methods of
attacks.
Use the same action for all
security risk types
Select this option if you want the same action
performed on all types of security risks, except
probable virus/malware. For Probable Virus/
Malware, the action is always "Pass".
If you choose "Clean" as the first action, select a
second action that Apex One (Mac) performs if
cleaning is unsuccessful. If the first action is not
"Clean", no second action is configurable.
For details about scan actions, see Scan Actions
on page 6-24.
2. Under Scheduled Scan Privileges, specify whether users can postpone or skip a
scheduled scan.

Trend Micro Apex One™ (Mac) 2019 Administrator’s Guide
6-22
Privilege Description
Postpone Scheduled
Scan
Users with the "Postpone Scheduled Scan" privilege can
perform the following actions:
• Postpone Scheduled Scan before it runs and then
specify the postpone duration. Scheduled Scan can
only be postponed once.
• If Scheduled Scan is in progress, users can stop
scanning and restart it later. Users then specify the
amount of time that should elapse before scanning
restarts. When scanning restarts, all previously
scanned files are scanned again. Scheduled Scan
can be stopped and then restarted only once.
Configure the number of hours and minutes, which
corresponds to:
• The maximum postpone duration
• The maximum amount of time that should elapse
before scanning restarts
Skip and Stop
Scheduled Scan
This privilege allows users to perform the following
actions:
• Skip Scheduled Scan before it runs
• Stop Scheduled Scan when it is in progress
3. Under Scheduled Scan Settings, specify the notification and battery power
settings.
Setting Description
Display a notification
before Scheduled Scan
runs
When you enable this option, a notification message
displays on the endpoint several minutes before
Scheduled Scan runs. Users are notified of the scan
schedule (date and time) and their Scheduled Scan
privileges, such as postponing, skipping, or stopping
Scheduled Scan.
Configure the timing for displaying the notification
message, in number of minutes.

Protecting Endpoints from Security Risks
6-23
Setting Description
Automatically stop
Scheduled Scan when
scanning lasts more
than __ hours and __
minutes
The Security Agent stops scanning when the specified
amount of time is exceeded and scanning is not yet
complete. The Security Agent immediately notifies users
of any security risk detected during scanning.
Skip Scheduled Scan
When a Wireless
Endpoint's Battery Life
is Less Than __ % and
its AC Adapter is
Unplugged
Apex One (Mac) skips a Scheduled Scan if it detects that
a wireless endpoint's battery life is running low and its AC
adapter is not connected to any power source. If battery
life is low but the AC adapter is connected to a power
source, scanning proceeds. If a scan is in progress when
the battery life is low, the scan is not terminated.
Scan Now
Scan Now is initiated remotely by a Apex One (Mac) administrator through the web
console and can be run on one or several endpoints.
Initiate Scan Now on endpoints that you suspect to be infected.
Initiating Scan Now
Before you begin
All the Scheduled Scan settings, except the actual schedule, are used during Scan Now.
To configure settings before initiating Scan Now, follow the steps in Configuring Scheduled
Scan Settings on page 6-18.
Procedure
1. Navigate to Agent Management.
2. In the agent tree, click the root icon (
) to include all Security Agents or select
specific groups or Security Agents.
3. Click Tasks > Scan Now.

Trend Micro Apex One™ (Mac) 2019 Administrator’s Guide
6-24
Supported Compressed File Types
Apex One (Mac) supports the following compression types.
Extension Type
.zip Archive created by Pkzip
.rar Archive created by RAR
.tar Archive created by Tar
.arj ARJ Compressed archive
.hqx BINHEX
.gz; .gzip Gnu ZIP
.Z LZW/Compressed 16bits
.bin MacBinary
.cab Microsoft Cabinet file
Microsoft Compressed/
MSCOMP
.eml; .mht MIME
.td0 Teledisk format
.bz2 Unix BZ2 Bzip compressed file
.uu UUEncode
.ace WinAce
Scan Actions
Specify the action Apex One (Mac) performs when a particular scan type detects a
security risk.

Protecting Endpoints from Security Risks
6-25
The action Apex One (Mac) performs depends on the scan type that detected the
security risk. For example, when Apex One (Mac) detects a security risk during Manual
Scan (scan type), it cleans (action) the infected file.
The following are the actions Apex One (Mac) can perform against security risks:
Scan Action Details
Delete Apex One (Mac) removes the infected file from the endpoint.
Quarantine Apex One (Mac) renames and then moves the infected file to the
quarantine directory on the endpoint located in <Agent installation
folder>/common/lib/vsapi/quarantine.
Once in the quarantine directory, Apex One (Mac) can perform another
action on the quarantined file, depending on the action specified by the
user. Apex One (Mac) can delete, clean, or restore the file. Restoring a
file means moving it back to its original location without performing any
action. Users may restore the file if it is actually harmless. Cleaning a
file means removing the security risk from the quarantined file and
then moving it to its original location if cleaning is successful.
Clean Apex One (Mac) removes the security risk from an infected file before
allowing users to access it.
If the file is uncleanable, Apex One (Mac) performs a second action,
which can be one of the following actions: Quarantine, Delete, and
Pass. To configure the second action, navigate to Agent Management
> Settings > {Scan Type} and click the Action tab.

Trend Micro Apex One™ (Mac) 2019 Administrator’s Guide
6-26
Scan Action Details
Pass Apex One (Mac) performs no action on the infected file but records the
detected security risk in the logs. The file stays where it is located.
Apex One (Mac) always performs "Pass" on files infected with the
Probable Virus/Malware type to mitigate a False Positive. If further
analysis confirms that probable virus/malware is indeed a security risk,
a new pattern will be released to allow Apex One (Mac) to perform the
appropriate scan action. If actually harmless, probable virus/malware
will no longer be detected.
For example: Apex One (Mac) detects "x_probable_virus" on a file
named "123.pdf" and performs no action at the time of detection.
Trend Micro then confirms that "x_probable_virus" is a Trojan horse
program and releases a new Virus Pattern version. After loading the
new pattern, Apex One (Mac) will detect "x_probable_virus" as a
Trojan program and, if the action against such programs is "Delete",
will delete "123.pdf".
Scan Exclusions
Configure scan exclusions to increase the scanning performance and skip scanning files
that are known to be harmless. When a particular scan type runs, Apex One (Mac)
checks the scan exclusion list to determine which files on the endpoint will be excluded
from scanning.
Scan Exclusion
List
Details
Files Apex One (Mac) will not scan a file if:
• The file is located under the directory path specified in the
scan exclusion list
• The file matches the full file path (directory path and file
name) specified in the scan exclusion list
File extensions Apex One (Mac) will not scan a file if its file extension matches
any of the extensions included in this exclusion list.

Protecting Endpoints from Security Risks
6-27
Configuring Scan Exclusion Lists
For details about Scan Exclusion Lists, see Scan Exclusions on page 6-26.
Procedure
1. Navigate to Agent Management.
2. In the agent tree, click the root icon (
) to include all Security Agents or select
specific groups or Security Agents.
3. Click Settings > Scan Exclusion Settings.
4. Select the check box to enable scan exclusion.
5. To configure the Scan Exclusion List (Files):
a. Type a full file path or directory path and click Add.
Reminders:
• It is not possible to type only a file name.
• You can specify a maximum of 64 paths. See the following table for
examples.
Path Details Examples
Full file path Excludes a
specific file on
the endpoint
• Example 1:
/file.log
• Example 2:
/System/file.log

Trend Micro Apex One™ (Mac) 2019 Administrator’s Guide
6-28
Path Details Examples
Directory
path
Excludes all files
located on a
specific folder
and all its
subfolders
• Example 1:
/System/
Examples of files excluded from
scans:
• /System/file.log
• /System/Library/
file.log
Examples of files that will be
scanned:
• /Applications/file.log
• Example 2:
/System/Library
Examples of files excluded from
scans:
• /System/Library/
file.log
• /System/Library/
Filters/file.log
Examples of files that will be
scanned:
• /System/file.log
• Use the asterisk wildcard (*) in place of folder names.
See the following table for examples.

Protecting Endpoints from Security Risks
6-29
Path Wildcard Usage Examples
Full file path /Users/Mac/*/file.log
Examples of files excluded from scans:
• /Users/Mac/Desktop/file.log
• /Users/Mac/Movies/file.log
Examples of files that will be scanned:
• /Users/file.log
• /Users/Mac/file.log
Directory path • Example 1:
/Users/Mac/*
Examples of files excluded from scans:
• /Users/Mac/doc.html
• /Users/Mac/Documents/doc.html
• /Users/Mac/Documents/Pics/pic.jpg
Examples of files that will be scanned:
• /Users/doc.html
• Example 2:
/*/Components
Examples of files excluded from scans:
• /Users/Components/file.log
• /System/Components/file.log
Examples of files that will be scanned:
• /file.log
• /Users/file.log
• /System/Files/file.log

Trend Micro Apex One™ (Mac) 2019 Administrator’s Guide
6-30
• Partial matching of folder names is not supported. For example, it is not
possible to type /Users/*user/temp to exclude files on folder names
ending in “user”, such as “end_user” or “new_user”.
b. To delete a path, select it and click Remove.
6. To configure the Scan Exclusion List (File Extensions):
a. Type a file extension without a period (.) and click Add. For example, type
pdf. You can specify a maximum of 64 file extensions.
b. To delete a file extension, select it and click Remove.
7. If you selected one or more groups or Security Agents on the agent tree, click Save
to apply settings to the groups or Security Agents. If you selected the root icon
(
), choose from the following options:
• Apply to All Agents: Applies settings to all existing Security Agents and to
any new Security Agent added to an existing/future group. Future groups are
groups not yet created at the time you configure the settings.
• Apply to Future Groups Only: Applies settings only to Security Agents
added to future groups. This option will not apply settings to new Security
Agents added to an existing group.
Cache Settings for Scans
Each time scanning runs, the Security Agent checks the modified files cache to see if a
file has been modified since the last agent startup.
• If a file has been modified, the Security Agent scans the file and adds it to the
scanned files cache.
• If a file has not been modified, the Security Agent checks if the file is in the
scanned files cache.
• If the file is in the scanned files cache, the Security Agent skips scanning the
file.

Protecting Endpoints from Security Risks
6-31
• If the file is not in the scanned files cache, the Security Agent checks the
approved files cache.
Note
The approved files cache contains files that Apex One (Mac) deems
trustworthy. Trustworthy files have been scanned by successive versions of the
pattern and declared threat-free each time, or threat-free files that have
remained unmodified for an extended period of time.
• If the file is in the approved files cache, the Security Agent skips
scanning the file.
• If the file is not in the approved files cache, the Security Agent scans the
file and adds it to the scanned files cache.
All or some of the caches are cleared whenever the scan engine or pattern is updated.
If scans are run frequently and many files hit the caches, the scanning time reduces
significantly.
If scans are seldom run, disable the caches so that files can be checked for threats with
each scan.
Configuring Cache Settings for Scans
For details about the on-demand scan cache, see Cache Settings for Scans on page 6-30.
Procedure
1. Navigate to Agent Management.
2. In the agent tree, click the root icon (
) to include all Security Agents or select
specific groups or Security Agents.
3. Click Settings > Cache Settings for Scans.
4. Select Enable the on-demand scan cache.

Trend Micro Apex One™ (Mac) 2019 Administrator’s Guide
6-32
5. If you selected one or more groups or Security Agents on the agent tree, click Save
to apply settings to the groups or Security Agents. If you selected the root icon
( ), choose from the following options:
• Apply to All Agents: Applies settings to all existing Security Agents and to
any new Security Agent added to an existing/future group. Future groups are
groups not yet created at the time you configure the settings.
• Apply to Future Groups Only: Applies settings only to Security Agents
added to future groups. This option will not apply settings to new Security
Agents added to an existing group.
Trusted Program List
You can configure Security Agents to skip scanning of trusted processes during Real-
time Scan and event recording. After adding a program to the Trusted Program List, the
Security Agent does not subject the program or any processes initiated by the program
to Real-time Scan and event recording. Add trusted programs to the Trusted Program
List to improve the performance of scanning on endpoints.
Note
You can add files to the Trusted Program List if the following requirements are met:
• The file is not located in the system directory.
• The file has a valid digital signature.
After adding a program to the Trusted Program List, the Security Agent automatically
excludes the program from the following:
• Real-time Scan file checking
• Real-time Scan process scanning
• Event recording

Protecting Endpoints from Security Risks
6-33
Configuring the Trusted Program List
The Trusted Program List excludes programs and all child processes called by the
program from Real-time Scan.
Procedure
1. Navigate to Agent Management.
2. In the agent tree, click the root icon (
) to include all Security Agents or select
specific groups or Security Agents.
3. Click Settings > Trusted Program List.
4. Type the full program path of the program to exclude from the list.
5. Click + Add.
6. To remove a program from the list, click the Delete icon.
7. To export the Trusted Program List, click Export and select a location for the file.
Note
Apex One (Mac) saves the list in DAT format.
8. To import a Trusted Program List, click Import. and select the location of the file.
a. Click Browse... and select the location of the DAT file.
b. Click Import.
9. If you selected one or more groups or Security Agents on the agent tree, click Save
to apply settings to the groups or Security Agents. If you selected the root icon
( ), choose from the following options:
• Apply to All Agents: Applies settings to all existing Security Agents and to
any new Security Agent added to an existing/future group. Future groups are
groups not yet created at the time you configure the settings.

Trend Micro Apex One™ (Mac) 2019 Administrator’s Guide
6-34
• Apply to Future Groups Only: Applies settings only to Security Agents
added to future groups. This option will not apply settings to new Security
Agents added to an existing group.
Viewing Scan Operation Logs
When a Manual Scan or Scheduled Scan runs, the Apex One (Mac) Security Agent
creates a scan log that contains information about the scan. You can view the scan log
by accessing the Apex One (Mac) server or agent consoles.
Procedure
1. Navigate to Agents > Agent Management.
2. In the agent tree, click the root icon ( ) to include all Security Agents or select
specific groups or Security Agents.
3. Click Logs > Scan Operation Logs.
4. Specify the log criteria and click Display Logs.
The Scan Operation Logs screen appears.
5. To save logs to a comma-separated value (CSV) file, click Export. Open the file or
save it to a specific location.
What to do next
To keep the size of logs from occupying too much space on the hard disk, manually
delete logs or configure a log deletion schedule. For more information about managing
logs, see Managing Logs on page 9-7.

Protecting Endpoints from Security Risks
6-35
Security Risk Notifications and Logs
Apex One (Mac) comes with a set of default notification messages to inform you and
other Apex One (Mac) administrators of detected security risks or any outbreak that has
occurred.
Apex One (Mac) generates logs when it detects security risks.
Configuring Administrator Notification Settings
When security risks are detected or when an outbreak occurs, Apex One (Mac)
administrators can receive notifications through email.
Procedure
1. Navigate to Notifications > General Settings.
2. In the SMTP server field, type either an IPv4/IPv6 address or endpoint name.
3. Type a port number between 1 and 65535.
4. Type the sender’s email address in the From field.
5. Click Save.
Configuring Security Risk Notifications for Administrators
Configure Apex One (Mac) to send a notification when it detects a security risk, or only
when the action on the security risk is unsuccessful and therefore requires your
intervention.
You can receive notifications through email. Configure administrator notification
settings to allow Apex One (Mac) to successfully send notifications through email.
Procedure
1. Navigate to Notifications > Standard Notifications.

Trend Micro Apex One™ (Mac) 2019 Administrator’s Guide
6-36
2. In the Criteria tab, specify whether to send notifications each time Apex One
(Mac) detects a security risk, or only when the action on the security risks is
unsuccessful.
3. Click Save.
4. In the Email tab:
a. Enable notifications to be sent through email.
b. Specify the email recipients and accept or modify the default subject.
Token variables are used to represent data in the Message field.
Variable Description
%v Security risk name
%s The endpoint where the security risk
was detected
%m Agent group name
%ii Endpoint IP address
%nm Endpoint MAC address
%p Location of the security risk
%y Date and time of detection
%a Scan action performed
5. Click Save.
Configuring Outbreak Notifications for Administrators
Define an outbreak by the number of security risk detections and the detection period.
After defining the outbreak criteria, configure Apex One (Mac) to notify you and other
Apex One (Mac) administrators of an outbreak so you can respond immediately.

Protecting Endpoints from Security Risks
6-37
You can receive notifications through email. Configure administrator notification
settings to allow Apex One (Mac) to successfully send notifications through email. For
details, see Configuring Administrator Notification Settings on page 6-35.
Procedure
1. Navigate to Notifications > Outbreak Notifications.
2. In the Criteria tab, specify the following:
• Number of unique sources of security risks
• Number of detections
• Detection period
Tip
Trend Micro recommends accepting the default values in this screen.
Apex One (Mac) declares an outbreak and sends a notification message when the
number of detections is exceeded. For example, if you specify 10 unique sources,
100 detections, and a time period of 5 hours, Apex One (Mac) sends the
notification when 10 different Security Agents have reported a total of 101 security
risks within a 5-hour period. If all instances are detected on only one Security
Agent within a 5- hour period, Apex One (Mac) does not send the notification.
3. Click Save.
4. In the Email tab:
a. Enable notifications to be sent through email.
b. Specify the email recipients and accept or modify the default subject.
Token variables are used to represent data in the Message field.
Variable Description
%CV Total number of security risks detected

Trend Micro Apex One™ (Mac) 2019 Administrator’s Guide
6-38
Variable Description
%CC Total number of endpoints with security risks
5. Select additional information to include in the email. You can include the Security
Agent or group name, security risk name, path and infected file, date and time of
detection, and scan result.
6. Click Save.
Viewing Security Risk Logs
Procedure
1. Navigate to Agent Management.
2. In the agent tree, click the root icon ( ) to include all Security Agents or select
specific groups or Security Agents.
3. Click Logs > Security Risk Logs.
4. Specify the log criteria and click Display Logs.
5. View logs. Logs contain the following information:
• Date and time of security risk detection
• Endpoint with security risk
• Security risk name
• Security risk source
• Scan type that detected the security risk
• Scan results, which indicate whether scan actions were performed successfully.
For details about scan results, see Scan Results on page 6-39.
• Platform
6. To save logs to a comma-separated value (CSV) file, click Export. Open the file or
save it to a specific location.

Protecting Endpoints from Security Risks
6-39
Note
If you are exporting a large number of logs, wait for the export task to finish. If you
close the page before the export task is finished, the .csv file will not be generated.
What to do next
To keep the size of logs from occupying too much space on the hard disk, manually
delete logs or configure a log deletion schedule. For more information about managing
logs, see Managing Logs on page 9-7.
Scan Results
The following scan results display in the virus/malware logs:
• Deleted
• First action is Delete and the infected file was deleted.
• First action is Clean but cleaning was unsuccessful. Second action is Delete
and the infected file was deleted.
• Quarantined
• First action is Quarantine and the infected file was quarantined.
• First action is Clean but cleaning was unsuccessful. Second action is
Quarantine and the infected file was quarantined.
• Cleaned
An infected file was cleaned.
• Passed
• First action is Pass. Apex One (Mac) did not perform any action on the
infected file.
• First action is Clean but cleaning was unsuccessful. Second action is Pass so
Apex One (Mac) did not perform any action on the infected file.
• Unable to clean or quarantine the file

Trend Micro Apex One™ (Mac) 2019 Administrator’s Guide
6-40
Clean is the first action. Quarantine is the second action, and both actions were
unsuccessful.
Solution: See “Unable to quarantine the file” below.
• Unable to clean or delete the file
Clean is the first action. Delete is the second action, and both actions were
unsuccessful.
Solution: See “Unable to delete the file” below.
• Unable to quarantine the file
The infected file may be locked by another application, is executing, or is on a CD.
Apex One (Mac) will quarantine the file after the application releases the file or
after it has been executed.
Solution
For infected files on a CD, consider not using the CD as the virus may infect other
endpoints on the network.
• Unable to delete the file
The infected file may be locked by another application, is executing, or is on a CD.
Apex One (Mac) will delete the file after the application releases the file or after it
has been executed.
Solution
For infected files on a CD, consider not using the CD as the virus may infect other
endpoints on the network.
• Unable to clean the file
The file may be uncleanable. For details and solutions, see Uncleanable Files on page
6-40.
Uncleanable Files
The Virus Scan Engine is unable to clean the following files:

Protecting Endpoints from Security Risks
6-41
Uncleanable
File
Explanation and Solution
Files infected with
worms
A computer worm is a self-contained program (or set of programs)
able to spread functional copies of itself or its segments to other
endpoint systems. The propagation usually takes place through
network connections or email attachments. Worms are
uncleanable because the file is a self-contained program.
Solution: Trend Micro recommends deleting worms.
Write-protected
infected files
Solution: Remove the write-protection to allow the Security Agent
to clean the file.
Password-protected
files
Includes password-protected files or compressed files.
Solution: Remove the password protection for the Security Agent
to clean these files.
Backup files Files with the RB0~RB9 extensions are backup copies of infected
files. The Security Agent creates a backup of the infected file in
case the virus/malware damaged the file during the cleaning
process.
Solution: If the Security Agent successfully cleans the infected
file, you do not need to keep the backup copy. If the endpoint
functions normally, you can delete the backup file.
Resetting Security Risk Count
You can go to the Reset Statistics screen to reset the detection count for security risks
back to zero.
Procedure
1. Navigate to Agent Management.
2. In the agent tree, click the root icon ( ) to include all Security Agents or select
specific groups or Security Agents.
3. Click Logs > Reset Statistics.

Trend Micro Apex One™ (Mac) 2019 Administrator’s Guide
6-42
Note
The Security Risk field displays the total detection count for the selected Security
Agents, all Security Agents in the selected groups, or all Security Agents.
4. Click Reset.
5. Click OK.

7-1
Chapter 7
Protecting Endpoints from Web-
based Threats
This chapter describes web-based threats and using Apex One (Mac) to protect your
network and endpoints from web-based threats.

Trend Micro Apex One™ (Mac) 2019 Administrator’s Guide
7-2
Web Threats
Web threats encompass a broad array of threats that originate from the Internet. Web
threats are sophisticated in their methods, using a combination of various files and
techniques rather than a single file or approach. For example, web threat creators
constantly change the version or variant used. Because the web threat is in a fixed
location of a website rather than on an infected endpoint, the web threat creator
constantly modifies its code to avoid detection.
In recent years, individuals once characterized as hackers, virus writers, spammers, and
spyware makers have become known as cyber criminals. Web threats help these
individuals pursue one of two goals. One goal is to steal information for subsequent sale.
The resulting impact is leakage of confidential information in the form of identity loss.
The infected endpoint may also become a vector to deliver phish attacks or other
information capturing activities. Among other impacts, this threat has the potential to
erode confidence in web commerce, corrupting the trust needed for Internet
transactions. The second goal is to hijack a user’s CPU power to use it as an instrument
to conduct profitable activities. Activities include sending spam or conducting extortion
in the form of distributed denial-of-service attacks or pay-per-click activities.
Web Reputation
Web reputation technology tracks the credibility of web domains by assigning a
reputation score based on factors such as a website's age, historical location changes, and
indications of suspicious activities discovered through malware behavior analysis. It will
then continue to scan sites and block users from accessing infected ones.
Security Agents send queries to smart protection sources to determine the reputation of
websites that users are attempting to access. A website’s reputation is correlated with the
specific web reputation policy enforced on the endpoint. Depending on the policy in
use, the Security Agents will either block or allow access to the website.
Note
This feature supports the latest Safari™, Mozilla™ Firefox™, and Google Chrome™
browsers.

Protecting Endpoints from Web-based Threats
7-3
Configuring Web Reputation Settings
Web Reputation settings include policies that dictate whether Apex One (Mac) will block
or allow access to a website. To determine the appropriate policy to use, Apex One
(Mac) checks the location of the Security Agent. The location of a Security Agent is
"internal" if the Security Agent can connect to the Apex One (Mac) server. Otherwise,
the location for the Security Agent is "external".
Procedure
1. Navigate to Agent Management.
2. In the agent tree, click the root icon ( ) to include all Security Agents or select
specific groups or Security Agents.
3. Click Settings > Web Reputation Settings.
4. To configure a policy for external Security Agents:
a. Click the External Agents tab.
b. Select Enable Web Reputation policy.
When the policy is enabled, external Security Agents send web reputation
queries to the Smart Protection Network.
Note
If a Security Agent only has an IPv6 address, read the IPv6 limitations for Web
Reputation queries in Pure IPv6 Agent Limitations on page A-3.
c. Select from the available web reputation security levels: High, Medium or
Low
Note
The security levels determine whether Apex One (Mac) will allow or block
access to a URL. For example, if you set the security level to Low, Apex One
(Mac) only blocks URLs that are known to be web threats. As you set the
security level higher, the web threat detection rate improves but the possibility
of false positives also increases.

Trend Micro Apex One™ (Mac) 2019 Administrator’s Guide
7-4
d. To submit web reputation feedback, click the URL provided. The Trend
Micro Web Reputation Query system opens in a browser window.
5. To configure a policy for internal Security Agents:
a. Click the Internal Agents tab.
b. Select Enable Web Reputation policy.
When the policy is enabled, internal Security Agents send web reputation
queries to:
• Smart Protection Servers if the Send queries to Smart Protection
Servers option is enabled.
• Smart Protection Network if the Send queries to Smart Protection
Servers option is disabled.
Note
If a Security Agent only has an IPv6 address, read the IPv6 limitations for Web
Reputation queries in Pure IPv6 Agent Limitations on page A-3.
c. Select Send queries to Smart Protection Servers if you want internal
Security Agents to send web reputation queries to Smart Protection Servers.
• If you enable this option, Security Agents refer to the same smart
protection source list used by Apex One Security Agents to determine
the Smart Protection Servers to which they send queries.
Important
Before enabling this option, read the guidelines in Trend Micro Smart
Protection on page 3-15.
• If you disable this option, Security Agents send web reputation queries
to Smart Protection Network. Endpoints must have Internet connection
to send queries successfully.
d. Select from the available web reputation security levels: High, Medium or
Low

Protecting Endpoints from Web-based Threats
7-5
Note
The security levels determine whether Apex One (Mac) will allow or block
access to a URL. For example, if you set the security level to Low, Apex One
(Mac) only blocks URLs that are known to be web threats. As you set the
security level higher, the web threat detection rate improves but the possibility
of false positives also increases.
Security Agents do not block untested websites, regardless of the security level.
e. To submit web reputation feedback, click the URL provided. The Trend
Micro Web Reputation Query system opens in a browser window.
f. Select whether to allow the Security Agents to send web reputation logs to the
server. Allow Security Agents to send logs if you want to analyze URLs being
blocked by Apex One (Mac) and take the appropriate action on URLs you
think are safe to access.
6. If you selected one or more groups or Security Agents on the agent tree, click Save
to apply settings to the groups or Security Agents. If you selected the root icon
( ), choose from the following options:
• Apply to All Agents: Applies settings to all existing Security Agents and to
any new Security Agent added to an existing/future group. Future groups are
groups not yet created at the time you configure the settings.
• Apply to Future Groups Only: Applies settings only to Security Agents
added to future groups. This option will not apply settings to new Security
Agents added to an existing group.
Configuring the Approved and Blocked URL
Lists
Add websites that you consider safe or dangerous to the approved or blocked list. When
Apex One (Mac) detects access to any of these websites, it automatically allows or blocks
the access and no longer sends a query to smart protection sources.

Trend Micro Apex One™ (Mac) 2019 Administrator’s Guide
7-6
Procedure
1. Navigate to Agents > Web Reputation Approved/Blocked URL List.
2. Specify a URL in the text box. You can add a wildcard character (*) anywhere on
the URL.
Examples:
•
www.trendmicro.com/* means all pages on the www.trendmicro.com
domain.
•
*.trendmicro.com/* means all pages on any sub-domain of
trendmicro.com.
You can type URLs containing IP addresses. If a URL contains an IPv6 address,
enclose the address in square brackets.
3. Click Add to Approved List or Add to Blocked List.
4. To delete an entry, select an option from the View drop-down list and click the
icon next to a URL.
5. Click Save.
Viewing Web Reputation Logs
Before you begin
Configure internal Security Agents to send Web Reputation logs to the server. Do this if
you want to analyze URLs that Apex One (Mac) blocks and take appropriate actions on
URLs you think are safe to access.
Procedure
1. Navigate to Agent Management.
2. In the agent tree, click the root icon (
) to include all Security Agents or select
specific groups or Security Agents.

Protecting Endpoints from Web-based Threats
7-7
3. Click Logs > Web Reputation Logs.
4. Specify the log criteria and click Display Logs.
5. View logs. Logs contain the following information:
• Date/Time Apex One (Mac) blocked the URL
• Endpoint where the user accessed the URL
• Blocked URL
• URL's risk level
• Link to the Trend Micro Web Reputation Query system that provides more
information about the blocked URL
6. To save logs to a comma-separated value (CSV) file, click Export. Open the file or
save it to a specific location.
Note
If you are exporting a large number of logs, wait for the export task to finish. If you
close the page before the export task is finished, the .csv file will not be generated.
What to do next
To keep the size of logs from occupying too much space on the hard disk, manually
delete logs or configure a log deletion schedule.
For more information about managing logs, see Managing Logs on page 9-7.

8-1
Chapter 8
Using Device Control
This chapter describes how to protect endpoints from security risks using the Device
Control feature.

Trend Micro Apex One™ (Mac) 2019 Administrator’s Guide
8-2
Device Control
Device Control regulates access to external storage devices and network resources
connected to endpoints. Device Control helps prevent data loss and leakage and,
combined with file scanning, helps guard against security risks.
You can configure Device Control policies for internal and external agents.
Administrators typically configure a stricter policy for external agents.
Policies are granular settings in the agent tree. You can enforce specific policies to agent
groups or individual Security Agents. You can also enforce a single policy to all Security
Agents.
Permissions for Storage Devices
Device Control permissions for storage devices are used when you:
• Allow access to USB storage devices, CD/DVD, SD cards, network drives, and
Thunderbolt SATA storage devices. You can grant full access to these devices or
limit the level of access.
• Configure the list of approved USB storage devices. Device Control allows you to
block access to all USB storage devices, except those that have been added to the
list of approved devices. You can grant full access to the approved devices or limit
the level of access.
The following table lists the permissions for storage devices.
Table 8-1. Device Control Permissions for Storage Devices
Permissions Files on the Device Incoming Files
Full access Permitted operations: Copy,
Move, Open, Save, Delete,
Execute
Permitted operations: Save,
Move, Copy
This means that a file can be
saved, moved, and copied to the
device.

Using Device Control
8-3
Permissions Files on the Device Incoming Files
Read only Permitted operations: Copy,
Open
Prohibited operations: Save,
Move, Delete, Execute
Prohibited operations: Save,
Move, Copy
Block Prohibited operations: All
operations
The device and the files it
contains are not visible to the
user (for example, from Finder).
Prohibited operations: Save,
Move, Copy
Note
The read-only permission is not available for network drives.
Configuring Device Control Settings
Procedure
1. Navigate to Agent Management.
2. In the agent tree, click the root icon ( ) to include all Security Agents or select
specific groups or Security Agents.
3. Click Settings > Device Control Settings.
4. Click the External Agents tab to configure settings for external agents or the
Internal Agents tab to configure settings for internal agents.
5. Select Enable Device Control.
6. Under Devices, select a permission for each storage device.
For details about permissions, see Permissions for Storage Devices on page 8-2.

Trend Micro Apex One™ (Mac) 2019 Administrator’s Guide
8-4
7. (Optional) If the permission for USB storage devices is Block, you can configure a
list of approved devices under USB Storage Device Approved List. Users can
access these devices and you can control the level of access using permissions.
Tip
The approved list for USB devices supports the use of the asterisk (*) wildcard.
Replace any field with the asterisk (*) to include all devices that satisfy the other
fields. For example, [manufacturer]-[product ID]-* places all USB devices from the
specified manufacturer and the specified product type, regardless of serial number, to
the approved list.
a. Type the device manufacturer, product ID, and serial number for a USB
storage device.
b. Click Add.
Tip
• To delete a device from the list, select an entry and click Remove.
• Use the Device List Tool to query devices connected to endpoints. The
tool provides the device manufacturer, product ID, and serial number for
each device.
For more information, see Device List Tool on page 8-5.
c. Select the permission for the device.
For details about permissions, see Permissions for Storage Devices on page 8-2.
Note
USB storage devices on the approved list must have a higher permission level
than the permission setting for USB storage devices in the Devices section.
8. Under Notification, select the Display a notification message on the agent
endpoint when a new device is detected option to display a notification when a
new storage device is connected to the endpoint. The notification indicates the
access permission for the new storage device.

Using Device Control
8-5
9. If you selected one or more groups or Security Agents on the agent tree, click Save
to apply settings to the groups or Security Agents. If you selected the root icon
( ), choose from the following options:
• Apply to All Agents: Applies settings to all existing Security Agents and to
any new Security Agent added to an existing/future group. Future groups are
groups not yet created at the time you configure the settings.
• Apply to Future Groups Only: Applies settings only to Security Agents
added to future groups. This option will not apply settings to new Security
Agents added to an existing group.
Device List Tool
Run the Device List Tool locally on a Windows computer to query external devices
connected to the computer. The tool scans for external devices and then displays device
information in a browser window. You can then use the information when configuring
device settings for Device Control.
Running the Device List Tool
Note
The device list tool does not support endpoints running macOS or OS X.
Procedure
1. On the Apex One (Mac) server computer, go to <Server installation folder>
\PCCSRV\Admin\Utility\ListDeviceInfo.
2. Connect external devices to a target Windows computer.
3. Copy listDeviceInfo.exe to the Windows computer.
4. On the Windows computer, run listDeviceInfo.exe.
5. View device information in the browser window that displays. Device Control use
the following information:

Trend Micro Apex One™ (Mac) 2019 Administrator’s Guide
8-6
• Vendor or manufacturer
• Model or product ID
• Serial ID or serial number
Viewing Device Control Logs
When a new storage device is connected to an endpoint, the Apex One (Mac) Security
Agent creates a log entry for the event with the access permission based on the device
control settings.
Procedure
1. Navigate to Agents > Agent Management.
2. In the agent tree, click the root icon ( ) to include all Security Agents or select
specific groups or Security Agents.
3. Click Logs > Device Control Logs.
4. Specify the log criteria and then click Display Logs.
The Device Control Logs screen appears.
5. To save logs to a comma-separated value (CSV) file, click Export to CSV. Open
the file or save it to a specific location.

9-1
Chapter 9
Managing the Server and Security
Agents
This chapter describes Apex One (Mac) server and agent management and additional
configurations.

Trend Micro Apex One™ (Mac) 2019 Administrator’s Guide
9-2
Agent Self-protection
The agent self-protection feature prevents other programs and even the user from
modifying or deleting files that the Security Agent uses.
When you enable Protect files used by the agent and the Security Agent is running on
an endpoint, Apex One (Mac) locks the following files and folders:
• /Library/Application Support/TrendMicro/common
• /Library/Application Support/TrendMicro/Kext
• /Library/Application Support/TrendMicro/TmccMac
• /Library/Application Support/TrendMicro/TmccUpdate
• /Library/Application Support/TrendMicro/Plug-in
• /Library/Application Support/TrendMicro/Tools
• /Library/LaunchDaemons/com.trendmicro.icore.*
• /Library/LaunchDaemons/com.trendmicro.tmsm.plugin.plist
• /Library/LaunchDaemons/com.trendmicro.tmsm.launcher.plist
• /Application/TrendMicroSecurity.app
Note
Apex One (Mac) allows files to be added in the /Library/Application Support/
TrendMicro/Tools folder, files cannot be deleted from the folder.
Configuring Agent Self-protection
Procedure
1. Navigate to Agent Management.
2. In the agent tree, click the root icon (
) to include all Security Agents or select
specific groups or Security Agents.

Managing the Server and Security Agents
9-3
3. Click Settings > Agent Self-protection.
4. Select Protect files used by the agent.
5. If you selected one or more groups or Security Agents on the agent tree, click Save
to apply settings to the groups or Security Agents. If you selected the root icon
( ), choose from the following options:
• Apply to All Agents: Applies settings to all existing Security Agents and to
any new Security Agent added to an existing/future group. Future groups are
groups not yet created at the time you configure the settings.
• Apply to Future Groups Only: Applies settings only to Security Agents
added to future groups. This option will not apply settings to new Security
Agents added to an existing group.
Enabling Certified Safe Software Service
The Certified Safe Software Service queries Trend Micro datacenters to verify the safety
of a program detected by antivirus scans. Enable Certified Safe Software Service to
reduce the likelihood of false positive detections.
Procedure
1. Navigate to Agents > Certified Safe Software Service.
2. Select Enable Certified Safe Software Service for antivirus scan.
3. Click Save.
Note
• If endpoints within your network require a proxy server to access the Internet,
configure proxy settings for internal agents.
• For more information, see Configuring Agent-Server Communication Settings on page
9-14.

Trend Micro Apex One™ (Mac) 2019 Administrator’s Guide
9-4
Enabling Predictive Machine Learning
Trend Micro Predictive Machine Learning uses advanced machine learning technology
to correlate threat information and perform in-depth file analysis to detect emerging
unknown security risks through digital DNA fingerprinting, API mapping, and other file
features. Predictive Machine Learning also performs a behavioral analysis on unknown
or low-prevalence processes to determine if an emerging or unknown threat is
attempting to infect your network.
Predictive Machine Learning is a powerful tool that helps protect your environment
from unidentified threats and zero-day attacks.
To enable this feature, go to Agents > Predictive Machine Learning and select
Enable Predictive Machine Learning.
Note
If endpoints within your network require a proxy server to access the Internet, configure
proxy settings for internal agents.
For more information, see Configuring Agent-Server Communication Settings on page 9-14.
Upgrading the Server and Security Agents
The Plug-in Manager console displays any new Apex One (Mac) build or version.
Upgrade the server and Security Agents immediately when the new build or version
becomes available.
Before upgrading, be sure that the server and Security Agents have the resources
outlined in Server Installation Requirements on page 2-2 and Agent Installation Requirements on
page 4-2.

Managing the Server and Security Agents
9-5
Upgrading the Server
Before you begin
Trend Micro recommends backing up the server’s program files and database, which can
be restored if there are problems with the upgrade.
• Program files
• Default path:
• C:\Program Files\Trend Micro\OfficeScan\Addon\TMSM
• C:\Program Files\Trend Micro\Apex One\Addon\TMSM
Or
• C:\Program Files (x86)\Trend Micro\OfficeScan\Addon
\TMSM
• C:\Program Files (x86)\Trend Micro\Apex One\Addon
\TMSM
• Files to back up:
• ..\apache-activemq\conf\.*
• ..\apache-activemq\bin\wrapper.conf
• .\ServerInfo.plist
• Database files. See Backing Up the Server Database on page 9-9.
Procedure
1. Open the Apex One or OfficeScan web console and click Plug-ins on the main
menu.
2. Go to the Apex One (Mac) section and click Download.
The size of the file to be downloaded displays beside the Download button.
Plug-in Manager downloads the package to <server installation folder>
\PCCSRV\Download.

Trend Micro Apex One™ (Mac) 2019 Administrator’s Guide
9-6
<server installation folder> is typically C:\Program Files\Trend
Micro\OfficeScan or C:\Program Files\Trend Micro\Apex One.
3. Monitor the download progress.
You can navigate away from the screen during the download.
If you encounter problems downloading the package, check the server update logs
on the Apex One or OfficeScan web console. On the main menu, click Logs >
Server Update.
4. To upgrade Apex One (Mac) immediately, click Upgrade Now, or to install at a
later time, perform the following:
a. Click Upgrade Later.
b. Open the Plug-in Manager screen.
c. Go to the Apex One (Mac) section and click Upgrade.
5. Monitor the upgrade progress. After the upgrade, the Plug-in Manager screen
reloads.
Upgrading Security Agents
Attention
To allow agent upgrades, clear the Agents can update the components but not upgrade
the agent program check box on the Agent Management > Settings > Update
Settings screen.
Procedure
1. Perform any of the following steps:
• Perform a manual update. Ensure that you select Apex One (Mac) Agent
from the list of components.
• On the agent tree, select the Security Agents to upgrade and then click Tasks
> Update.

Managing the Server and Security Agents
9-7
• If scheduled update has been enabled, ensure that Apex One (Mac) Agent is
selected.
• Instruct users to click Update from the agent console.
Security Agents that receive the notification start to upgrade. On the endpoint, the
Apex One (Mac) icon on the menu bar indicates that the product is updating. Users
cannot run any task from the console until the upgrade is complete.
2. Check the upgrade status.
a. Click Summary on the main menu and go to the Program section under
Update Status.
b. Click the link under the Not Upgraded column. The agent tree opens,
showing all the Security Agents that have not been upgraded.
c. To upgrade the Security Agents that have not been upgraded, click Tasks >
Update.
Managing Logs
Apex One (Mac) keeps comprehensive logs about security risk detections, blocked
URLs, scan operations, and device control events. Use these logs to assess your
organization's protection policies and to identify Security Agents that are at a higher risk
of infection or attack.
To keep the size of logs from occupying too much space on the hard disk, manually
delete logs or configure a log deletion schedule from the web console.
Procedure
1. Navigate to Administration > Log Maintenance.
2. Select Enable scheduled deletion of logs.
3. Select whether to delete all logs or only logs older than a certain number of days.
4. Specify the log deletion frequency and time.

Trend Micro Apex One™ (Mac) 2019 Administrator’s Guide
9-8
5. Click Save.
Managing Licenses
View, activate, and renew the Apex One (Mac) license on the web console.
The status of the product license determines the features available to users. Refer to the
table below for details.
License Type and
Status
Features
Real-time
Scan
Scheduled
Scan
Web
Reputation
Pattern
Update
Full version and
Activated
Enabled Enabled Enabled Enabled
Evaluation (trial)
version and Activated
Enabled Enabled Enabled Enabled
Full version and
Expired
Enabled Enabled Enabled Disabled
Evaluation version and
Expired
Disabled Disabled Disabled Disabled
Not activated Disabled Disabled Disabled Disabled
Note
If the server only has an IPv6 address, read the IPv6 limitations for license updates in Pure
IPv6 Server Limitations on page A-2.
Procedure
1. Navigate to Administration > Product License.
2. View license information. To get the latest license information, click Update
Information.

Managing the Server and Security Agents
9-9
The License Information section provides you the following details:
• Status: Displays either "Activated" or "Expired"
• Version: Displays either "Full" or "Evaluation" version. If you are using an
evaluation version, you can upgrade to the full version anytime. For upgrade
instructions, click View license upgrade instructions.
• Seats: The maximum number of agent installations the license supports
• License expires on: The expiration date of the license
• Activation Code: The code used to activate the license
• Last Updated: Date and time the license was last updated.
3. To specify a new Activation Code, click New Activation Code.
4. In the screen that opens, type the Activation Code and click Save.
This screen also provides a link to the Trend Micro website where you can view
detailed information about your license.
Backing Up the Server Database
Procedure
1. Stop the following services from Microsoft Management Console:
• ActiveMQ for Apex One (Mac)
• Apex One (Mac) Main Service
2. Open SQL Server Management Studio (for example, from Windows Start menu
> Programs > Microsoft SQL Server {version} > SQL Server Management
Studio.
3. Search for db_TMSM and then use the backup function in SQL Server
Management Studio to back up the database files.

Trend Micro Apex One™ (Mac) 2019 Administrator’s Guide
9-10
See the SQL Server Management Studio documentation for details.
4. Start the stopped services.
Restoring the Server Database
Before you begin
Prepare the backup of the database files created during backup. For details, see Backing
Up the Server Database on page 9-9.
Procedure
1. Stop the following services from Microsoft Management Console:
• ActiveMQ for Apex One (Mac)
• Apex One (Mac) Main Service
2. Open SQL Server Management Studio (for example, from Windows Start menu
> Programs > Microsoft SQL Server {version} > SQL Server Management
Studio.
3. Search for db_TMSM and then use the detach option in SQL Server Management
Studio to detach the current database files.
See the SQL Server Management Studio documentation for details.
4. Use the attach option to attach the backup of the database files.
5. Start the stopped services.

Managing the Server and Security Agents
9-11
Apex Central and Control Manager Integration
in this Release
This Apex One (Mac) release supports Apex Central 2019 and Control Manager 7.0
Patch 1. In this release, you can create, manage, and deploy Apex One (Mac) policies
and monitor endpoints from Apex Central or Control Manager.
The following are the policy configurations available:
• Manual Scan Settings
• Real-time Scan Settings
• Scan Exclusion Settings
• Cache Settings for Scans
• Scheduled Scan Settings
• Update Settings
• Web Reputation Settings
• Agent Self-protection Settings
• Scan Method Settings
• Endpoint Sensor Settings (Apex Central only)
• Device Control Settings (Apex Central only)
• Predictive Machine Learning Settings (Apex Central only)
• Trusted Program List Settings (Apex Central only)
You can monitor endpoints using the Apex One (Mac) Key Performance Indicators
widget in Apex Central or Control Manager.
For details, see Key Performance Indicators Widget on page 9-12.
See the Apex Central or Control Manager documentation for details.

Trend Micro Apex One™ (Mac) 2019 Administrator’s Guide
9-12
Note
You can also specify Apex Central or Control Manager as the Apex One (Mac) server’s
update source. For details, see Configuring the Server Update Source on page 5-5.
Key Performance Indicators Widget
Use this widget on the Apex Central or Control Manager Dashboard screen to display
Apex One (Mac) key performance indicators (KPIs) based on selected criteria.
For information on how to add a widget to the Dashboard screen, see the Apex Central
or Control Manager documentation.
Tip
By default, the widget marks events as “Important” ( ) at 15 occurrences and “Critical”
( ) at 30 occurrences. Optionally, mark events as Important or Critical by customizing
event thresholds.
Configuring Server Connection Settings
Specify the Apex Central or Control Manager server to obtain data for widget display.
1. Go to the Dashboard screen on Apex Central or Control Manager.
2. Click the tab on which the Apex One (Mac) Key Performance Indicators
widget is added.
3. Select the Server Settings icon ( ) from the top-right menu ( ) of the widget.
4. Select one or more Apex One (Mac) servers.
5. Click Save.
Configuring Key Performance Indicators
In Apex Central or Control Manager, access the Apex One (Mac) Key Performance
Indicators widget on the Dashboard to perform the following indicator-related tasks.

Managing the Server and Security Agents
9-13
Table 9-1. KPI Widget Indicator Tasks
Task Steps
Add a new indicator 1. Click Add Indicator. The Add Indicator screen
appears.
2. Select an option from the Name drop-down list
and optionally customize settings.
3. Click Save.
Edit an indicator 1. Click the indicator in the list. The Edit Indicator
screen appears.
2. Customize settings.
3. Click Save.
Delete an indicator 1. Click the indicator in the list. The Edit Indicator
screen appears.
2. Click Delete.
3. Click OK.
Configure event threshold
settings
1. On the Add Indicator or Edit Indicator screen,
select Enable alerts at the following
thresholds.
2. Type the minimum number of event occurrences
for each event type.
3. Click Save.
Note
The important or critical icon displays in the
Occurrences column if both of the following
are true:
• The number of event occurrences that
match this indicator is equal to or more
than the threshold.
• Enable alerts at the following threshold
is selected.
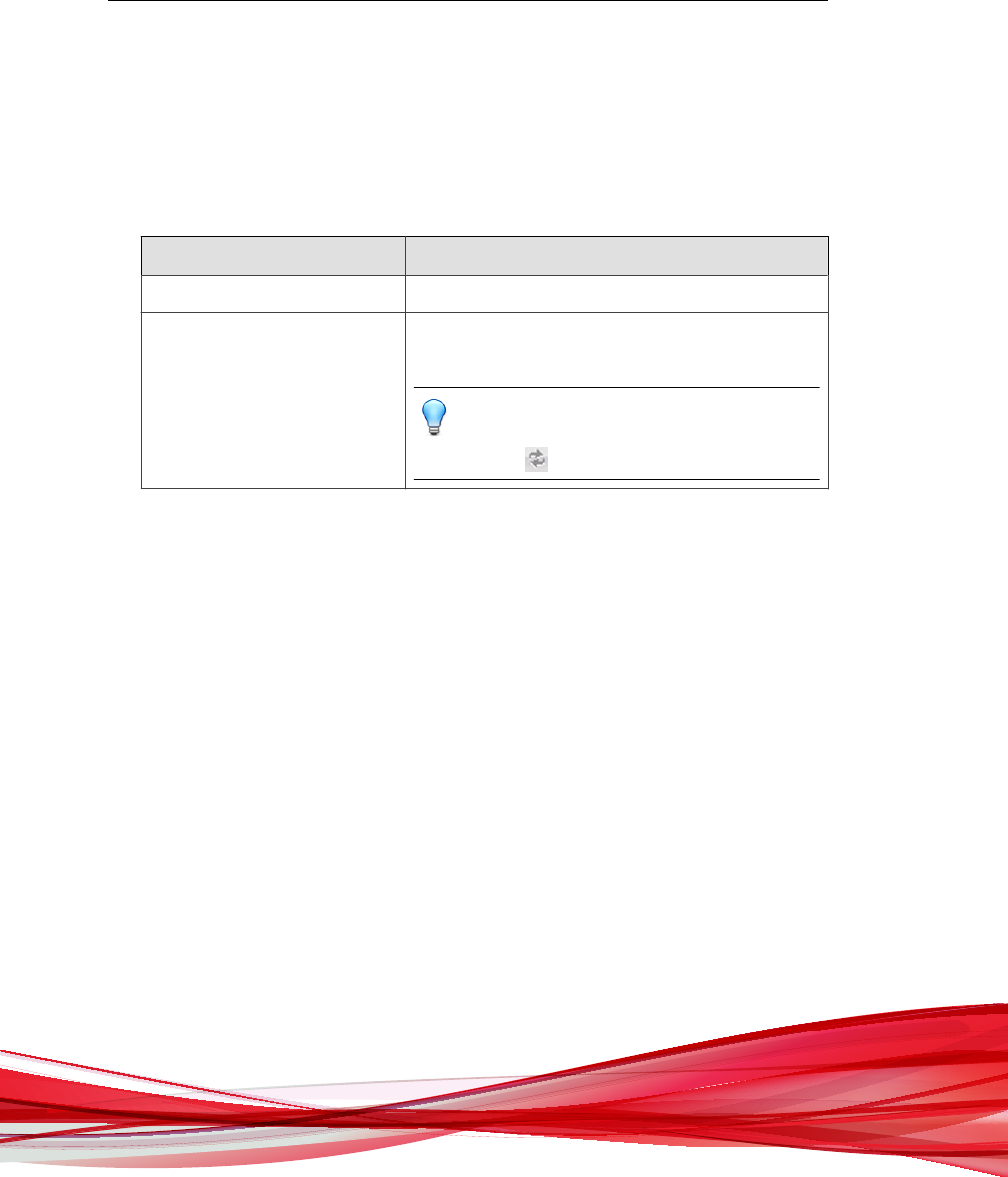
Trend Micro Apex One™ (Mac) 2019 Administrator’s Guide
9-14
Configuring Widget Settings
On the Apex Central or Control Manager Dashboard screen, select Widget Settings
from the menu on the top-right of the widget to perform the following tasks.
Table 9-2. KPI Widget Settings
Task Steps
Edit widget title Type the widget title in the text field.
Configure daily update time From the drop-down list, select the hour to generate
the widget data every day.
Tip
To manually refresh the widget data, click the
refresh ( ) icon.
Configuring Agent-Server Communication
Settings
Security Agents identify the server that manages them by the server’s name or IPv4/
IPv6 address. During the Apex One (Mac) server installation, the installer identifies the
server computer’s IP addresses, which are then displayed on the Agent-Server
Communication screen.
The server communicates with Security Agents through the listening port, which is port
number 61617 by default.

Managing the Server and Security Agents
9-15
Note
• If you change the port number, ensure that it is not currently in use to prevent
conflicts with other applications and agent-server communication issues.
• If a firewall application is in use on the server computer, ensure that the firewall does
not block agent-server communication through the listening port. For example, if the
Apex One Security Agent firewall has been enabled on the endpoint, add a policy
exception that allows incoming and outgoing traffic through the listening port.
• You can configure Security Agents to connect to the server through a proxy server. A
proxy server, however, is usually not required for agent-server connections within the
corporate network.
• If you plan to update or replace all of the existing server names and IPv4/IPv6
addresses or change the listening port or proxy settings, do so before installing
Security Agents. If you have installed Security Agents and then make changes, Security
Agents will lose connection with the server and the only way to re-establish
connection is to re-deploy the Security Agents.
Procedure
1. Navigate to Administration > Agent-Server Communication.
2. Under Server Name and Listening Port, type the server’s name or IPv4/IPv6
address(es), and listening port.
Note
If there are multiple entries in the Server name (or IP address) field, the Security
Agent randomly selects an entry. Ensure that agent-server connection can be
established using all the entries.
3. Under Proxy Settings, select whether Security Agents connect to the server
through a proxy server.
a. Select the proxy server protocol.
b. Type the proxy server name or IPv4/IPv6 address, and port number.
c. If the proxy server requires authentication, type the user name and password
in the fields provided.

Trend Micro Apex One™ (Mac) 2019 Administrator’s Guide
9-16
4. Click Save.
5. If you are prompted to restart Apex One (Mac) services for the settings to take
effect, perform the following steps:
a. Navigate to the <Server installation folder>.
b. Double-click restart_TMSM.bat.
c. Wait until all the services have restarted.
Inactive Security Agents
Apex One (Mac) displays Security Agents as inactive:
• If you use the agent uninstallation program to remove the agent program from the
endpoints but do not unregister the Security Agent from the server.
• If you reformatted the endoint hard drive without unregistering the Security Agent
from the server.
• If you manually removed the agent files.
• If a user unloads or disables the Security Agent for an extended period of time.
To have the agent tree display active Security Agents only, configure Apex One (Mac) to
automatically remove inactive Security Agents from the agent tree.
Automatically Removing Inactive Security Agents
Procedure
1. Go to Administration > Inactive Agents.
2. Select Enable automatic removal of inactive agents.
3. Select how many days should pass before Apex One (Mac) considers the Security
Agent inactive.

Managing the Server and Security Agents
9-17
4. Click Save.
Agent Icons
Icons on the endpoint’s system tray and main console indicate the status of a Security
Agent and the task it is currently running.
Tray Icon Menu Icon Description
The Security Agent is up and running and is
connected to its parent server.
The product license has been activated.
The Security Agent is up and running but is
disconnected from its parent server.
A new component version is available. Update the
Security Agent immediately.
The Security Agent has detected a security threat
that requires a computer restart to fix.
The Security Agent is scanning for security risks and
is connected to its parent server.
The Security Agent is updating components from its
parent server.

Trend Micro Apex One™ (Mac) 2019 Administrator’s Guide
9-18
Tray Icon Menu Icon Description
A component update requires you to restart the
Security Agent to finish installation.
Smart Scan or Web Reputation service is not
available on the Security Agent. Check your network
connection.
The Security Agent has been registered to its parent
server but the product license has not been
activated. Some Security Agent features will not be
available if the license has not been activated.
For details, see Managing Licenses on page 9-8.
The Security Agent has not been registered to its
parent server. The product license may or may not
have been activated.
If the Security Agent is not registered to its parent
server, all functions (including Real-Time Scan,
Manual Scan, Scheduled Scan, Web Reputation,
and pattern updates) are disabled.
The product license (full or evaluation version) has
been activated but has expired. Some Security
Agent features will not be available if the license has
expired.
The Security Agent has been installed on an
unsupported platform.
The Security Agent is not functioning properly.
Upgrade the Security Agent to the latest release or
contact technical support.
The Security Agent has completed a scan or has
detected a security threat.

10-1
Chapter 10
Getting Help
This chapter describes troubleshooting issues that may arise and how to contact
support.

Trend Micro Apex One™ (Mac) 2019 Administrator’s Guide
10-2
Troubleshooting
Web Console Access
Problem:
The web console cannot be accessed.
Procedure
1. Check if the endpoint meets the requirements for installing and running Apex One
(Mac) server.
For details, see Server Installation Requirements on page 2-2.
2. Check if the following services have been started:
• ActiveMQ for Apex One (Mac)
• Apex One Plug-in Manager
• Apex One (Mac) Main Service
3. Collect debug logs. Use 'error' or 'fail' as keyword when performing a search on the
logs.
• Installation logs: C:\TMSM*.log
• General debug logs: <Server installation folder>\debug.log
• Apex One: C:\Program Files\Trend Micro\Apex One\PCCSRV
\Log\ofcdebug.log
a. If the file does not exist, enable debug logging. On the banner of the
Apex One web console, click the first "A" in "Apex One", specify debug
log settings, and click Save.
b. Reproduce the steps that led to the web console access problem.
c. Obtain the debug logs.

Getting Help
10-3
4. Check the Apex One (Mac) registry keys by navigating to HKEY_LOCAL_MACHINE
\SOFTWARE\Wow6432Node\TrendMicro\TMSM.
5. Check the database files and registry keys.
a. Check if the following files exist under C:\Program Files\Microsoft
SQL Server\MSSQL.x\MSSQL\Data\ or C:\Program
Files(x86)\Microsoft SQL Server\MSSQL.x\MSSQL\Data\:
• db_TMSM.mdf
• db_TMSM_log.LDF
b. Check if the Apex One (Mac) database instance on the Microsoft SQL server
registry key exists:
• HKEY_LOCAL_MACHINE\SOFTWARE\Microsoft\Microsoft SQL
Server\TMSM
• HKEY_LOCAL_MACHINE\SOFTWARE\Microsoft\Microsoft SQL
Server\ TMSM\ MSSQLServer\CurrentVersion
6. Send the following to Trend Micro:
• Registry files
a. Navigate to HKEY_LOCAL_MACHINE\SOFTWARE\Microsoft
\Microsoft SQL server\TMSM.
b. Click File > Export and then save the registry key to a .reg file.
• Server computer information
• Operating system and version
• Available disk space
• Available RAM
• Whether other plug-in programs, such as Intrusion Defense Firewall, is
installed
7. Restart the Apex One (Mac) services.

Trend Micro Apex One™ (Mac) 2019 Administrator’s Guide
10-4
a. Navigate to the <Server installation folder>.
b. Double-click restart_TMSM.bat.
c. Wait until all the services have restarted.
8. The Apex One (Mac) service should always be running. If this service is not
running, there may be a problem with the ActiveMQ service.
a. Back up ActiveMQ data in C:\Program Files\Trend Micro
\OfficeScan\Addon\TMSM\apache-activemq\data\*.* or
C:\Program Files\Trend Micro\Apex One\Addon\TMSM\apache-
activemq\data\*.*.
b. Delete the ActiveMQ data.
c. Try to restart the Apex One (Mac) service by double-clicking
restart_TMSM.bat.
d. Try to access the web console again to check if the access problem has been
resolved.
Server Uninstallation
Problem:
The following message displays:
Unable to uninstall the plug-in program. The uninstallation
command for the plug-in program is missing in the registry key.
Procedure
1. Open registry editor and navigate to HKEY_LOCAL_MACHINE\SOFTWARE
\TrendMicro\Wow6432Node\OfficeScan\service\AoS
\OSCE_Addon_Service_CompList_Version.
2. Reset the value to
1.0.1000.

Getting Help
10-5
3. Delete the plug-in program registry key; for example, HKEY_LOCAL_MACHINE
\SOFTWARE\Wow6432Node\TrendMicro\OfficeScan\service\AoS
\OSCE_ADDON_xxxx.
4. Restart the Apex One Plug-in Manager service.
5. Download, install, and then uninstall the plug-in program.
Agent Installation
Problem:
The installation was unsuccessful. The installation package (tmsminstall.zip or
tmsminstall.mpkg.zip) was launched using an archiving tool not built-in on the
Mac or through an unsupported command (such as unzip) issued from a command-
line tool, causing the extracted folder (tmsminstall) or file (tmsminstall.mpkg) to
become corrupted.
Procedure
1. Remove the extracted folder (tmsminstall) or file (tmsminstall.mpkg).
2. Launch the installation package again using a built-in archiving tool such as Archive
Utility.
You can also launch the package from the command line by using the following
command:

Trend Micro Apex One™ (Mac) 2019 Administrator’s Guide
10-6
• If the package is tmsminstall.zip:
ditto –xk <tmsminstall.zip file path> <destination
folder>
For example:
ditto –xk users/mac/Desktop/tmsminstall.zip users/mac/
Desktop
• If the package is tmsminstall.mpkg.zip:
ditto –xk <tmsminstall.mpkg.zip file path> <destination
folder>
For example:
ditto –xk users/mac/Desktop/tmsminstall.mpkg.zip
users/mac/Desktop
General Agent Error
Problem:
An error or problem was encountered on the Security Agent.
Procedure
1. Open <Agent installation folder>/Tools and launch Trend Micro Debug Manager.
2. Follow the on-screen instructions in the tool to successfully collect data.
WARNING!
The tool will not work if a user moves it to a different location on the endpoint. If
the tool has been moved, uninstall and then install the Security Agent.
If the tool was copied to another location, remove the copied version and then run
the tool from its original location.

Getting Help
10-7
Technical Support
Learn about the following topics:
• Troubleshooting Resources on page 10-7
• Contacting Trend Micro on page 10-8
• Sending Suspicious Content to Trend Micro on page 10-9
• Other Resources on page 10-10
Troubleshooting Resources
Before contacting technical support, consider visiting the following Trend Micro online
resources.
Using the Support Portal
The Trend Micro Support Portal is a 24x7 online resource that contains the most up-to-
date information about both common and unusual problems.
Procedure
1. Go to
http://esupport.trendmicro.com.
2. Select from the available products or click the appropriate button to search for
solutions.
3. Use the Search Support box to search for available solutions.
4. If no solution is found, click Contact Support and select the type of support
needed.
Tip
To submit a support case online, visit the following URL:
http://esupport.trendmicro.com/srf/SRFMain.aspx

Trend Micro Apex One™ (Mac) 2019 Administrator’s Guide
10-8
A Trend Micro support engineer investigates the case and responds in 24 hours or
less.
Threat Encyclopedia
Most malware today consists of blended threats, which combine two or more
technologies, to bypass computer security protocols. Trend Micro combats this complex
malware with products that create a custom defense strategy. The Threat Encyclopedia
provides a comprehensive list of names and symptoms for various blended threats,
including known malware, spam, malicious URLs, and known vulnerabilities.
Go to http://about-threats.trendmicro.com/us/threatencyclopedia#malware to learn
more about:
• Malware and malicious mobile code currently active or "in the wild"
• Correlated threat information pages to form a complete web attack story
• Internet threat advisories about targeted attacks and security threats
• Web attack and online trend information
• Weekly malware reports
Contacting Trend Micro
In the United States, Trend Micro representatives are available by phone or email:
Address
Trend Micro, Incorporated
225 E. John Carpenter Freeway, Suite 1500
Irving, Texas 75062 U.S.A.
Phone Phone: +1 (817) 569-8900
Toll-free: (888) 762-8736
Website http://www.trendmicro.com
Email address [email protected]

Getting Help
10-9
• Worldwide support offices:
http://www.trendmicro.com/us/about-us/contact/index.html
• Trend Micro product documentation:
http://docs.trendmicro.com
Speeding Up the Support Call
To improve problem resolution, have the following information available:
• Steps to reproduce the problem
• Appliance or network information
• Computer brand, model, and any additional connected hardware or devices
• Amount of memory and free hard disk space
• Operating system and service pack version
• Version of the installed agent
• Serial number or Activation Code
• Detailed description of install environment
• Exact text of any error message received
Sending Suspicious Content to Trend Micro
Several options are available for sending suspicious content to Trend Micro for further
analysis.
Email Reputation Services
Query the reputation of a specific IP address and nominate a message transfer agent for
inclusion in the global approved list:
https://ers.trendmicro.com/

Trend Micro Apex One™ (Mac) 2019 Administrator’s Guide
10-10
Refer to the following Knowledge Base entry to send message samples to Trend Micro:
http://esupport.trendmicro.com/solution/en-US/1112106.aspx
File Reputation Services
Gather system information and submit suspicious file content to Trend Micro:
http://esupport.trendmicro.com/solution/en-us/1059565.aspx
Record the case number for tracking purposes.
Web Reputation Services
Query the safety rating and content type of a URL suspected of being a phishing site, or
other so-called "disease vector" (the intentional source of Internet threats such as
spyware and malware):
http://global.sitesafety.trendmicro.com/
If the assigned rating is incorrect, send a re-classification request to Trend Micro.
Other Resources
In addition to solutions and support, there are many other helpful resources available
online to stay up to date, learn about innovations, and be aware of the latest security
trends.
Download Center
From time to time, Trend Micro may release a patch for a reported known issue or an
upgrade that applies to a specific product or service. To find out whether any patches
are available, go to:
http://www.trendmicro.com/download/

Getting Help
10-11
If a patch has not been applied (patches are dated), open the Readme file to determine
whether it is relevant to your environment. The Readme file also contains installation
instructions.
Documentation Feedback
Trend Micro always seeks to improve its documentation. If you have questions,
comments, or suggestions about this or any Trend Micro document, please go to the
following site:
http://www.trendmicro.com/download/documentation/rating.asp

A-1
Appendix A
IPv6 Support in Apex One (Mac)
This appendix is required reading for users who plan to deploy Apex One (Mac) in an
environment that supports IPv6 addressing. This appendix contains information on the
extent of IPv6 support in Apex One (Mac).
Trend Micro assumes that the reader is familiar with IPv6 concepts and the tasks
involved in setting up a network that supports IPv6 addressing.

Trend Micro Apex One™ (Mac) 2019 Administrator’s Guide
A-2
IPv6 Support for Apex One (Mac) Server and
Security Agents
IPv6 support is automatically enabled after installing or upgrading the Apex One (Mac)
server and Security Agents that satisfy the IPv6 requirements.
Apex One (Mac) Security Agent IPv6
Requirements
All Mac OS X versions supported by the Apex One (Mac) Security Agent also support
IPv6.
It is preferable for the Security Agent to have both IPv4 and IPv6 addresses as some of
the entities to which it connects only support IPv4 addressing.
Pure IPv6 Server Limitations
The following table lists the limitations when the Apex One (Mac) server only has an
IPv6 address.
Table A-1. Pure IPv6 Server Limitations
Item Limitation
Agent
management
A pure IPv6 server cannot manage pure IPv4 agents.
Updates and
centralized
management
A pure IPv6 server cannot update from pure IPv4 update sources or
report to pure IPv4 central management products, such as:
• Trend Micro ActiveUpdate Server
• Any pure IPv4 custom update source

IPv6 Support in Apex One (Mac)
A-3
Item Limitation
Product
registration,
activation, and
renewal
A pure IPv6 server cannot connect to the Trend Micro Online
Registration Server to register the product, obtain the license, and
activate/renew the license.
Proxy connection A pure IPv6 server cannot connect through a pure IPv4 proxy server.
Most of these limitations can be overcome by setting up a dual-stack proxy server that
can convert between IPv4 and IPv6 addresses (such as DeleGate). Position the proxy
server between the Apex One (Mac) server and the entities to which it connects or the
entities that it serves.
Pure IPv6 Agent Limitations
The following table lists the limitations when Security Agents only have an IPv6 address.
Table A-2. Pure IPv6 Agent Limitations
Item Limitation
Parent server Pure IPv6 agents cannot be managed by a pure IPv4 server.
Updates A pure IPv6 agent cannot update from pure IPv4 update
sources, such as:
• Trend Micro ActiveUpdate Server
• A pure IPv4 Apex One (Mac) server
Web Reputation queries A pure IPv6 agent cannot send Web Reputation queries to
Trend Micro Smart Protection Network.
Proxy connection A pure IPv6 agent cannot connect through a pure IPv4 proxy
server.
Agent deployment Apple Remote Desktop is unable to deploy the agent to pure
IPv6 endpoints because these endpoints always appear as
offline.

Trend Micro Apex One™ (Mac) 2019 Administrator’s Guide
A-4
Most of these limitations can be overcome by setting up a dual-stack proxy server that
can convert between IPv4 and IPv6 addresses (such as DeleGate). Position the proxy
server between the agents and the entities to which they connect.
Configuring IPv6 Addresses
The web console allows you to configure an IPv6 address or an IPv6 address range. The
following are some configuration guidelines.
• Apex One (Mac) accepts standard IPv6 address presentations.
For example:
2001:0db7:85a3:0000:0000:8a2e:0370:7334
2001:db7:85a3:0:0:8a2e:370:7334
2001:db7:85a3::8a2e:370:7334
::ffff:192.0.2.128
• Apex One (Mac) also accepts link-local IPv6 addresses, such as:
fe80::210:5aff:feaa:20a2
WARNING!
Exercise caution when specifying a link-local IPv6 address because even though Apex
One (Mac) can accept the address, it might not work as expected under certain
circumstances. For example, agents cannot update from an update source if the
source is on another network segment and is identified by its link-local IPv6 address.
• When the IPv6 address is part of a URL, enclose the address in square brackets.
• For IPv6 address ranges, a prefix and prefix length are usually required.

IPv6 Support in Apex One (Mac)
A-5
Screens That Display IP Addresses
The agent tree displays the IPv6 addresses of agents under the IPv6 Address column.

IN-1
Index
A
agent-server communication, 9-14
agent tree, 3-5
general tasks, 3-5
Apex Central integration, 9-11
C
components, 3-14
configuration
overview, 3-2
Control Manager integration, 9-11
conventional scan, 6-5–6-7
switching to smart scan, 6-7
D
Damage Cleanup Services, 1-4
device control, 8-1, 8-2
logs, 8-6
permissions, 8-2
storage devices, 8-2
Device List Tool, 8-5
documentation feedback, 10-11
F
File Reputation Services, 3-16
G
getting started, 3-2
I
IPv6 support, A-2
limitations, A-2, A-3
P
permissions
storage devices, 8-2
programs, 3-14
S
scan method
default, 6-5
scan types, 6-11
Smart Feedback, 3-16
Smart Protection
File Reputation Services, 3-16
Web Reputation Services, 3-16
smart scan, 6-5–6-7
switching from conventional scan, 6-7
storage devices
permissions, 8-2
support
resolve issues faster, 10-9
T
Trojan horse program, 1-4
V
virus/malware scan
results, 6-39
W
web console, 3-2
about, 3-2
web reputation, 7-2
Web Reputation Services, 3-16
web threats, 7-2
widgets, 3-12, 3-14, 3-15

