C L OUD
MOBIL E
C7
USER
MANUAL

Table of Contents
Getting Started
• Get to Know Your Phone ................................................................ 1
Meet your Cloud Mobile Stratus C7
• SIM Card ..................................................................................................... 1
Install Your SIM Card
Remove Your SIM Card
• Memory SD Card ................................................................................ 3
Install your Memory SD Card
Remove your Memory SD Card
Using Your Phone
• Charge Your Battery ......................................................................... 3
• Turn Your Phone On or Off .......................................................... 3
• Restart Your Phone .......................................................................... 4
• Lock or Unlock Your Phone ........................................................ 4
• Use the Setup Wizard ..................................................................... 4
• Touch Buttons ...................................................................................... 4
• Home Screen .......................................................................................... 5
• Navigation ............................................................................................... 5
Swipe Up
Swipe Down
Tap
Drag and Drop
Long Press
Screenshot
Apps
• Phone ........................................................................................................... 6
Search Bar
Make a Call
Make a Call from Favorites
Make a Call from Recents
Make a Call from Contacts
Voicemail
Answer a Call
Decline a Call
Decline a Call with a Message
Actions on a Call

Save a Contact from a Recent Call
• Message .................................................................................................... 8
Send a Message
Receiving a Message
• Camera ........................................................................................................ 8
• Gallery ........................................................................................................... 9
View Pictures and Videos
Edit Pictures and Videos
Share Pictures and Videos
Settings
• Network & Internet .......................................................................... 10
Wi-Fi
Mobile Network
Airplane Mode
Hotspot and Tethering
• Connected Devices .......................................................................... 11
Pair a New Device
View Previously Connected Devices
Connection Preferences
Bluetooth®
Device Name
Pair a Bluetooth Device
Cast
Printing
Locate a File Received via Bluetooth
Nearby Share
Device Visibility
Data
Sharing Options
• Apps .............................................................................................................. 14
Default Apps
Screen Time
Unused Apps
Special App Access
• Notifications .......................................................................................... 15
App Settings
Notification History
Conversations
Device and App Notifications
Notifications on Lock Screen

Do Not Disturb
Turn On Do Not Disturb Mode
Wireless Emergency Alerts
Hide Silent Notifications in Status Bar
Allow Notification Snoozing
Notification Dot on App Icon
Enhanced Notifications
• Battery ........................................................................................................ 18
Battery Saver
Automatically Turn On Battery Saver
Battery Manager
Battery Percentage
• Storage ...................................................................................................... 19
Free Up Space
• Sound .......................................................................................................... 20
Volume
Do Not Disturb
Turn On Do Not Disturb Mode
Phone Ringtone
Media
Vibrate for Calls
Default Notification Sound
Select Preferred Notification Sound
Add Your Own Notification Sound
Default Alarm Sound
Preferred Notification Sound
Dial Pad Tone
Screen Locking Sound
Charging Sounds and Vibration
Touch Sounds
Touch Vibration
Sound Enhancement
• Display ...................................................................................................... 23
Brightness Level
Dark Theme
Night Light
Adaptive Brightness
Wallpaper
Screen Timeout
Advanced Settings
Auto-Rotate Screen

Font Size
Display Size
Screen Saver
Lock Screen
Privacy
Add Text on Lock Screen
Show Wallet
Show Device Controls
Wake Screen for Notifications
Lift to Wake
• Wallpaper ............................................................................................... 27
• Accessibility .......................................................................................... 28
Select to Speak
TalkBack
• Security .................................................................................................... 28
Security Status
Device Security
Screen Lock
Smart Lock
App Pinning
• Privacy ...................................................................................................... 30
Privacy Dashboard
Permission Manager
Camera Access
Microphone Access
Show Passwords
Notifications on Lock Screen
Show Clipboard Access
Autofill Service from Google
Google Location History
Activity Controls
Ads
• Location .................................................................................................. 32
App Location Permissions
Location Services
• Safety and Emergency ................................................................ 32
Emergency Information
Medical Information
Emergency Contacts
Emergency SOS
Notify for Help

Change your preferred contact number
Emergency Location Service
Wireless Emergency Alerts
• Passwords and Accounts ............................................................ 35
Passwords
Change Autofill Settings
• Digital Wellbeing and Parental Controls ........................ 35
Dashboard
Set an App Timer on Apps
Set a Timer
Delete a Timer
Focus Mode
Manage Notifications
Do Not Disturb
Turn On Do Not Disturb Mode
Show Icon in App List
Parental Controls
• Google ...................................................................................................... 38
Ads
Ad Personalization
Autofill
Backup
Set up and Restore
Restore Contacts
• DuraSpeed ............................................................................................. 40
• System ....................................................................................................... 41
• About Phone ......................................................................................... 41
Basic Info
Device Name
Legal and Regulatory
Device Details
SIM Status (SIM slots 1 or 2)
Device Identifiers
• Limited Warranty ............................................................................. 42
Precautions ............................................................................................ 43
FCC RF Exposure Information ........................................ 44

Earphone Jack
Charging Port
(Type-C Connector)
Light Distance
Sensor
Receiver
Front Camera
Touchscreen
Microphone
Volume Button
Power Button
Rear Camera
Speaker
LED Flash
Getting Started
Get to Know Your Phone
Meet your Cloud Mobile Stratus C7
SIM Card
install Your SIM Card
Your device uses a Nano SIM card. A SIM card may be
pre-installed or you may be able to use your previous
SIM card.
Your SIM card is provided by your carrier. For some
devices, the SIM card is pre-installed in your phone.
1. Place phone screen side down. Make sure it is on a
soft and dry surface.
2. Locate the cut-out slot at the bottom left corner of
phone.
3. Insert your fingernail into the cut-out slot to remove
the back cover of phone.
1

4. Place the back phone cover aside. You’ll need it later.
5. Find the SIM card slots located in the middle of your
phone. Each slot is labeled with a number (1 or 2).
6. Gently slide the SIM card into the slot with the numeric
label of “1” .
7. If you have a second SIM card, slide the SIM card into
the other slot. Make sure the SIM card's gold chip is
facing down. The phone only requires one SIM card to
be operational. Dual SIM is supported.
8. After the SIM card is inserted, reattach the back
cover to your phone by applying light pressure to the
back panel. Make sure to press the cover back into
place. Once your SIM card is installed, turn on your
phone, and wait a few minutes for your phone to find
a network.
NOTE
To avoid damage to phone, do not use any
other kind of SIM card, or any non-standard Nano
SIM card cut from a SIM card.
Remove your SIM Card
1. Place your phone screen side down. Make sure it is on
a soft and dry surface.
2. Locate the cut-out slot at the bottom left corner of
your phone.
3. Insert your fingernail into the cut-out slot to remove
the back cover of your phone.
4. Place the back phone cover aside. You'll need it later.
5. Find your SIM card you want to remove.
6. Press on your SIM card to lift the cover and gently
remove your SIM card.
2
SIM Card 2 Slot
SIM Card 1 Slot
Memory SD
Card Slot
SIM Card 2
SIM Card 1
Memory
SD Card

Memory SD Card
Install your Memory SD Card
1. Turn off your phone
2. Place your phone screen side down. Make sure it is on
a soft and dry surface.
3. Insert your fingernail into the cut-out slot to remove
the back cover of your phone
4. Place the back phone cover aside. You'll need it later.
5. Locate your memory SD card
6. Gently slide your memory SD card into the slot until it
clicks
Remove your Memory SD Card
1. Close all apps on your phone
2. Go to your Settings > Storage > Unmount SD card
3. Wait till you see the message displayed on the screen:
"SD card safe to remove"
4. Remove the back cover of your phone
5. Press on the memory SD card and gently slide memory
SD card out
Using Your Phone
Charge your Battery
Before turning on your device, make sure you charge it
fully.
Insert the provided USB-C cable and wall charger into
the charging port located at the top of your phone.
You can charge your battery from any standard outlet.
Turn Your Phone On or O
To turn your phone on:
• Press and hold the Power button, located on the right
side of your phone
To turn your phone o:
• Press and hold the Power button, located on the right
side of your phone
• Tap Power o
when prompted
3

Restart Your Phone
If your device stops responding to
taps or finger gestures and you’re
unable to turn it off, you can restart
your phone.
To restart your phone:
• Press and hold the Power button on
the right side of your phone and tap
Restart
when prompted.
Lock or Unlock Your Phone
Use your phone's screen lock features to keep your
phone secure. By default, your phone locks automatical-
ly when the screen times out.
To lock your phone, press the Power button.
To unlock your phone, press the Power button.
If you set a password, it will prompt you to enter your
password.
To set a screen lock, you can use a screen lock function
such as swipe, pattern, PIN, or password. Go to Settings
> Security > Screen Lock.
Use the Setup Wizard
The first time you turn your phone on, the setup wizard
guides you through how to set up your phone.
Follow the prompts to choose a default language,
connect to a Wi-Fi network, set up accounts, and more.
Touch Buttons
• The button moves back one step to the previous
menu/page.
• The button returns immediately to the main screen.
• The button displays a menu of recently opened
apps. You can also Clear All
in this view.
4
Save a Contact from a Recent Call
• Message .................................................................................................... 8
Send a Message
Receiving a Message
• Camera ........................................................................................................ 8
• Gallery ........................................................................................................... 9
View Pictures and Videos
Edit Pictures and Videos
Share Pictures and Videos
Settings
• Network & Internet .......................................................................... 10
Wi-Fi
Mobile Network
Airplane Mode
Hotspot and Tethering
• Connected Devices .......................................................................... 11
Pair a New Device
View Previously Connected Devices
Connection Preferences
Bluetooth®
Device Name
Pair a Bluetooth Device
Cast
Printing
Locate a File Received via Bluetooth
Nearby Share
Device Visibility
Data
Sharing Options
• Apps .............................................................................................................. 14
Default Apps
Screen Time
Unused Apps
Special App Access
• Notifications .......................................................................................... 15
App Settings
Notification History
Conversations
Device and App Notifications
Notifications on Lock Screen
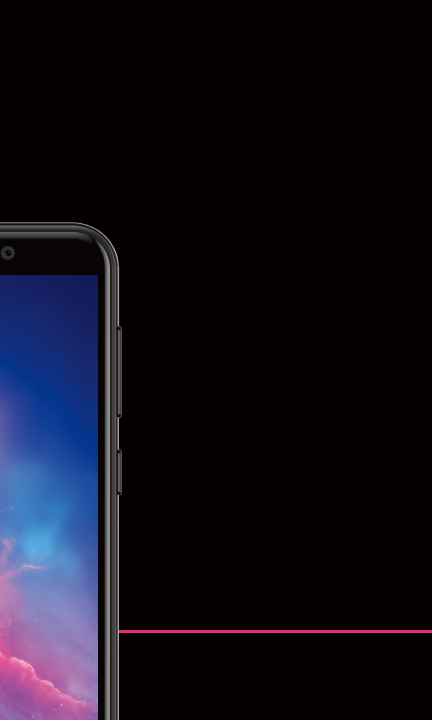
Home Screen
The home screen will look similar
to the picture to the right.
• To switch between screens, simply
slide your finger across the touch
screen.
• The home screen contains
shortcuts to your most-used
apps and widgets.
• The status bar displays system
information, such as current time,
wireless connectivity and phone
battery.
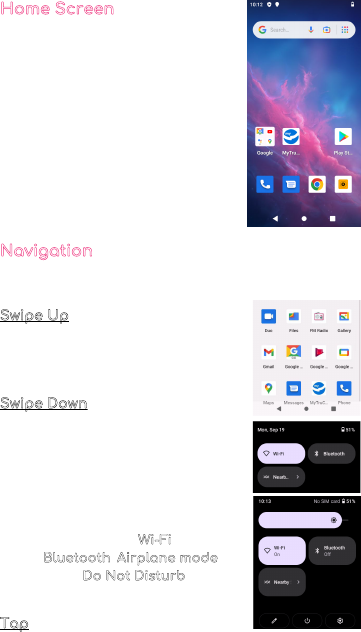
Navigation
The touch screen responds best to a light touch. Do not
use excessive force or other objects on the touchscreen.
Swipe Up
When you swipe up, all your apps will
appear. Here, you can see all your
available apps.
Swipe Down
When you swipe in a downwards
motion on your screen, you can
quickly review your notifications
in the Notification Panel.
Swipe down again to display the fast
access menu, where you can modify
the functions such as Wi-Fi
, Battery
Saver, Bluetooth
, Airplane mode,
Auto-rotate, Do Not Disturb
, and
brightness.
Tap
Lightly tap on apps to select or launch them.
5

Drag and Drop
Tap and hold on an app and then move it to a new
location. You can:
1. Drag an app shortcut to add it to a home screen
2. Drag an app to place it in a new location
Long Press
Press and hold on an app to delete, uninstall, or move.
Screenshot
To take a screenshot, press and hold the Power button
and the Volume
button simultaneously for 1-2 seconds.
A floating toolbar will appear on the bottom of your
screen where you can quickly choose to edit or share
the screenshot. You can also find your screenshot in
your Gallery
.
Apps
Phone
The Phone app allows you to make calls and listen to
your voicemail.
Search Bar
On the top of your screen, you can search for your
contacts and places. To get contact information for
places near you, allow access to your location in
Settings
.
Make a Call
Tap Phone. Tap the Keypad in the bottom right
corner of your the phone screen. Here, you can enter a
number on the keypad to make a call.
6
Make a Call from Favorites
Call your favorite contacts with just one tap. In this tab,
you can add a person from your contacts to your
Favorites
.
Make a Call from Recents
The Recent tab features your call log of all incoming,
outgoing, and missed calls.
Make a Call from Contacts
In the Contacts tab, you’ll see all your contacts listed.
Tap on a contact to see their details and select call,
text, or video.
Voicemail
The Voicemail tab will display all your voicemail
messages. You'll be prompted to set up your visual
voicemail if it is your first time opening this tab.
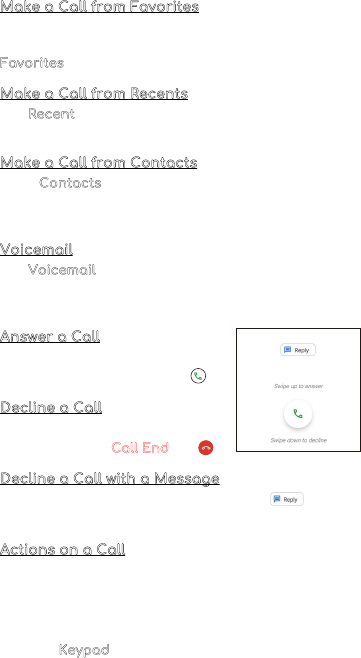
Answer a Call
On the incoming call screen, swipe
your finger up to answer a call .
Decline a Call
To decline a call, swipe your
finger to the Red Call End
key .
Decline a Call with a Message
You can decline a call with a text message . Choose
from responses listed or write your own response.
Actions on a Call
While you are on a call, you can do the following:
• Mute the call
• Choose to put call on speaker
• Add call
• Hold the call
• Use the
Keypad
7

Save a Contact from a Recent Call
In the Recents tab of your phone app, you can save a
contact from a recent call.
Message
Send and receive messages with the Message app.
Send a Message
Compose a new message to a saved contact or
manually enter a phone number.
1. Tap the Message
2. Select Start Chat button in the bottom right corner
3. Choose recipients from Contacts
or enter a phone
number
Receiving a Message
When you receive a message, you’ll be notified. To see
your message, open the Message
app to view.
Camera
• Tap the Camera to enter
camera
mode and open the interface.
• Tap the button to take a
picture.
• Tap the button to start
camera recording.
• Tap the in the top right
corner to switch between
the front and back camera.
8
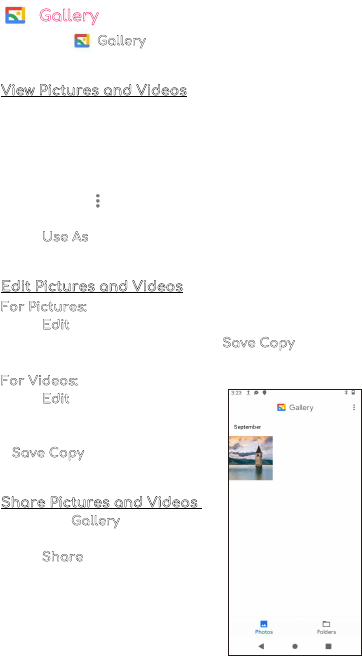
Gallery
Go to your Gallery to view, edit, and manage your
pictures and videos.
View Pictures and Videos
• Tap on a picture to view it
• Swipe left or right to view other pictures or videos in
order
• Tap on the star icon in the top right corner to mark
the picture as a favorite
• Tap on the three dots in the upper right corner to
see more details
• Tap Use As
to set the selected picture as your
wallpaper or assign it to a contact
Edit Pictures and Videos
For Pictures:
• Tap Edit to rotate, crop, or add a filter to your picture
• To save your edited picture, tap Save Copy
in the top
right corner
For Videos:
• Tap Edit to to adjust the length
of your video
• To save your edited video, tap
Save Copy
in the top right
corner
Share Pictures and Videos
From your Gallery,
• Tap on a picture or video
• Tap Share
and choose a
Contact or an app to share
your picture or video selection
9

Settings
To change settings, tap on Settings in your app
menu.
Network & Internet
Wi-Fi
You can connect your phone to a Wi-Fi network to
access the internet without using your mobile data.
1. Settings > Network and Internet > Wi-Fi
, and then
tap to turn on Wi-Fi and scan for available networks
2. Tap a network and enter password if required
3. Tap Connect
Mobile Network
Use Mobile Network to configure your phone’s ability to
connect to mobile networks or mobile data.
• Data Roaming:
Choose whether to allow your phone
to connect to mobile data when outside your carrier's
network area
• Data Usage:
Select to enable or disable mobile data,
view current usage, or set mobile data limit
Mobile data charges apply when data is turned on and
data will be passed through your mobile carrier's network.
To see your Mobile Network
, go to Settings > Network
and Internet > Mobile Network.
Airplane Mode
Airplane Mode turns off all network connections
including calling, texting, mobile data, Wi-Fi, and
Bluetooth
.
When Airplane Mode
is enabled, you can turn on Wi-Fi
and Bluetooth
in Settings to connect to available
networks or devices.
10
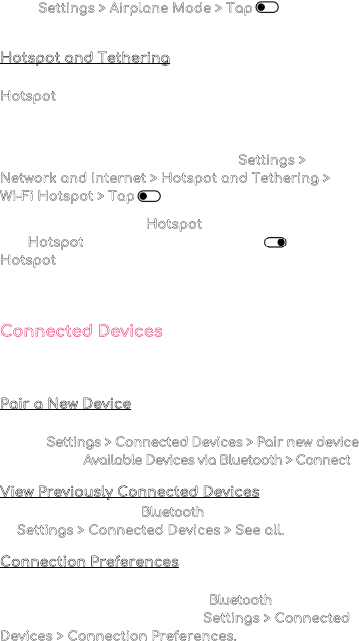
Go to Settings > Airplane Mode > Tap to enable
this feature.
Hotspot and Tethering
Your phone can be used as a mobile hotspot. When the
Hotspot
feature is enabled, it uses your mobile carrier
data plan to create a Wi-Fi network that can be used
for multiple devices.
To enable your mobile hotspot, go to Settings >
Network and Internet > Hotspot and Tethering >
Wi-Fi Hotspot > Tap to use Wi-Fi Hotspot.
Here, you will see your Hotspot
name, security code,
and Hotspot
password. You can also tap to turn off
Hotspot
automatically when no devices are connected
or extend compatibility to help other devices find this
hotspot.
Connected Devices
View your current or previously connected devices and
change your connection preferences.
Pair a New Device
To pair a new device:
1. Go to Settings > Connected Devices > Pair new device
2. Select from Available Devices via Bluetooth > Connect
View Previously Connected Devices
To view all previously Bluetooth connected devices, go
to Settings > Connected Devices > See all.
Connection Preferences
Connection preferences allows you to change settings
for various connections, such as Bluetooth
or casting.
To update these settings, go to Settings > Connected
Devices > Connection Preferences.
11
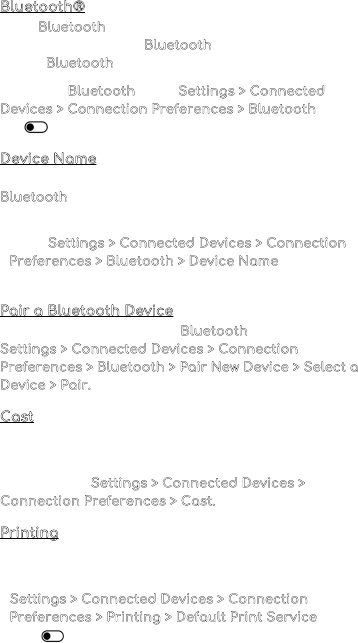
Bluetooth®
When Bluetooth is turned on, your phone can communi-
cate with other nearby Bluetooth
-enabled devices if
paired. Bluetooth
pairing is a one-time process.
To enable Bluetooth
, go to Settings > Connected
Devices > Connection Preferences > Bluetooth and
tap .
Device Name
You can rename your device’s name that appears in
Bluetooth
pairing to help identify it easier.
To update a connected device name:
1. Go to Settings > Connected Devices > Connection
Preferences > Bluetooth > Device Name
2. Fill out the form field to the desired name
Pair a Bluetooth Device
To connect your phone to a Bluetooth device, go to
Settings > Connected Devices > Connection
Preferences > Bluetooth > Pair New Device > Select a
Device > Pair.
Cast
You can cast content from your phone to nearby
devices that are on the same Wi-Fi network.
To cast, go to Settings > Connected Devices >
Connection Preferences > Cast.
Printing
Connect to nearby printers on the same Wi-Fi network
to print files from your phone.
1. Settings > Connected Devices > Connection
Preferences > Printing > Default Print Service
2. Tap to use print service
12
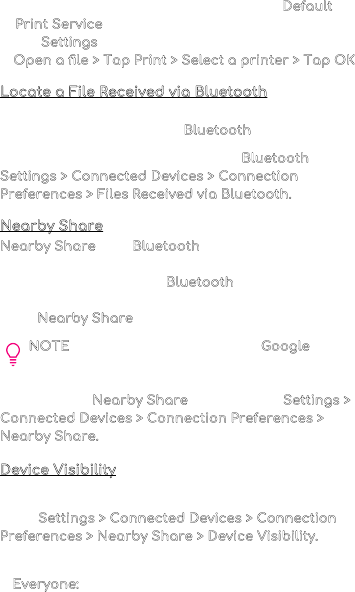
3. Make sure your Wi-Fi-enabled printer is on and
connected to the same Wi-Fi network as your phone
4. Verify your Wi-Fi-enabled printer is in the Default
Print Service list
5. Exit Settings
6. Open a file > Tap Print > Select a printer > Tap OK
Locate a File Received via Bluetooth
Use this feature to locate, move, copy, rename, or share
files that you received using Bluetooth
.
To find files that were sent to you via Bluetooth
, go to
Settings > Connected Devices > Connection
Preferences > Files Received via Bluetooth.
Nearby Share
Nearby Share uses Bluetooth scanning to find nearby
Android devices to send and receives files or apps. If
notifications are enabled, Bluetooth
scanning is used to
notify you if someone wants to share with you, even
when Nearby Share
is turned off.
NOTE
You must be signed into your Google
account to use this feature
To enable the Nearby Share
feature, go to Settings >
Connected Devices > Connection Preferences >
Nearby Share.
Device Visibility
Choose who can share with you when they are nearby.
Go to Settings > Connected Devices > Connection
Preferences > Nearby Share > Device Visibility.
Change your visibility by selecting one of the following:
• Everyone:
Anyone can share with you when they are
nearby
13
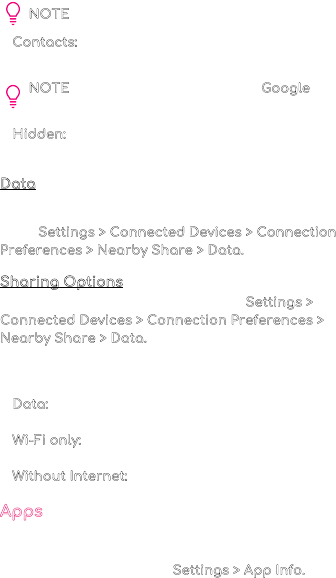
NOTE You must accept the transfer
• Contacts:
Only your contacts can share with you
when they are nearby
NOTE
You must be signed into your Google
account to use this feature
• Hidden:
No one can share with you until you make
yourself visible
Data
Select how you’d like to share your files.
Go to Settings > Connected Devices > Connection
Preferences > Nearby Share > Data.
Sharing Options
To change your sharing options, go to Settings >
Connected Devices > Connection Preferences >
Nearby Share > Data.
You can choose your data sharing option from the
following list:
• Data:
Data may be used for small files (charges may
apply)
• Wi-Fi only:
Only use Wi-Fi to share and never use
data to share
• Without Internet:
Files will always be shared offline
Apps
Apps allow you to see your recently opened apps and
all apps installed on your phone. To see all your apps
and app information, go to Settings > App Info.
14
NOTE You must accept the transfer
• Contacts:
Only your contacts can share with you
when they are nearby
NOTE
You must be signed into your Google
account to use this feature
• Hidden:
No one can share with you until you make
yourself visible
Data
Select how you’d like to share your files.
Go to Settings > Connected Devices > Connection
Preferences > Nearby Share > Data.
Sharing Options
To change your sharing options, go to Settings >
Connected Devices > Connection Preferences >
Nearby Share > Data.
You can choose your data sharing option from the
following list:
• Data:
Data may be used for small files (charges may
apply)
• Wi-Fi only:
Only use Wi-Fi to share and never use
data to share
• Without Internet:
Files will always be shared offline
Apps
Apps allow you to see your recently opened apps and
all apps installed on your phone. To see all your apps
and app information, go to Settings > App Info.
Default Apps
Choose your default app for your browser, caller ID,
spam, Digital Assistant, Home, Phone
, and SMS.
Screen Time
In the dashboard, you can see how much screen time
you use per day.
Unused Apps
Unused apps on your phone can be automatically moved
to this section after a long period of inactivity to free up
storage space on your phone.
To view your unused apps, go to Settings > Apps >
Unused Apps.
To enable or disable an individual app, go to Settings >
Apps > Tap to enable the Remove permissions
and free up space feature.
Special App Access
You can prioritize and streamline app access by
changing which apps have file access for your file
records. Here, you can modify system settings for all
apps in your phone.
Notifications
You can adjust notifications settings by prioritizing and
streamlining app alerts to change which apps send
notifications and how notifications alert you.
App Settings
Control notifications from individual apps. To allow and
enable notifications, tap for all your apps.
To update your app notifications, go to Settings >
Notifications > App Settings.
15

Save a Contact from a Recent Call
In the Recents tab of your phone app, you can save a
contact from a recent call.
Message
Send and receive messages with the Message app.
Send a Message
Compose a new message to a saved contact or
manually enter a phone number.
1. Tap the Message
2. Select Start Chat button in the bottom right corner
3. Choose recipients from Contacts
or enter a phone
number
Receiving a Message
When you receive a message, you’ll be notified. To see
your message, open the Message
app to view.
Camera
• Tap the Camera to enter
camera
mode and open the interface.
• Tap the button to take a
picture.
• Tap the button to start
camera recording.
• Tap the in the top right
corner to switch between
the front and back camera.
Notification History
To enable the notification history feature, tap . When
enabled, your recent and snoozed notifications will
appear here. If disabled, you will not see any notifica-
tions listed here.
To see your Notification History
, go to Settings >
Notifications > Notification history.
Conversations
You can see your priority and modified conversations
here. If you marked a conversation as priority or make
any other changes to conversations, they will appear
here.
To update conversation settings: Swipe down > Open the
pull-down shade > Touch and hold a conversation.
Device and App Notifications
Control which apps and devices can read notifications.
To view and modify your device and app permissions,
go to Settings > Notifications > Device and App
Notifications.
Notifications on Lock Screen
To change how you see notifications on your lock
screen, go to Settings > Notifications > Notifications
on Lock Screen.
Choose to:
• Show conversations, default, and silent
• Hide silent conversations and notifications
• Don’t show any notifications
16

Do Not Disturb
With Do Not Disturb mode, you can mute sound, stop
vibration, and block visual disturbances. You can select
which apps, contacts, and notifications you want to
receive notifications from by either silencing them or
allowing them. Go to Settings > Notifications > Do Not
Disturb.
Turn On Do Not Disturb Mode
Tap the Turn On Now button to enable Do Not Disturb
mode. You can also select what notifications are allowed
in Do Not Disturb
Mode.
• People
: Select which conversation, calls, or messages
from your contacts can reach you when in Do Not
Disturb mode
• Apps
: Choose which app notifications to allow when
Do Not Disturb
mode is enabled
• Alarms and Other Interruptions:
Tap to enable
alarms, media sounds, touch sounds, reminders, or
calendar events from interrupting you in Do Not
Disturb mode.
Wireless Emergency Alerts
Go to Settings > Notifications > Wireless Emergency
Alerts > and tap to enable or disable wireless
emergency alerts. Select your alert preferences and
reminder frequency.
Types of Alerts available are:
• Extreme threats to life and property
• Severe threat to life and property
• AMBER alerts
• Test alerts
You can also see your Emergency Alert history.
17

Hide Silent Notifications in Status Bar
To hide silent notifications in the status bar, go to
Settings > Notifications > Hide Silent Notifications in
Status Bar > Tap .
Allow Notification Snoozing
To allow notification snoozing, go to Settings >
Notifications > Allow Notification Snoozing > Tap .
Notification Dot on App Icon
A notification dot will appear next to an app icon to let
you know you have a notification within the app. To
enable, go to Settings > Notifications > Notification
Dot on App Icon > Tap .
Enhanced Notifications
To enable enhanced notifications, go to Settings >
Notifications > Enhanced Notifications > Tap .
Once enabled, you’ll get suggested actions, replies, and
more.
Battery
Check your phone's battery percentage, battery usage,
and manage other features.
The Cloud Mobile Stratus C7 has a battery life of 6+
hours and is powered by a rechargeable battery. Use
the provided USB-C cord and wall charger to maximize
your phone’s battery lifespan.
Battery Saver
Battery Saver mode reduces the amount of power that
your phone uses when the battery gets low or when you
want to conserve your battery life. Battery Saver
mode
enables dark theme and limits background activity,
visual effects, and network connections.
18

To enable the Battery Saver feature, tap .
Automatically Turn On Battery Saver
1. Go to Settings > Battery > Battery Saver > Set a
Schedule
2. When setting your Battery Saver schedule, you can
select between two options: no schedule or based on
percentage
To enable Battery Saver
, go to Settings > Battery >
Battery Saver > Tap .
You can enable Battery Saver
to turn off when your
phone charges above 90%, go to Settings > Battery >
Tap .
Battery Manager
Battery Manager is a feature you can enable to
restrict apps that are draining your battery.
To enable Battery Manager
, go to Settings > Battery >
Battery Manager, Tap to detect when apps are
draining battery.
Battery Percentage
To view battery percentage, go to Settings > Battery >
Battery Percentage > Tap .
Storage
View your storage capacity available on your phone.
Here, you can view how much storage your Apps,
System, Trash, Documents, Games, Audio, Videos, and
Images are using.
19

Free Up Space
Manage and free your phone storage space.
• Tap Free up space
o go to your files and view
cleaning suggestions
• Choose to clean, browse, and share files
NOTE
You can free up space by enabling the Remove
permissions and free up space feature. To enable
this feature, go to Settings > Apps > Tap .
Sound
Volume
Adjust your Volume bar for media, call, alarm, ring, and
notification volume by going to Settings > Sound
.
Do Not Disturb
With Do Not Disturb mode, you can mute sound, stop
vibration, and block visual disturbances. You can select
which apps, contacts, and notifications you want to
receive notifications from by either silencing them or
allowing them.
To access the Do Not Disturb
feature, go to Settings >
Sound > Do Not Disturb.
Turn On Do Not Disturb Mode
To enable Do Not Disturb mode, tap the Turn On Now
button.
You can also select what notifications are allowed in Do
Not Disturb mode.
• People:
Select which conversation, calls, or messages
from your contacts can reach you when in Do Not
Disturb mode
• Apps:
Choose which app notifications to allow when
Do Not Disturb
mode is enabled
20
Free Up Space
Manage and free your phone storage space.
• Tap Free up space
o go to your files and view
cleaning suggestions
• Choose to clean, browse, and share files
NOTE
You can free up space by enabling the Remove
permissions and free up space feature. To enable
this feature, go to Settings > Apps > Tap .
Sound
Volume
Adjust your Volume bar for media, call, alarm, ring, and
notification volume by going to Settings > Sound
.
Do Not Disturb
With Do Not Disturb mode, you can mute sound, stop
vibration, and block visual disturbances. You can select
which apps, contacts, and notifications you want to
receive notifications from by either silencing them or
allowing them.
To access the Do Not Disturb
feature, go to Settings >
Sound > Do Not Disturb.
Turn On Do Not Disturb Mode
To enable Do Not Disturb mode, tap the Turn On Now
button.
You can also select what notifications are allowed in Do
Not Disturb mode.
• People:
Select which conversation, calls, or messages
from your contacts can reach you when in Do Not
Disturb mode
• Apps:
Choose which app notifications to allow when
Do Not Disturb
mode is enabled
• Alarms and Other Interruptions: Tap to enable
alarms, media sounds, touch sounds, reminders, or
calendar events from interrupting you in Do Not
Disturb mode
Phone Ringtone
Choose a pre-installed system ringtone or add your own
ringtone from your audio files.
Add your own ringtone by tapping + Add ringtone
and
select an audio file from your Files
or browse audio files
from your other apps.
To choose or change your ringtone, go to Settings >
Sound > Phone ringtone.
Media
Manage your media recommendations and Media
Player settings. To update media settings, go to
Settings > Sound > Media
.
To pin the Media Player
or show media recommenda-
tions, tap .
To show media recommendations based on your
activity, tap .
Vibrate for Calls
Choose from the selection to:
• Never vibrate
• Always vibrate
• Vibrate first then ring gradually
To customize your vibration settings, go to Settings >
Sound > Vibrate for calls.
Default Notification Sound
Select a pre-installed sound or add your own notifica-
tion sound from your audio files.
21

Select Preferred Notification Sound
To choose your preferred notification sound, go to
Settings > Sound > Default Notification Sound.
Add Your Own Notification Sound
1. Tap + Add notification
2. Select an audio file from your Files or browse audio
files from your other apps
Default Alarm Sound
Choose a pre-installed alarm sound or add your own
alarm sound from your audio files.
Preferred Notification Sound
To choose your preferred alarm sound, go to Settings >
Sound > Default Alarm Sound.
Add Your Own Alarm Sound
1. Tap + Add notification
2. Select an audio file from your Files or browse audio
files from your other apps
Dial Pad Tone
To enable the dial pad tone, go to Settings > Sound >
Dial Pad Tone > Tap .
Screen Locking Sound
To turn on the screen lock sound, go to Settings >
Sound > Screen Locking Sound > Tap .
Charging Sounds and Vibration
To enable charging sounds and vibration, go to Settings
> Sound > Charging Sounds and Vibration > Tap .
Touch Sounds
To enable touch sounds, go to Settings > Sound >
Touch Sounds > Tap .
22

Touch Vibration
To enable touch vibration, go to Settings > Sound >
Touch Vibration > Tap .
Sound Enhancement
BesLoudness is a audio post-processing feature to
increase your phone’s device volume. Toggle your
BesLoudness
to enhance your volume for your
speakers.
To enable BesLoudness
, go to Settings > Sound >
Sound Enhancement > Tap .
Display
Brightness Level
Adjust the screen brightness to suit your surroundings
or personal preference. You can also adjust screen
brightness to conserve battery power.
To adjust the brightness level, go to Settings > Display.
• Customize options under Brightness
• Drag the Brightness slider to set a custom brightness
level
Dark Theme
You can change your phone’s display to a dark
background using a dark theme. To enable dark theme,
go to Settings > Display > Tap
.
Night Light
Night Light is a feature that reduces the amount of
blue light emitted by the device display to match the
natural light of your phone’s environment. This feature
will tint your screen in an amber color and make it
easier to look at your screen or read in dim light.
To enable Night Light
, go to Settings > Display > Tap .
23

Adaptive Brightness
When the Adaptive Brightness feature is enabled, your
screen brightness will automatically adjust to your
environment and activities. You can adjust the
brightness slider manually to help your phone learn your
preferences.
To enable adaptive brightness, go to Settings > Display
> Adaptive Brightness > Tap .
Wallpaper
You can personalize your phone’s wallpaper by using
your own picture from your gallery or from a
pre-installed wallpaper option.
To apply a wallpaper from your Gallery
, go to
Wallpaper > Gallery > Select Picture
.
To apply a pre-installed system wallpaper:
Wallpaper > Wallpapers > Select pre-installed picture.
Screen Timeout
The screen timeout feature will turn the screen off to
save battery life. The default is 1 minute. Choose from
the drop-down when your screen will timeout from:
• 15 seconds
• 30 seconds
• 1 minute
• 2 minutes
• 5 minutes
• 10 minutes
• 30 minutes
To change the screen timeout length, go to Settings >
Display > Screen Timeout.
Advanced Settings
To view advanced settings, tap the to view or
change your phone’s advanced display settings.
24

Auto-Rotate Screen
When this setting is on, the screen will automatically
rotate when you move your device between landscape
and portrait position.
To enable the auto-rotate screen feature, go to
Settings > Display > Advanced Settings > Tap .
NOTE
If you are using the TalkBack feature, you
might want to turn off the auto-rotate feature as it
can interrupt any spoken feedback.
Font Size
You will see a preview of the change of your font in the
sample text after you’ve set each slider to your
preferred size. Adjust the font size on the slider to
make the text on your screen smaller or larger.
To change font size, go to Settings > Display > Font Size.
Display Size
You will see a preview of the change of your font in the
sample display after you’ve set each slider to your
preferred size. Adjust the font size on the slider to
make the text on your screen smaller or larger.
To change display size, go to Settings > Display >
Display Size.
Screen Saver
Your phone’s screen saver can show the clock or
colorful backgrounds when your phone is charging or
docked.
To enable Screen Saver
, go to Settings > Display >
Advanced > Screen Saver > Tap .
25

Auto-Rotate Screen
When this setting is on, the screen will automatically
rotate when you move your device between landscape
and portrait position.
To enable the auto-rotate screen feature, go to
Settings > Display > Advanced Settings > Tap .
NOTE
If you are using the TalkBack feature, you
might want to turn off the auto-rotate feature as it
can interrupt any spoken feedback.
Font Size
You will see a preview of the change of your font in the
sample text after you’ve set each slider to your
preferred size. Adjust the font size on the slider to
make the text on your screen smaller or larger.
To change font size, go to Settings > Display > Font Size.
Display Size
You will see a preview of the change of your font in the
sample display after you’ve set each slider to your
preferred size. Adjust the font size on the slider to
make the text on your screen smaller or larger.
To change display size, go to Settings > Display >
Display Size.
Screen Saver
Your phone’s screen saver can show the clock or
colorful backgrounds when your phone is charging or
docked.
To enable Screen Saver
, go to Settings > Display >
Advanced > Screen Saver > Tap .
To update your screen saver:
1. Go to Settings > Display > Advanced > Screen Saver
2. Select Current Screen Saver
3. Select Colors or Clock
To update when to start your screen saver:
1. Go to Settings > Display > Advanced Screen Saver
2. Select When to start
3. Choose: while charging, while docked, while charging
or docked, or never
Lock Screen
You can choose what your lock screen displays on your
phone.
To change your lock screen image, go to Settings >
Display > Advanced > Lock Screen.
Privacy
To adjust your privacy settings on your lock screen, go
to Settings > Display > Lock Screen > Privacy
and
choose to:
• Show all notification content
• Don’t show notifications at all
Add Text on Lock Screen
You can add a custom lock screen message on your
phone.
To add text on your lock screen, go to Settings >
Display > Lock Screen > Add text on lock screen >
Enter in your custom text in the form field
Show Wallet
Your phone wallet can store electronic cards, passes,
tickets, coupons, and more.
26

To enable your wallet, go to Settings > Display >
Advanced > Lock Screen > tap to show wallet.
NOTE
To show your phone’s wallet, you must have
your screen lock enabled for security purposes.
Show Device Controls
To enable Device Controls, go to Settings > Display >
Advanced > Lock Screen > tap to show device
controls.
Wake Screen for Notifications
The wake screen feature will turn on and light up your
screen when you get a new notification.
To enable wake screen for notifications, go to Settings
> Display > Advanced > Lock Screen > Tap .
Lift to Wake
The Lift to Wake feature automatically wakes the lock
screen when you raise your phone to look at it.
To enable the Lift to Wake
feature, go to Settings >
Display > Advanced > Tap .
Wallpaper
Change your home and lock screen wallpaper. You can
display a favorite picture or choose from pre-installed
wallpapers.
To change your wallpaper:
1. Settings > Wallpapers
2. Select where to choose your wallpaper from: Gallery
or Wallpapers
3. Tap an image to choose it
a. Tap Set Wallpaper
at the top left corner
4. Select Home Screen, Lock Screen, or Home Screen
and Lock Screen
27

Accessibility
Select to Speak
When Select to Speak is turned on, you can tap specific
items on your screen to hear them read aloud.
To enable Select to Speak
, go to Settings > Accessibili-
ty > Select to Speak and Tap .
To use Select to Speak
:
1. Tap a specific item (text or image)
2. Tap the Play
button to hear your selection read aloud
TalkBack
TalkBack is a screen reader intended for people who
have difficulty seeing the screen. When TalkBack
is on,
it provides spoken feedback so you can use your device
without looking at the screen.
To enable TalkBack
, go to Settings > Accessibility >
TalkBack and Tap .
To enable a TalkBack shortcut, hold your Volume
button for a few seconds.
To use TalkBack
:
• Swipe right or left to move between screens. When
TalkBack
is on, the focused item on the screen is
spoken out loud.
NOTE
You might want to turn off the auto-rotate
feature if you enable TalkBack
, as it can interrupt
any spoken feedback.
Security
Security Status
View your security status in Google Play Protect, check
the date of your last security update, and set up Find
My Device.
28

To check your security status, go to Settings > Security
Device Security
View your screen lock, Smart Lock, device admin apps,
Encryption and credentials, Trust agents, and app
pinning features.
Screen Lock
To change your screen lock, go to Settings > Screen
Lock > Choose from the following options:
• None
• Swipe
• Pattern
• PIN
• Password
Smart Lock
The Smart Lock feature keeps your phone unlocked
when it’s with you. Smart Lock
can recognize when:
• Your phone is being carried
• You're near home or another trusted place
• Your watch or another trusted device is nearby
To change your Smart Lock
, go to Settings > Screen
Lock > Smart Lock. To disable your Smart Lock, go to
Settings > Screen Lock > Smart Lock > Trust Agents
.
App Pinning
App pinning allows you to keep an app’s screen in your
view until you decide to unpin it. You will not be able to
use any other apps while one app is pinned. To use
other apps again, simply unpin that screen.
To turn on the app pinning feature, go to Settings >
Security > App Pinning > Tap .
29
Privacy
Cloud Mobile phones are designed to protect your
privacy and information. You can grant or deny apps
permission to suit your preferences while using other
companies' apps and websites. To adjust your privacy
settings, go to Settings > Privacy
.
Privacy Dashboard
See which apps were recently updated with permissions.
Go to Settings > Privacy > Privacy Dashboard
.
Permission Manager
Control app access to your data from your Body
sensors, Calendar
, Call logs, Camera, Contacts, Files,
Location, Microphone, Nearby Devices, Phone, Physical
Activity, SMS, and Additional Permissions.
To access the permission manager, go to Settings >
Privacy > Permission Manager.
Camera Access
To enable access to your device’s front and back
camera, go to Settings > Privacy > Tap
.
Microphone Access
To enable access to your device’s microphone, go to
Settings > Privacy > Tap
.
Show Passwords
You can choose to display characters briefly as you
type your passwords. To enable the show passwords
feature, go to Settings > Privacy > Tap
.
Notifications on Lock Screen
You can choose to show all notifications on your
device’s lock screen or choose to have no notifications
shown at all.
30

To have notifications appear on your lock screen, go to
Settings > Privacy > Notifications on Lock Screen.
Show Clipboard Access
When Clipboard Access is enabled on your phone, you’ll
see a message when your app has accessed your
clipboard. This feature will show a message when apps
access text, images, or other content you’ve copied. To
enable clipboard access, go to Settings > Privacy >
Tap to show clipboard access.
Autofill Service from Google
View all your saved passwords, credit cards, and
addresses that you have saved in Google
.
To access all your autofill information, go to Settings >
Privacy > Autofill Service from Google.
Google Location History
View all your Google saved locations.
To access your Google
location history, go to Settings >
Privacy > Google Location History.
Activity Controls
Choose the activities and information you allow Google
to save.
To customize the saved information, go to Settings >
Privacy > Activity Controls.
Ads
See your advertising ID and personalization information
on Google
.
• To opt-out of Ads Personalization, tap
31

Location
View all the apps that recently accessed your location.
To enable the option for your device to use your
current location, go to Settings > Location > Tap to
use location.
App Location Permissions
You can choose which apps have access to your
location and change your location permissions at any
time.
To enable location permission:
1. Go to Settings > Location > App Location Permissions
2. Select an app
3. Choose from the options: Allow only while using the
ap, ask every time, or don’t allow
Location Services
You can see your Google Location History here, and can
turn on or off the following:
• Emergency Location Service
• Google
Location Accuracy
• Wi-Fi scanning
• Bluetooth
scanning
To change your location services preferences, go to
Settings > Location > Location Services
.
Safety and Emergency
Emergency Information
Fill out your emergency information to help first
responders in an emergency. Anyone can read this
information from your lock screen and dial your
contacts without unlocking your phone.
32

Medical Information
Get help during an emergency with your phone by
adding your medical information to help first respond-
ers.
You can fill out the following fields:
• Name
• Address
• Blood Type
• Allergies
• Medications
• Organ Donor
• Medical Notes
To add medical information, go to Settings > Safety and
Emergency > Emergency Information > Add Information
> Fill in form fields.
Emergency Contacts
You can enter your emergency contact to help first
responders in an emergency situation.
To add an emergency contact, go to Settings > Safety
and Emergency > Emergency Information > Emergency
Contacts > Add Contact > Choose a Contact.
Emergency SOS
The Emergency SOS feature will call the local
emergency service number or preferred contact
number and play an alarm in an emergency. To send an
Emergency SOS
, press the Power button quickly 5 times
or more to start the Emergency SOS
feature and the
countdown alarm.
To enable the Emergency SOS
feature, tap .
To enable the countdown alarm to play a loud sound
when Emergency SOS
is starting, tap .
33

Notify for Help
Add a phone number that you would like to be called
during an emergency. The default number to call for
help is dependent on your local emergency service
number.
Change your preferred contact number
To change your preferred contact number, go to
Settings > Safety and Emergency > Emergency SOS >
Call for help.
NOTE
If you choose to enter a non-emergency
number, your device must be unlocked to use
Emergency SOS and your call may not be answered.
Emergency Location Service
To enable access to use the Emergency Location
Service, Go to Settings > Safety and Emergency >
Emergency Location Service > tap .
When you enable Emergency Location Service
:
• Your device can automatically send its location to
emergency response partners when you call or text
an emergency number
• Emergency Location Service
may use your device’s
location and Google
Location Accuracy
NOTE
If your Emergency Location Service is off,
your mobile carrier may still send your device’s
location during an emergency call.
Wireless Emergency Alerts
To enable wireless emergency alerts, tap and select
your alert preferences and reminder frequency. You
can also see all the Emergency alert history your phone
has previously alerted you.
34

Notify for Help
Add a phone number that you would like to be called
during an emergency. The default number to call for
help is dependent on your local emergency service
number.
Change your preferred contact number
To change your preferred contact number, go to
Settings > Safety and Emergency > Emergency SOS >
Call for help.
NOTE
If you choose to enter a non-emergency
number, your device must be unlocked to use
Emergency SOS and your call may not be answered.
Emergency Location Service
To enable access to use the Emergency Location
Service, Go to Settings > Safety and Emergency >
Emergency Location Service > tap .
When you enable Emergency Location Service
:
• Your device can automatically send its location to
emergency response partners when you call or text
an emergency number
• Emergency Location Service
may use your device’s
location and Google
Location Accuracy
NOTE
If your Emergency Location Service is off,
your mobile carrier may still send your device’s
location during an emergency call.
Wireless Emergency Alerts
To enable wireless emergency alerts, tap and select
your alert preferences and reminder frequency. You
can also see all the Emergency alert history your phone
has previously alerted you.
Types of Alerts available are:
• Extreme threats to life and property
• Severe thereat to life and property
• AMBER alerts
• Test alerts
Passwords and Accounts
Access saved passwords to login into your accounts
seamlessly. Manage both your accounts and passwords
from a single page. With this feature, you can choose
your credentials and let your phone automatically fill out
the rest of your passwords.
Passwords
Once you connect a Google account to your phone, you
can sync your password manager stored on the cloud
to your phone.
Go access your passwords, go to Settings > Passwords
and Accounts > Passwords > Google > Select your Gmail
account on your phone > View all saved passwords
Change Autofill Settings
Easily switch out the preferred password autofill app on
your phone.
Go change your autofill settings, go to Settings >
Passwords and Accounts > Autofill Service > Select the
service > Tap OK to confirm you trust the app.
To enable apps to refresh data automatically, tap .
Digital Wellbeing and Parental Controls
In Digital Wellbeing, you can see which apps and
websites you use most and set daily limits. You can learn
more about your phone usage, track it over time, and
limit the time spent on certain apps. This was built for
parents to monitor and limit their child’s screen time.
35

Dashboard
The Dashboard section will display all the apps you’ve
used each day to discover how much screen time you’ve
been using. To navigate through each day, tap on the
left <
or right > arrows.
To locate your dashboard, go to Settings > Digital
Wellbeing and Parental Controls > Dashboard.
Set an App Timer on Apps
Tap on the next to an app to set app timers to limit
time spent on an app. App timers will reset at midnight.
You cannot set app timers for important system apps
like Settings
, Phone, or the Playstore.
After the timer expires, the app icon stays grayed out
for the rest of the day until midnight. You can override
the timer and reopen the app after it has grayed out.
Set a Timer
To set a timer, go to Settings > Dashboard > Show all apps
> Tap on the next to an app > set timer > Tap OK.
Delete a Timer
To delete a timer, go to Settings > Dashboard > Show all
apps > Tap on the next to an app > Tap Delete Timer.
Focus Mode
You can set your phone in Focus mode to pause specific
app notifications. Select the apps you wish to pause and
tap the Turn On Now
button.
You can also use the Take a Break
option to temporar-
ily resume the notifications for your selected apps in
Focus
mode. After the timer expires, Focus mode will
turn back on.
36

To turn on Focus mode, go to Settings > Focus Mode >
Select Distracting Apps > Tap Set a Schedule > Tap
the Turn On Now button.
Manage Notifications
To enable notifications, go to Settings > Digital Wellbeing
and Parental Controls > App Notifications > Tap .
Do Not Disturb
With Do Not Disturb mode, you can mute sound, stop
vibration, and block visual disturbances. You can select
which apps, contacts, and notifications you want to
receive notifications from by either silencing them or
allowing them.
Turn On Do Not Disturb Mode
Tap the Turn On Now button to enable Do Not Disturb
mode. You can also select what notifications are allowed
in Do Not Disturb
mode.
• People:
Select which conversation, calls, or messages
from your contacts can reach you when in Do Not
Disturb mode
• Apps:
Choose which app notifications to allow when
Do Not Disturb
mode is enabled
• Alarms and Other Interruptions:
Tap to enable
alarms, media sounds, touch sounds, reminders, or
calendar events from interrupting you in Do Not
Disturb mode
To turn on Do Not Disturb
mode from the Digital
Wellbeing and Parental Controls section, go to Settings
> Digital Wellbeing and Parental Controls > Do Not
Disturb.
37

Show Icon in App List
To enable the Digital Wellbeing and Parental Controls
icon in the app list, go to Settings > Digital Wellbeing
and Parental Controls > Tap .
Parental Controls
Add content restrictions and set other limits to help
your child balance their screen time.
To enable parental controls, go to Settings > Digital
Wellbeing and Parental Controls > Set Up Parental
Controls > Select Get Started to set up parental
controls with Google’s Family Link.
Google
Sign into your Google account to enable your phone to
synchronize your email, contacts, and calendar using
Gmail
. You can back up, restore, and transfer your data
from an old Google-supported phone to your new
phone.
NOTE
Your phone can run without a Google
account and you can add other accounts to fill out
your contacts and calendar and calendar.
Ads
See your advertising ID and personalization information
on Google
.
Ad Personalization
By default, your phone is enabled to receive personal-
ized and relevant ads. If you wish to opt-out of this
feature, go to Settings > Google > Ads > Tap to
Opt-out of Ads Personalization.
38
Autofill
Choose to autofill with Google or have SMS verifications
codes be automatically filled.
To access autofill, go to Settings > Google > Autofill
.
To enable autofill for SMS verification codes, go to
Settings > Google > Autofill > SMS Verficiation Codes >
tap autofill service.
To enable your default browser to allow autofill service
to enter verification codes from text messages, go to
Settings > Google > Autofill > SMS Verficiation Codes >
tap default browser.
Backup
Easily restore your data or switch devices at any time
by backing up your data to your Google
account via
Google Drive
. Backup includes:
• Apps and data
• Call history
• Contacts
• Device includes such as Wi-Fi passwords and permissions)
• SMS
To back up your data, go to Settings > Google > Backup
.
Set up and Restore
You can back up the contacts stored on your phone or SIM
card. Storing data varies by phone and Android version.
You cannot restore a backup from a higher Android
version onto a phone running a lower Android version.
39
Restore Contacts
1. Go to Settings > Google > Set Up and Restore >
Restore Contacts
2. Choose which Google
account’s contacts to restore
3. Tap the phone with contacts to copy
4. Tap Restore
5. Wait until you see a prompt stating your contacts were
restored
DuraSpeed
DuraSpeed helps boost the foreground app by
restricting background apps.
NOTE
Notifications may be postponed or not
received.
To enable an app to run in the background, tap for
any of the following apps:
• Calculator
• Calendar
• Camera
• Chrome
• Clock
• Contacts
• Digital Wellbeing
• Drive
• Duo
• Files
• Files by Google
• FM Radio
• Gallery
• Gboard
• Gmail
• Google Assistant Go
• Google Go
• Google Play services
• Google Play Store
• Google TV
• Maps
• Messages
40

Restore Contacts
1. Go to Settings > Google > Set Up and Restore >
Restore Contacts
2. Choose which Google
account’s contacts to restore
3. Tap the phone with contacts to copy
4. Tap Restore
5. Wait until you see a prompt stating your contacts were
restored
DuraSpeed
DuraSpeed helps boost the foreground app by
restricting background apps.
NOTE
Notifications may be postponed or not
received.
To enable an app to run in the background, tap for
any of the following apps:
• Calculator
• Calendar
• Camera
• Chrome
• Clock
• Contacts
• Digital Wellbeing
• Drive
• Duo
• Files
• Files by Google
• FM Radio
• Gallery
• Gboard
• Gmail
• Google Assistant Go
• Google Go
• Google Play services
• Google Play Store
• Google TV
• Maps
• Messages
• Google TV
• Maps
• Messages
• MyTruConnect
• Phone
• Settings
• SIM Toolkit
• Sound Recorder
• Wireless emergency alerts
• YouTube
• YouTube Music
System
Customize your phone’s system settings or reset the
device.
• Language and input:
Select device languages and
change settings such as keyboards and voice input types
• Data and time:
Access the settings to control how the
device displays the date and time
• Backup:
Easily restore your data or switch devices at
any time by backing up your data to your Google
account via Google Drive
• System Update: View the phone’s software version and
check for updates
Tap on the Check for Update
button to check for needed
updates
About Phone
Access your phone’s information, view your device details,
and read the legal disclaimers.
Go to Settings > About Phone
to access all your phone’s
information listed below.
Basic Info
View or change your Device Name and the phone
numbers in your SIM slots (1 or 2).
Device Name
You can rename your device’s name in the About Phone
section.
41

• Google TV
• Maps
• Messages
• MyTruConnect
• Phone
• Settings
• SIM Toolkit
• Sound Recorder
• Wireless emergency alerts
• YouTube
• YouTube Music
System
Customize your phone’s system settings or reset the
device.
• Language and input:
Select device languages and
change settings such as keyboards and voice input types
• Data and time:
Access the settings to control how the
device displays the date and time
• Backup:
Easily restore your data or switch devices at
any time by backing up your data to your Google
account via Google Drive
• System Update: View the phone’s software version and
check for updates
Tap on the Check for Update
button to check for needed
updates
About Phone
Access your phone’s information, view your device details,
and read the legal disclaimers.
Go to Settings > About Phone
to access all your phone’s
information listed below.
Basic Info
View or change your Device Name and the phone
numbers in your SIM slots (1 or 2).
Device Name
You can rename your device’s name in the About Phone
section.
Go to Settings > About Phone > Device Name > Fill out
the form field.
Legal and Regulatory
To read the legal and regulatory information, go to
Settings > About Phone > Legal Information.
Here, you can view:
• Third-party Licenses
• Google
Legal
• Google Play
System Update Licenses
• System WebView Licenses
Device Details
See your SIM status in SIM slots (1 or 2), phone model, IMEI
number, and Android version from here.
SIM Status (SIM slots 1 or 2)
View the network, pohone number, mobile network
state, operator info, service state, signal strength, and
mobile voice network type on your SIM. Go to Settings >
About Phone > SIM Status (SIM slot 1) or SIM Status
(SIM slot 2).
Device Identifiers
Your device identifier is your unique, anonymous
identifier assigned to your phone. Go to Settings >
About Phone to see your phone’s:
• IP Address
• Wi-Fi MAC address
• Device Wi-Fi MAC Address
• Bluetooth
address
• Up time
• Build number
• Custom build version
Limited Warranty
Your new Cloud Mobile Stratus C7 phone has a limited
warranty. Details are available at
www.cloudmobile.com/warranty.
42

Precautions
On the Road
Using a device while driving is illegal in many countries.
Please refrain from using your mobile device while
driving.
Near Sensitive Electronics or Medical
Equipment
Don’t use your device near sensitive electronic
equipment – particularly medical devices such as
pacemakers – as it could cause them to malfunction. It
can also interfere with the operation of fire detectors
and other automatic-control equipment.
While Flying
Your device can cause interference with aircraft
equipment. So it’s essential you follow airline regulations.
If airline personnel asks you to switch off your device, or
disable its wireless functions, please do as they say.
At a Gas Station
Don’t use your device at gas stations. In fact, it’s always
best to turn off your phone whenever you’re near fuels,
chemicals or explosives.
Making Repairs
Never take your device apart. Please leave that to the
professionals. Unauthorized repairs could break the terms
of your warranty. Don’t use your device if the antenna is
damaged, as it could cause injury.
Around Children
Keep your mobile out of children’s reach. It should never
be used as a toy as the device can be hazardous.
Near Explosives
Turn off your device in or near areas where explosive
materials are used. Always obey local laws and turn off
your device when requested.
43

Emergency Calls
To make an emergency call, your device must be turned
on and in an area where there’s network coverage. Dial
the national emergency number and press “Send.”
Explain exactly where you are and don’t hang up until
help has arrived.
Working Temperature
The working temperature for the device is between 0
and 40 degree Celsius. Please don’t use the device
outside the range. Using the device under too high or
too low temperature might cause problems. At very high
volume, prolonged listening to a mobile device can
damage your hearing.
FCC RF Exposure Information
Read this information before using your phone
In August 1986 the Federal Communicatons Commission
(FCC) of the United States with its action in Report and
FCC 96-326 adopted an updated safety standard for
human exposure to radio frequency (RE) electromagnet-
ic energy emitted by FCC regulated transmitters. Those
guidelines are consistent with the safety standard
previously set by both U.S. and international standards
bodies. The design of this phone complies with the FCC
guidelines and these international standards. Use only
the supplied or an approved antenna. Unauthorized
antennas modifications, or attachments could impair call
quality, damage the phone, or result in violation of FCC
regulations. Do not use the phone with a damaged
antenna. If a damaged antenna meets the skin, a minor
burn may result. Please contact your local dealer for
replacement antenna.
44

Body-Worn Operation:
This device was tested for typical body-worn
operations with the back/front of the phone kept 1cm
from the body. To comply with FCC RF exposure
requirements, a minimum separation distance of 1cm
must be maintained between the user's body and the
back/front of the phone, including the antenna.
Third-party belt-clips, holsters and similar accessories
containing metallic components shall not be used.
Body-worn accessories that cannot maintain 1cm
separation distance between the use's body and the
back/front of the phone and have not been tested for
typical body-worn operations may not comply with FCC
RE exposure limits and should be avoided.
For more information about RF exposure, please visit
the FCC website at www.fcc.gov
Your wireless handheld portable telephone is a low
power radio transmitter and receiver. When it is ON, it
receives and sends out radio frequency (RF) signals. In
August,1996,the Federal Communications Commissions
(FCC) adopted RF exposure guidelines with safety levels
for hand-held wireless phones. Those guidelines are
consistent with the safety standards previously set by
both U.S. and international standards bodies:
<ANSIC95.1>1992/<NCRP Report 86>1986/
<ICNIRP>1999
Those standards were based on comprehensive and
periodic evaluations of the relevant scientific literature.
For example, over 120 scientists, engineers, and
physicians from universites, government health
agencies, and industry reviewed the available body of
45

research to develop the ANSI StandardC95.1
Nevertheless, we recommend that your use a
hands-free kit with your phone (such as an earpiece or
headset) to avoid potential exposure to RF energy. The
design of your phone complies with the FCC guidelines
(and those standards) .
Use only the supplied or an approved replacement
antenna. Unauthorized antennas, modifications, or
attachments could damage the phone and may violate
FCC regulations.
Normal Position:
Hold the phone as you would any other telephone with
the antenna pointed up and over your shoulder.
RF Exposure Information:
This product is compliance to FCC RF Exposure
requirements and refers to FCC website https://apps.f-
cc.gov/oetcf/eas/reports/GenericSearch.cfm search
for FCC ID:2AY6A-C7
This device complies with part 15 of the FCC rules.
Operation is subject to the following two conditions:
(1 )This device may not cause harmful interference.
(2)This device must accept any interference received,
including interference that may cause undesired
operation.
The manufacturer is not responsible for any radio or TV
interference caused by unauthorized modifications to
this equipment. Such modifications could void the user's
authority to operate the equipment.
46

This equipment has been tested and found to comply
with the limits for a Class B digital device, pursuant to
part 15 of the FCC Rules. These limits are designed to
provide reasonable protection against harmful
interference in a residential installation. This equipment
generates uses and can radiate radio frequency energy
and, if not installed and used in accordance with the
instructions, may cause harmful interference to radio
communications. However, there is no guarantee that
interference will not occur in a particular installation. If
this equipment does cause harmful interference to
radio or television reception, which can be determined
by turning the equipment off and on, the user is
encouraged to try to correct the interference by one or
more of the following measures:
• Reorient or relocate the receiving antenna.
• Increase the separation between the equipment and
receiver.
• Connect the equipment into an outlet on a circuit
different from that to which the receiver is connected.
• Consult the dealer or an experienced radio/TV
technician for help.
Do not use the device with the environment which below
minimum -10
o
C or over maximum 40
o
C, the device may
not work. Changes or modifications to this unit not
expressly approved by the party responsible for
compliance could void the user's authority to operate
the equipment.
Google
, Google Play, YouTube and other marks are
trademarks of Google
LLC.
47