
OBS Studio Tutorial: How to record your presentation
Step 1 - Download OBS Studio at https://obsproject.com/ (available for Windows, MacOs and
Linux)
Step 2 - Open OBS Studio and run the Auto-Configuration Wizard (Tools -> Auto-
Configuration Wizard)
Step 3 - Set the options as indicated bellow:
Select “Optimize just for recording, I will not be streaming”. Click “Next”.
Resolution: preferably 1280x720 (HD) or 1920x1080 (Full HD). Should be equal or lower than your
current resolution (shown by “Display 1”). Set FPS to 30. Click “Next”.

Auto-Configuration Wizard will run a test.
Apply the recommended settings.

Step 4 - Check the recommended settings: File -> Settings
In “Output”:
Check if your configurations match those in the figure, mainly “Video Bitrate = 2500 Kbps”,
“Recording Quality = High Quality, Medium File Size” and “Recording Format = mkv”. Set your
“Recording Path” accordingly.
In “Video”:
Check if your “Output (Scaled) Resolution” matches the “Base (Canvas) Resolution”, and if the
“FPS Value” is set to 30.
Click “OK” to accept the configurations and close the dialog box.
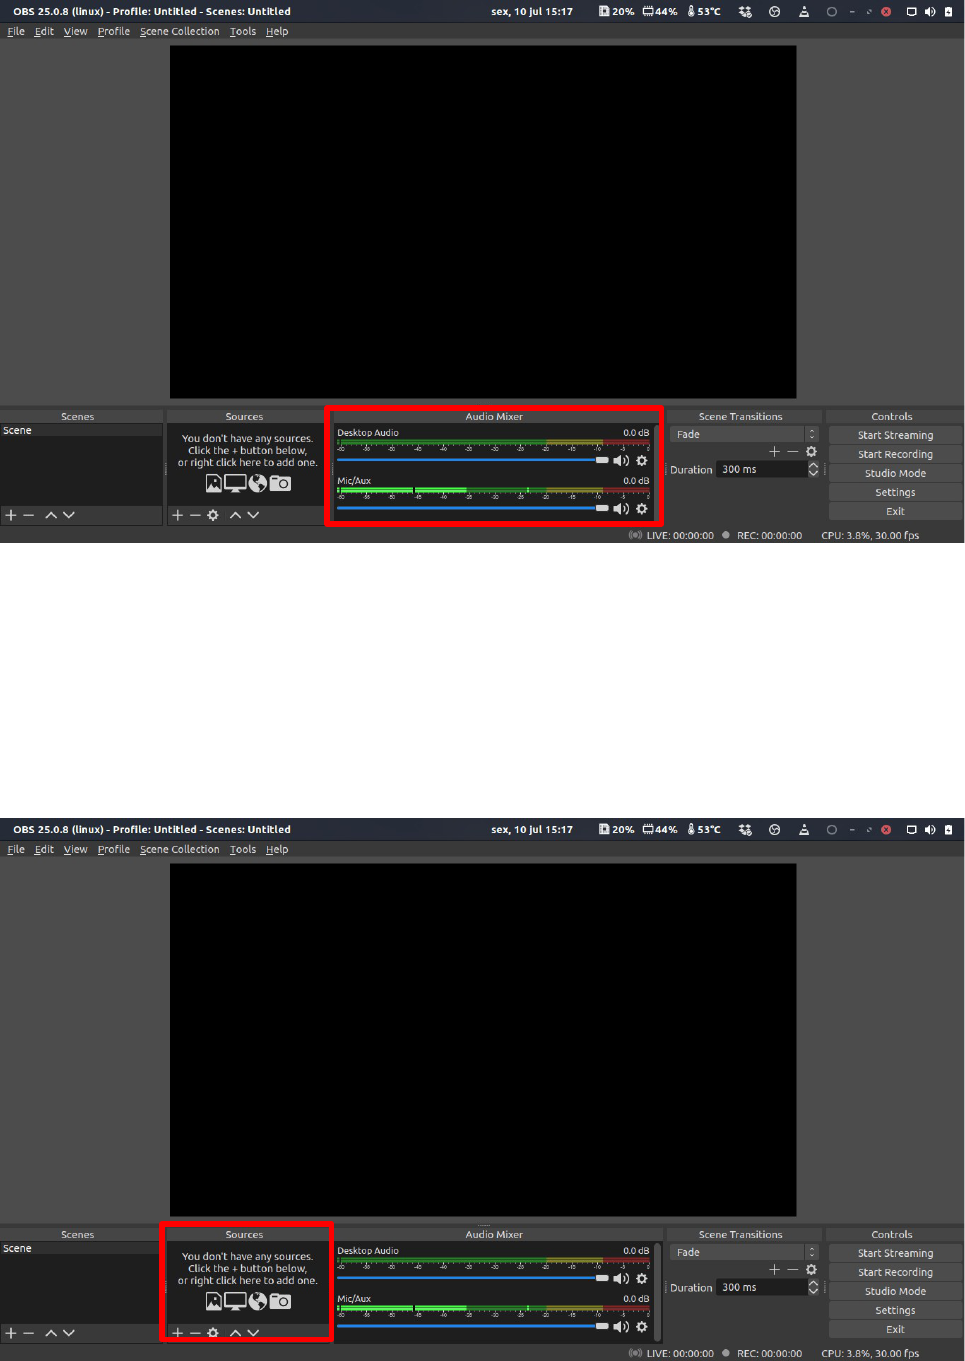
Step 5 - Check audio
Check if the “Mic/Aux” bar is moving while you speak. This indicates that the microphone on your
computer is already being recorded. If the bar is constantly reaching the red area, you can lower the
volume in the sliding bar located directly bellow it.
Step 6 - Add Sources
In this step, we will add the sources that will compose the scene to be shown at the screen. Use the
“+” sign to add a source, “-” to remove it, and the up and down arrows to change the priority
position.

a) Background image: Add (“+”): Image
You can change the name of this source to a better name, such as “Background”. Click “OK”.
Browse for the background image provided by the “EPTT 2020” staff. Choose between the “16x9”
or “4x3” according to your presentation format. Click “OK”.
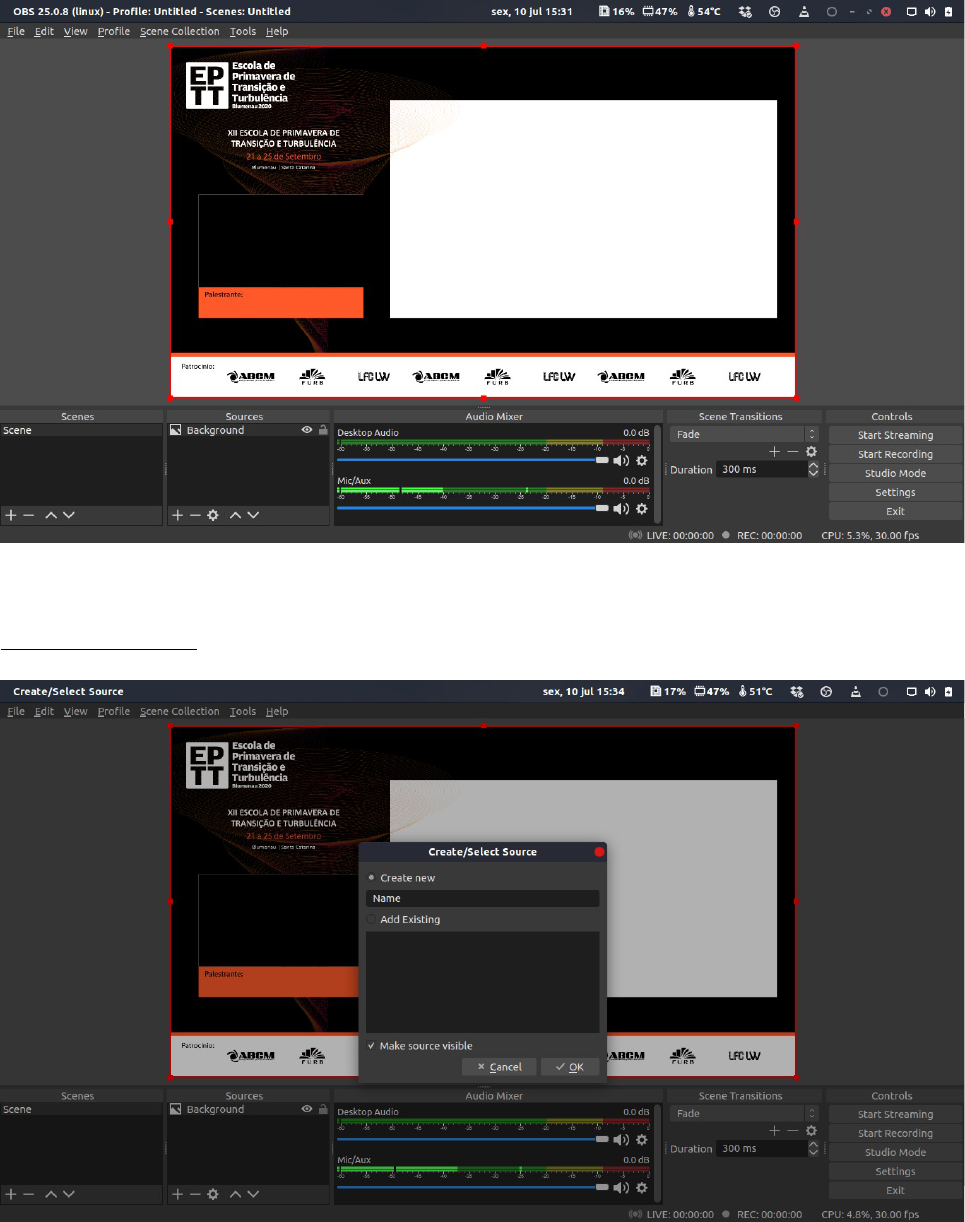
Click on the screen and press “Ctrl+F” to automatically set the image to the window size.
b) Presenter’s name: Add (“+”): Text
You can change the name of this source to a better name, such as “Name”. Click “OK”.

Type in your full name and click “OK”.
Fit the name box in the area as shown.
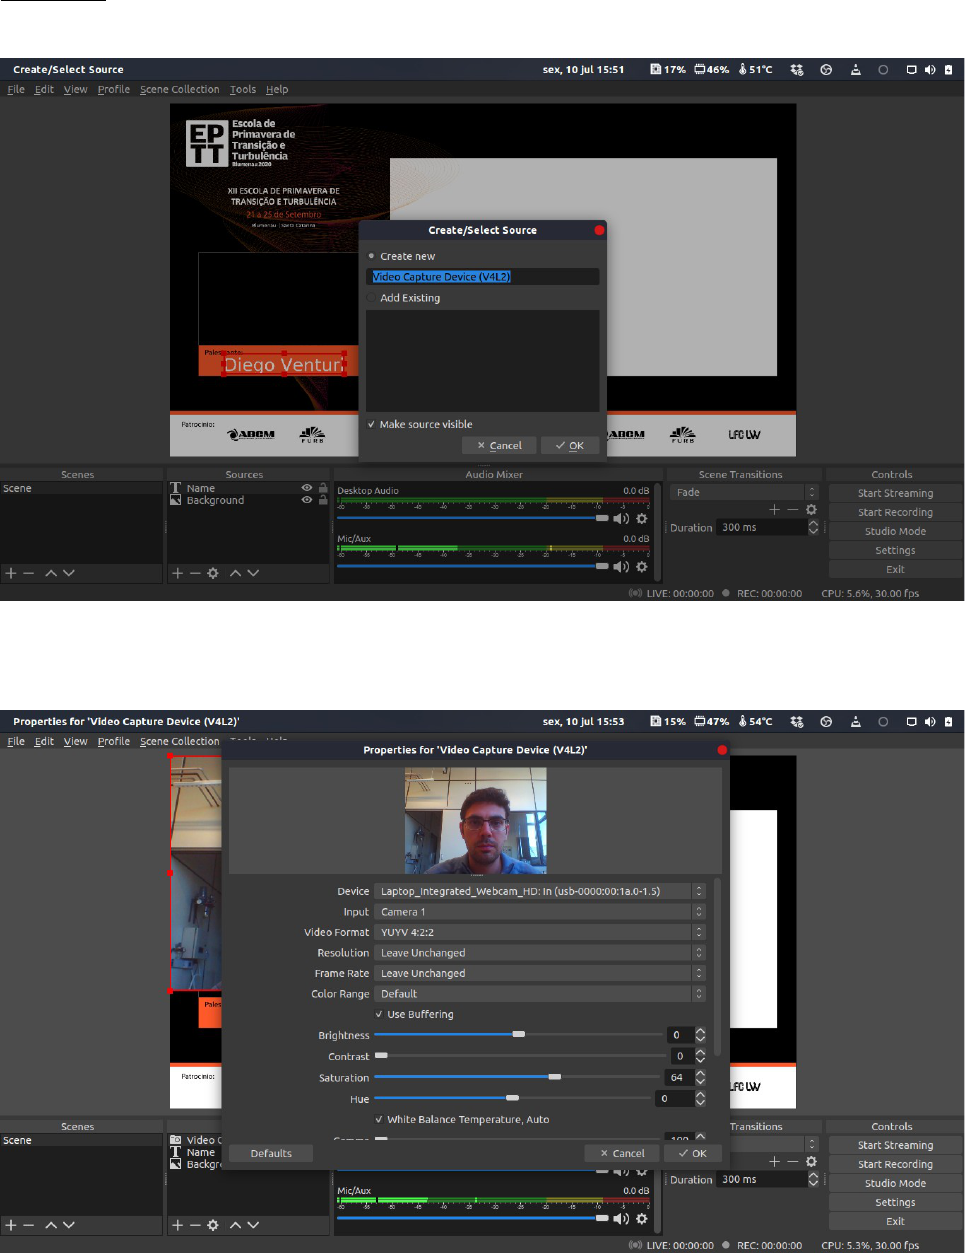
c) Camera: Add (“+”): Video Capture Device
Click “OK”.
Select the proper camera in “Device” if you have more than one. Default configurations are usually
enough. You can change it to try to get better colors if needed. Click “OK”.

In the “Sources” box, move the “Video Capture Device” to a position bellow the background image.
Since the background image is transparent in the webcam designated area, it will be easier to fit
your cam in the space.
Resize the camera box and fit into the designated area.

d) Presentation:
Firstly, open your presentation in your preferred software, such as Power-Point, LibreOffice
Impress, PDF viewers, In-Browser presenters (such as Prezi), etc. Now, put it into presentation
mode (fullscreen). Finally, Alt+Tab back to OBS Studio while keeping the presentation mode open.
Add the presentation into OBS Studio: Add (+) -> Window Capture
Click “OK”.
Under “Window”, select the item that will show your presentation in fullscreen. Sometimes it is
necessary to check the “Swap red and blue” box to correct the colors. Click “OK”.

Resize the presentation window to fit into the designated area.
Step 7 – Start Recording!
Your OBS Studio is ready for recording. Just press the “Start Recording” button in the lower right
corner, “Alt+Tab” into your fullscreen presentation, and go on!
At the end of your presentation, “Alt+Tab” back into OBS Studio and click “Stop Recording” at the
same place.
TIP: Do a check run first to see if everything works fine.
We look forward to seeing your presentation at the “EPTT 2020”!
