a
b
c
d
e
f
g
h
i
j
k
l
m
n
o
p
q
r
s
t
u
v
w
x
y
z
a
b
c
d
e
f
g
h
i
j
k
l
m
n
o
p
q
r
s
t
u
v
w
x
y
z
a
b
c
d
e
f
g
h
i
j
k
l
m
n
o
p
q
r
s
t
u
v
w
x
y
z
a
b
c
d
e
f
g
h
i
j
k
l
m
n
o
p
q
r
s
t
u
v
w
x
y
z
a
b
c
d
e
f
g
h
i
j
k
l
m
n
o
p
q
r
s
t
u
v
w
x
y
z
a
b
c
d
e
f
g
h
i
j
k
l
m
n
o
p
q
r
s
t
u
v
w
x
y
z
a
b
c
d
e
f
g
h
i
j
k
l
m
n
o
p
q
r
s
t
u
v
w
x
y
z
Unit 1
Teacher Guide
Kindergarten Core Knowledge Language Arts® • Skills Strand

Unit 1
Teacher Guide
Skills Strand
KINDERGARTEN
Core Knowledge Language Arts®

Creative Commons Licensing
This work is licensed under a Creative Commons Attribution-
NonCommercial-ShareAlike 3.0 Unported License.
You are free:
to Share — to copy, distribute and transmit the work
to Remix — to adapt the work
Under the following conditions:
Attribution — You must attribute the work in the
following manner:
This work is based on an original work of the Core
Knowledge® Foundation made available through
licensing under a Creative Commons Attribution-
NonCommercial-ShareAlike 3.0 Unported License. This
does not in any way imply that the Core Knowledge
Foundation endorses this work.
Noncommercial — You may not use this work for
commercial purposes.
Share Alike — If you alter, transform, or build upon this
work, you may distribute the resulting work only under
the same or similar license to this one.
With the understanding that:
For any reuse or distribution, you must make clear to
others the license terms of this work. The best way to
do this is with a link to this web page:
http://creativecommons.org/licenses/by-nc-sa/3.0/
Copyright © 2013 Core Knowledge Foundation
www.coreknowledge.org
All Rights Reserved.
Core Knowledge Language Arts, Listening & Learning,
and Tell It Again! are trademarks of the Core Knowledge
Foundation.
Trademarks and trade names are shown in this book strictly
for illustrative and educational purposes and are the property
of their respective owners. References herein should not
be regarded as affecting the validity of said trademarks and
trade names.
Table of Contents
Unit 1
Teacher Guide
Alignment Chart for Unit 1 . . . . . . . . . . . . . . . . . . . . . . . . . . . . . . . . . . . . . . . . . . . . . . . . . . . . . . . .v
Introduction to Unit 1 . . . . . . . . . . . . . . . . . . . . . . . . . . . . . . . . . . . . . . . . . . . . . . . . . . . . . . . . . . .1
Lesson 1: Awareness of Noises; Prewriting Skills . . . . . . . . . . . . . . . . . . . . . . . . . . . . . . . . . . . . . . . . . . . .9
Lesson 2: Awareness of Noises; Prewriting Skills: Vertical Line . . . . . . . . . . . . . . . . . . . . . . . . . . . . . . . . . . . 13
Lesson 3: Awareness of Noises; Prewriting Skills . . . . . . . . . . . . . . . . . . . . . . . . . . . . . . . . . . . . . . . . . . . 18
Lesson 4: Awareness of Noises; Prewriting Skills: Horizontal Line; Blending Pretest . . . . . . . . . . . . . . . . . . . . . . 23
Lesson 5: Awareness of Noises and Words; Prewriting Skills: Circle . . . . . . . . . . . . . . . . . . . . . . . . . . . . . . . . 31
Lesson 6: Awareness of Noises and Words; Prewriting Skills: Writing Strokes Pretest . . . . . . . . . . . . . . . . . . . . . 36
Lesson 7: Awareness of Noises and Words; Prewriting Skills: Diagonal Line . . . . . . . . . . . . . . . . . . . . . . . . . . . 47
Lesson 8: Awareness of Noises and Words; Prewriting Skills: Square . . . . . . . . . . . . . . . . . . . . . . . . . . . . . . . 51
Lesson 9: Awareness of Words; Prewriting Skills: Triangle. . . . . . . . . . . . . . . . . . . . . . . . . . . . . . . . . . . . . . 55
Lesson 10: Awareness of Words; Prewriting Skills; Unit 1 Assessment . . . . . . . . . . . . . . . . . . . . . . . . . . . . . . 59
Pausing Point . . . . . . . . . . . . . . . . . . . . . . . . . . . . . . . . . . . . . . . . . . . . . . . . . . . . . . . . . . . . . . . 67
Appendices
A: About This Program . . . . . . . . . . . . . . . . . . . . . . . . . . . . . . . . . . . . . . . . . . . . . . . . . . . . . . . . 77
B: Kindergarten Scope and Sequence . . . . . . . . . . . . . . . . . . . . . . . . . . . . . . . . . . . . . . . . . . . . . . . 87
C: Components of Program . . . . . . . . . . . . . . . . . . . . . . . . . . . . . . . . . . . . . . . . . . . . . . . . . . . . . 90
Teacher Resources . . . . . . . . . . . . . . . . . . . . . . . . . . . . . . . . . . . . . . . . . . . . . . . . . . . . . . . . . . . . 95
Workbook Answer Key . . . . . . . . . . . . . . . . . . . . . . . . . . . . . . . . . . . . . . . . . . . . . . . . . . . . . . . . . 98

Unit 1 | Alignment Chart v
© 2013 Core Knowledge Foundation
Alignment Chart for Unit 1
The following chart demonstrates alignment between the Common Core State
Standards and corresponding Core Knowledge Language Arts (CKLA) goals.
Alignment Chart for Unit 1
Lessons
12345678910
Reading Standards for Foundational Skills: Kindergarten
Print Concepts
STD RF.K.1a Follow words from left to right, top to bottom, and page by page.
CKLA
Goal(s)
Demonstrate understanding of directionality
(left to right, return sweep, top to bottom,
front to back)
Establish bodily and spatial awareness
Phonological Awareness
STD RF.K.2 Demonstrate understanding of spoken words, syllables, and sounds (phonemes).
CKLA
Goal(s)
Identify environmental sounds
Count the number of environmental
sounds heard (e.g., clapping, rhythm band
instruments)
Identify whether environmental sounds are
the same or different
Segment spoken sentences into words
Presentation of Knowledge and Ideas
STD SL.K.6 Speak audibly and express thoughts, feelings, and ideas clearly.
CKLA
Goal(s)
Speak audibly and express thoughts,
feelings, and ideas clearly
Language Standards: Kindergarten
Conventions of Standard English
STD L.K.1 Demonstrate command of the conventions of standard English grammar and usage when writing or
speaking.
STD L.K.1a Print many lowercase letters.
CKLA
Goal(s)
Hold a writing utensil with a tripod (or pincer)
grip and make marks on paper

vi Unit 1 | Alignment Chart
© 2013 Core Knowledge Foundation
Alignment Chart for Unit 1
Lessons
12345678910
STD L.K.1e Use the most frequently occurring prepositions (e.g., to, from, in, out, on, off, for, of, by, with).
CKLA
Goal(s)
Use spatial words: there, here; in, on; in front
of, behind; at the top of, at the bottom of;
under, over; above, below; next to, in the
middle of; near, far; inside, outside; around,
between; up, down; high, low; left, right;
front, back
These goals are addressed in all lessons in this domain. Rather than repeat these goals as lesson
objectives throughout the domain, they are designated here as frequently occurring goals.

Unit 1 | Introduction 1
© 2013 Core Knowledge Foundation
Welcome
Dear Kindergarten Teacher,
Welcome to the Core Knowledge Language Arts program (CKLA)! CKLA is
divided into two strands: a Skills Strand and a Listening & Learning Strand.
You are currently reading the Introduction to Unit 1 of the Skills Strand.
Some key aspects of the Skills Strand of CKLA are listed below. (To learn
more about the two strands of CKLA and the rationale for this setup, please
consult Appendix A at the end of this unit.)
• CKLA focuses on sounds, or phonemes, as the primary organizing principle
of the program, rather than letters.
• CKLA includes phonics instruction, but the instruction differs from the sort
of phonics usually taught in the United States in that it begins with sounds
and then attaches those sounds to spellings. In a typical phonics lesson in
the United States, the teacher writes the letter ‘m’ on the board and says,
“This is the letter ‘em’. It says /m/.” As a teacher using this program, you
will be asked to present your lessons in a different way. You will be asked to
begin with the sound. At the beginning of the lesson you will tell the class:
“Today’s sound is /m/.” You will then lead the class in some engaging oral
language exercises that will allow students to say and hear the sound /m/.
Once students are familiar with the sound, you will show them how to draw a
“picture of the sound.” You will write the letter ‘m’ on the board and explain
this is how we make a picture of the /m/ sound.
• CKLA uses a synthetic phonics approach which teaches students to read by
blending through the word; it does not teach multiple cueing strategies, use
of pictures as a primary resource in decoding, or part-word guessing.
• CKLA begins by teaching the most common or least ambiguous spelling
for a sound (the basic code spelling); later it teaches spelling alternatives
for sounds which can be spelled several different ways. The system is kept
simple at rst and complexity is added bit by bit as students gain con dence
and automatize their reading and writing skills.
• CKLA avoids letter names in the early lessons of Kindergarten, because the
importance for reading is not the letter names but the sound values the letters
stand for. To read the word cat, it is essential to know /k/ /a/ /t/, not “see aay tee.”
Introduction to Unit 1

2 Unit 1 | Introduction
© 2013 Core Knowledge Foundation
Week One
Day 1 (Lesson 1) Day 2 (Lesson 2) Day 3 (Lesson 3) Day 4 (Lesson 4) Day 5 (Lesson 5)
Counting with Fingers
(10min.)
Counting with Fingers
(5min.)
Counting with Fingers
(5min.)
Counting with Fingers
(5min.)
Counting with Fingers
(5min.)
Knocking and Counting
(10min.)
Same or Different?
(10min.)
Knocking and Counting
(10min.)
Same or Different?
(10min.)
What Did You Hear?
(10min.)
How Many Noises?
(10min.)
What Did You Hear?
(10min.)
How Many Noises?
(10min.)
How Many Noises?
(10min.)
Greeting (10 min.) Greeting (5 min.) Greeting (5 min.) Greeting (5 min.) Hearing Words in
Phrases and Sentences
(10 min.)
Follow Me (5 min.) Follow Me (10 min.) Follow Me (10 min.) Reviewing the Tripod
Grip
(5 min.)
Greeting (5 min.)
Drawing on a Vertical
Surface (15min.)
Finger Introduction
(5min.)
Introducing the Tripod
Grip (5 min.)
Reviewing the Tripod
Grip (5min.)
Drawing Horizontal Lines
on a Vertical Surface
(10min.)
Horizontal Line Practice
(15 min.)
Making Vertical Lines,
Horizontal Lines, and
Circles with Playdough
(10min.)
Drawing Vertical Lines
on a Vertical Surface
(10min.)
Vertical Line Practice
(15min.)
Blending Pretest Drawing Circles to the
Left on a Vertical Surface
(10 min.)
Tracking Practice
(10min.)
60 min. 60 min. 60 min. 60 min. 60 min.
Week Two
Day 6 (Lesson 6) Day 7 (Lesson 7) Day 8 (Lesson 8) Day 9 (Lesson 9) Day 10 (Lesson 10)
Counting with Fingers
(5min.)
Counting with Fingers
(5min.)
Counting with Fingers
(5min.)
What is This? (5 min.)
Counting with Fingers
(5min.)
Counting with Fingers
(5min.)
What is This? (5 min.)
How Many Noises?
(10min.)
Stepping Forward for
Noises (10 min.)
Stepping Forward for
Noises (10min.)
Stepping Forward for
Words (10min.)
Circle the Cubes (10min.)
Hearing Words in
Phrases and Sentences
(10min.)
Stepping Forward for
Words (10 min.)
Hearing Words in
Phrases and Sentences
(10 min.)
Teacher-Student Echo
(10 min.)
Teacher-Student Echo
(10 min.)
Making Circles and
Triangles with Playdough
(10 min.)
Unit 1 Assessment
(30min.)
Writing Strokes Pretest
(20 min.)
Drawing Diagonal Lines
on a Vertical Surface
(10min.)
Diagonal Line Practice
(15 min.)
Drawing Squares on a
Vertical Surface
(15min.)
Reviewing Vertical and
Horizontal Lines (15 min.)
Drawing Triangles on a
Vertical Surface
(10min.)
Reviewing Circles and
Diagonal Lines (15 min.)
Circle to the Left Practice
(15 min.)
Tracking Practice
(10min.)
60 min. 60 min. 60 min. 60 min. 60 min.

Unit 1 | Introduction 3
© 2013 Core Knowledge Foundation
Skills Strand Components
Here is a list of the components you will use as you teach the Skills Strand:
• Teacher Guide (one for each unit)
• Workbook (one copy per student per unit)
• Blending Picture Cards (one set per classroom)
• Large Cards (one set per classroom)
• Chaining Folder and Small Cards (one set per student)
• Decodable Reader (one copy per student per unit, Units 6–10)
• Big Book (one for each unit, Units 4–8)
• Media Disk (one for each unit, Units 4–10)
• Sound Posters and Sound Cards
• Assessment and Remediation Guide
Please note only the Teacher Guide and Workbook are used in Unit 1. The other
materials listed above will be introduced gradually throughout the year. For more
detailed descriptions of these components, see Appendix C in this Teacher
Guide. (Some teachers nd it helpful to keep one unused copy of the Student
Workbook in order to make copies for extra practice.)
Additional Materials Needed in Unit 1
Some additional materials (most typically available in Kindergarten
classrooms) are needed for speci c lessons of Unit 1. These materials are
always listed in the At a Glance chart at the beginning of each lesson. For
your convenience, a complete list of additional materials is included here. The
number in parentheses indicates the rst lesson in which the materials are
used:
• Rhythm band instruments or other objects that make sounds (1)
• Beanbags, small balls, or other small objects, one per student (1)
• Chart paper (1)
• Broken crayons for all students (Please see explanation regarding the
use of crayon pieces in Lesson 1, Drawing Time.) (1)
• Small stickers, any type (2)
• Mats, one per student; may be a placemat, construction paper; see
directions in Lesson 3 (3)
• Counting cubes, 4 per student; if cubes are not available other markers
or manipulatives may be used (3)
• Stamp and ink pad (3)
• Rough or silky textured glove (4)

4 Unit 1 | Introduction
© 2013 Core Knowledge Foundation
• Playdough or other modeling compound (5)
• Peel and stick red dots (3)
• Peel and stick green stars (3)
In order to remain within the given time frames, it is essential for teachers to
prepare all materials ahead of time, giving thought to their distribution and
collection.
Primary Goals of Unit 1
In many ways, Units 1 and 2 are the most important of the Kindergarten Skills
Strand units. Units 1 and 2 lay the groundwork for teaching students to read
and write, which you will begin to do in Unit 3.
Unit 1 has three main purposes. The rst purpose is to increase students’
awareness of environmental noises and words within sentences. Paying
attention to environmental noises and to words within sentences prepares
students to pay attention to sounds within words. The ability to hear sounds
(i.e., phonemes) is crucial for writing; when we write a word, we essentially
write one symbol (either a single- or multiple-letter spelling) for each sound
in the word. For this reason, it is important to begin to increase students’
awareness of the sounds they hear.
The second purpose of Unit 1 is to teach students to draw a number of
writing strokes used to create letters (e.g., horizontal lines, vertical lines,
circles, etc.). As students learn to draw these writing strokes, their ne motor
skills will increase and they will begin to master the tripod grip. This will
prepare students to write letters in Unit 3.
The third purpose of Unit 1 is to teach students the meanings of various
position words (e.g., right, left, top, bottom, etc.). In Unit 3, students will
begin to read and write. Reading and writing are done from left to right and
top to bottom, so it will be helpful if students are able to identify the left side,
right side, top, and bottom of a page. Additionally, when teaching students to
write letters, you will use position words. Finally, you will often use position
words when explaining worksheets to students.
Please note at the end of Unit 1, you will assess students’ ability to:
• draw a horizontal line, a vertical line, a diagonal line, and a circle;
• understand the position words right, left, top, middle, and bottom; and
• discriminate words.
We recommend looking over the assessment in Lesson 10 before teaching
Unit 1 in order to understand the level of mastery expected of students.

Unit 1 | Introduction 5
© 2013 Core Knowledge Foundation
Is Unit 1 Necessary for All Students?
Students enter Kindergarten classrooms with a wide range of experiences
making them more or less ready for Kindergarten instruction. Some students
may have attended preschool; others may not. Some students may have had
picture books read aloud to them on a regular basis while, again, others may
not. As noted earlier, the activities included in Units 1 and 2, while seemingly
simple, lay a critical foundation for the reading instruction in later units. The
time spent practicing these skills at the start of the year is time well spent as
it will enable students to approach the early reading activities with success.
We strongly suggest you start instruction for your entire class with Unit 1 and
not be tempted to skip these lessons.
If you believe students in your Kindergarten classroom have entered school
particularly well prepared, you may want to administer the Unit 1 Student
Performance Task Assessment, as described in Lesson 10, to all students
during the rst day or two of school. There are a total of 14 items on this
assessment. If all students in your classroom answer at least 12 of 14 items
correctly, with no more than 1 item missed per section (A, B, or C), you might
consider starting instruction with Unit 2. You should not consider skipping
Unit 1, however, under any other circumstances, even if just a few students
perform below this benchmark. Instruction in the early units of the CKLA
Kindergarten program (Units 1–4) is explicitly designed to be implemented as
whole group instruction. Based on extensive experience in eld testing this
program, we have found this approach to be the most effective and ef cient
way to ensure the reading success of all students.
Format of the Unit 1 Lessons
Lesson objectives are listed at the beginning of each lesson. Following the
objectives is an At a Glance chart listing the exercises in the lesson, the
materials needed for each exercise, and the amount of time allotted to each
exercise. The lesson’s exercises follow the At a Glance chart. Sidebars are
printed alongside many of the exercises. These often list Pausing Point activities
that can be used to give students additional practice with a target skill.
Each Unit 1 lesson is divided equally between auditory exercises and
prewriting exercises. The auditory exercises are intended to increase students’
awareness of environmental noises and/or words, and the prewriting exercises
are intended to prepare students to write letters, words, and sentences. The
At a Glance chart at the beginning of each exercise has icons to help you
distinguish the two parts of each lesson: auditory exercises are marked by an
ear icon and prewriting exercises are marked by a hand icon.
For the handwriting activities in the early CKLA Kindergarten units, we
strongly recommend that all students use crayons. For all handwriting, in
fact, we prefer students use small or broken crayons. While this may sound
odd, these smaller stubs increase the likelihood of students grasping the
writing utensil with the preferred tripod or quadropod grip. Furthermore,
writing with crayons provides students with increased sensory input as they

6 Unit 1 | Introduction
© 2013 Core Knowledge Foundation
practice writing. This is because crayon wax has greater resistance to paper
than graphite or ink. The push-pull motion will strengthen nger and hand
muscles, permitting students greater control and endurance when writing.
Projection System
Throughout this unit and others, whenever the lesson suggests that the
teacher model the completion of a worksheet, you should choose the most
convenient and effective method of reproducing and displaying the worksheet
for all to see. This may include making a transparency of the worksheet and
using an overhead projector, scanning the page and projecting it on a Smart
Board, using a document camera, or writing the worksheet exercises on chart
paper or a white board.
Take-Home Material
To encourage family member involvement and to maximize student exposure
to the material, we have included a number of take-home worksheets. These
worksheets are optional. Should you choose to use them, please distribute
these worksheets to students and instruct them to take the worksheet to a
family member. At your discretion, take-home material may also be used in
the classroom for extension activities and work stations.
Pretests
You will administer a blending pretest in Lesson 4 and a writing strokes
pretest in Lesson 6. Instructions for administering and scoring the pretests
are included in the lessons. The purpose of the pretests is strictly to establish
a baseline for every student.
CKLA has been designed to be suitable for the majority of Kindergarten
students. Thus, these pretests are not meant to identify students who are
not ready for the Kindergarten sequence. They are intended to help you
determine what students already know and establish benchmarks against
which you can document students’ progress.
Student Performance Task Assessment
All units in CKLA will typically include an end-of-unit assessment, as well as
multiple opportunities for other observation and evaluation throughout the
unit. We strongly recommend that you start an assessment portfolio for each
student. Beginning with this unit collect various examples of the student’s
work, as well as more formal assessments. Remember to include the date on
any work you place in this portfolio.
Major assessments are indicated in this Teacher Guide by a circle with the
number 10 inside it, like the one shown beside the word “Student” at the
beginning of this subsection. The 10 is a reference to the Tens system of
assessment which you can use, if you wish, as a way of recording the results
of the assessments. If you would like to learn more about the Tens system of
assessment, please consult Appendix C at the end of this Teacher Guide.

Unit 1 | Introduction 7
© 2013 Core Knowledge Foundation
In addition to these major assessments, there are many additional
opportunities to assess students. Almost every exercise or worksheet
represents an opportunity to assess students and increase your awareness
of skills they have mastered, and skills which need additional work. We
encourage you to use assessment to systematically guide instruction.
In Lesson 10, you will assess students’ ability to:
• draw a horizontal line, a vertical line, a diagonal line, and a circle;
• understand the position words left, right, top, middle, and bottom; and
• discriminate words.
Instructions for administering and scoring the assessment are included in
Lesson 10.
Pausing Point
The 10 lessons of this unit are followed by a Pausing Point, which is
comprised of a number of supplemental exercises. You should stop at the
Pausing Point if the unit assessment indicates students are having trouble
with any of the Unit 1 objectives. Please note the Pausing Point exercises are
organized by the unit objectives they satisfy.
Pausing Point exercises can also be used before you reach the end of the unit.
Opportunities for using the Pausing Point exercises are identi ed in the sidebars.
Assessment and Remediation Guide
A separate publication, the Assessment and Remediation Guide, provides
further guidance in assessing, analyzing, and remediating speci c skills. This
guide can be found online at http://www.coreknowledge.org/AR-GK-U1.
Refer to this URL for additional resources, mini-lessons, and activities to
assist students who experience dif culty with any of the skills presented in
this unit.
Time Management
You should use the time allotments listed in the At a Glance chart (and listed
throughout the lesson) to guide you as you teach the lesson. For example, in
Lesson 8, you should try to spend about 10 minutes on the “Teacher-Student
Echo” exercise. You may nd that 10 minutes is enough time to teach all
of the sentences listed in the lesson plan, or you may nd you can only get
through half of them.
If you are forced to choose, it is better to leave out a few items in each
exercise than it is to teach one exercise in full and omit other exercises. In
other words, your primary goal should be to teach all of the exercises in the
lesson rather than to teach every item in every exercise.

8 Unit 1 | Introduction
© 2013 Core Knowledge Foundation
Appendices
This brief introduction covers the most basic information about Unit 1. If you
would like to learn more about the philosophy behind the program, the Tens
system of scoring, and other aspects of the program, we strongly encourage
you to consult the appendices at the end of this volume.
Teacher Resources
At the end of each unit, you will nd a section titled, “Teacher Resources.”
In this section, we have included assorted forms and charts which may be
useful.

Unit 1 | Lesson 1 9
© 2013 Core Knowledge Foundation
The following language arts objectives are addressed in this lesson. Objectives aligning with the Common Core
State Standards are noted with the corresponding standard in parentheses. Refer to the Alignment Chart for
additional standards addressed in all lessons in this unit.
Objectives
Lesson 1
Emergent Reading and
Writing Skills
Segment spoken sentences into words by
counting fingers (RF.K.2)
Count the number of environmental sounds
heard as the teacher varies the number of
knocks on a desk (RF.K.2)
Identify whether environmental sounds
are the same or different using a variety of
common classroom objects (RF.K.2)
Demonstrate understanding of
directionality by extending the right hand to
greet others (RF.K.1a)
Establish bodily and spatial awareness
by moving an object to various positions
around the body (RF.K.1a)
Hold a writing utensil with a tripod (or
pincer) grip and make marks on paper using
small crayons (L.K.1a)
At a Glance
Exercise Materials Minutes
Warm-Up
Counting with Fingers
10
Listening to
Environmental Noises
Knocking and Counting
10
Same or Different?
musical instruments or
classroom objects
10
Left/Right Discrimination
Greeting
10
Spatial and Bodily
Awareness
Follow Me
one beanbag, foam ball, or
small object per student
5
Drawing Time
Drawing on a Vertical Surface
crayons; chart paper 15
Take-Home Material
CKLA Overview
Worksheet 1.1 *

10 Unit 1 | Lesson 1
© 2013 Core Knowledge Foundation
Warm-Up 10 minutes
Counting with Fingers
Note: In this exercise students will practice counting to 10 using their ngers.
This task is important because it visually emphasizes that a word (one, two,
etc.) is an individual entity that can be represented, in this case, with ngers.
This exercise will be repeated at the beginning of each lesson in Unit 1. If you
nd that counting to 10 is too dif cult for students at this point, have them
count to ve and increase to 10 when students are ready.
• Count from one to 10, lifting one nger for each number as you count.
• Have students repeat after you.
Listening to Environmental Noises 20 minutes
Knocking and Counting 10 minutes
If students need additional
practice discriminating noises,
you may use the Pausing
Point exercise “Listening Walk”
and the activities in Unit 1,
Section I of the Assessment
and Remediation Guide.
Note: This exercise is important because it requires students to distinguish
discrete noises (in this case, knocks). This is similar to distinguishing
discrete sounds in spoken words. The ability to distinguish sounds is a
prerequisite for writing; to write a word, you must know how many sounds
are in the word so you can write a spelling for each sound.
• Tell students to listen and watch as you knock on your desk.
• Knock on your desk one to three times with your right hand. As you knock,
raise one nger on your left hand for each knock, starting with your thumb.
(To students, you should appear to be lifting your ngers from left to right.)
• Repeat the knocks at a slower pace, having students raise one nger for each
knock (ideally from left to right, but do not dwell on this).
• Have students hold up their hands, indicating with their raised ngers how
many times you knocked.
• Repeat several times, varying the number of knocks.
Same or Different? 10 minutes
For this exercise, students
need to know the meanings of
the terms same and different.
Make two noises that are the
same and tell students two
noises that sound alike are the
same. Make two noises that
are different and tell students
two noises that do not sound
alike are different.
Note: This exercise familiarizes students with the sources of noises and
helps them to discriminate between them.
• Gather various rhythm instruments or classroom objects which make
distinctive noises; e.g., stapler, pencil sharpener, scissors, etc.
• Familiarize students with the instruments or objects and the noises they make
by naming them and producing the noises.
• Make two noises and ask students whether the noises were the same or
different.
• If students are successful, repeat with the instruments or objects now hidden
from view.

Unit 1 | Lesson 1 11
© 2013 Core Knowledge Foundation
Left/Right Discrimination 10 minutes
Greeting
Please be aware that greeting
a person by shaking his or her
hand and looking him or her
in the eyes is not a universal
social tradition. Additionally,
please note this exercise
may be difficult for autistic
students.
If students need additional
work on left/right
discrimination, you may
use the activities in Unit 1,
Section III of the Assessment
and Remediation Guide.
Note: Shaking hands teaches American social skills. Additionally, a rm grip
develops hand awareness and increases muscle tone in the hand, which is
useful for writing. Finally, this exercise familiarizes students with their right
hands (and with the concept of “right” in general). This knowledge will be
bene cial when students are taught to read and write from left to right.
• Tell students when we greet a person we shake the person’s right hand.
• Greet one student after the other by saying hello, looking him or her in the
eyes, and rmly shaking his or her right hand.
• Say, “Hello, . We greet others by shaking their right hand. I’m using my
right hand to shake your right hand.”
• Encourage students to greet you properly, “Hello, . I’m using my right
hand to shake your right hand.”
Spatial and Bodily Awareness 5 minutes
Follow Me
A squishy object gives
students plenty of sensory
feedback as they move the
object in space. If possible,
have students use a soft
object for this exercise.
If students need additional
work on gross motor skills,
you may use any of the
Pausing Point activities listed
under “Gross Motor Activities.”
If students need additional
practice with position words,
you may use the Pausing Point
exercise “The Grand Old Duke
of York” and the activities
in Unit1, Section III of the
Assessment and Remediation
Guide.
Note: This exercise familiarizes students with position words, which you
will use when teaching letter forms and when teaching the directionality
of reading and writing (top to bottom/left to right). It also develops gross
motor skills.
• Give each student a beanbag, foam ball, or another small object.
• Have students stand about an arm’s length apart.
• Stand with your back to students and tell them to do what you do.
• Make sure to emphasize the position words top, bottom, over, under, right,
other side, and around by saying what you are doing.
• You should do the following actions in order before varying the game:
• Move the ball to the top of your head.
• Lift up your foot and move the ball down to the bottom of your foot.
• Raise your arm sideways and move the ball over your arm.
• Raise your arm sideways and move the ball under your arm.
• Move the ball to the right of your body.
• Move the ball to the other side of your body.
• Move the ball around your legs.
Note: The position word left is avoided here to emphasize the right hand
and right side of the body.

12 Unit 1 | Lesson 1
© 2013 Core Knowledge Foundation
Drawing Time 15 minutes
Drawing on a Vertical Surface
If students need additional
practice drawing on a vertical
surface, you may use the
activities in Unit 1, Section IV
of the Assessment and
Remediation Guide.
Note: In this exercise students will learn to control movement at the
shoulder, elbow, wrist, and ngers to make marks on paper with small
crayons. The small size of the crayons encourages the pincer grasp, which
leads into the ef cient tripod grip. The tripod grip will be taught in the next
lesson.
• Set up drawing paper on an easel or some other large, vertical surface at a
height students can reach.
• Provide students with small pieces of crayon.
• Have students draw on the vertical surface. Encourage a range of motion,
from large movements made at the shoulder and elbows to small movements
made at the wrists and ngers.
Take-Home Material
CKLA Overview
• Have students give Worksheet 1.1 to a family member.

Unit 1 | Lesson 2 13
© 2013 Core Knowledge Foundation
The following language arts objectives are addressed in this lesson. Objectives aligning with the Common Core
State Standards are noted with the corresponding standard in parentheses. Refer to the Alignment Chart for
additional standards addressed in all lessons in this unit.
Objectives
Lesson 2
Emergent Reading and
Writing Skills
Segment spoken sentences into words by
counting fingers (RF.K.2)
Count the number of environmental sounds
heard as the teacher varies the number of
knocks on a desk (RF.K.2)
Identify whether environmental sounds
are the same or different using a variety of
common classroom objects (RF.K.2)
Demonstrate understanding of directionality
by extending the right hand to greet others
(RF.K.1a)
Establish bodily and spatial awareness
by moving an object to various positions
around the body (RF.K.1a)
Use spatial words while practicing writing
strokes in the air and on paper (L.K.1e)
Hold a writing utensil with a tripod (or
pincer) grip and make marks on paper using
small crayons (L.K.1a)
At a Glance
Exercise Materials Minutes
Warm-Up
Counting with Fingers
5
Listening to
Environmental Noises
Knocking and Counting
10
Same or Different?
musical instruments or
classroom objects
10
Left/Right Discrimination
Greeting
small stickers 5
Spatial and Bodily
Awareness
Follow Me
one beanbag, foam ball, or
small object per student
10
Finger/Hand Awareness
Finger Introduction
5
Introducing the Tripod Grip
crayons 5
Drawing Time
Drawing Vertical Lines on a
Vertical Surface
crayons; chart paper 10
Take-Home Material
Vertical Line Practice
Worksheet 2.1 *

14 Unit 1 | Lesson 2
© 2013 Core Knowledge Foundation
Warm-Up 5 minutes
Counting with Fingers
• Count from one to 10, lifting one nger for each number as you count.
• Have students repeat after you.
Listening to Environmental Noises 20 minutes
Knocking and Counting 10 minutes
If students need additional
practice discriminating noises,
you may use the Pausing
Point exercise “Listening
Walk” and the activities
in Unit 1, Section I of the
Assessment and Remediation
Guide.
• Tell students to listen and watch as you knock on your desk.
• Knock on your desk one to four times with your right hand. As you knock,
raise one nger on your left hand for each knock, starting with your thumb.
(To students, you should appear to be lifting your ngers from left to right.)
• Repeat the knocks at a slower pace, having students raise one nger for each
knock (ideally from left to right, but, again, do not dwell on this).
• Have students hold up their hands, indicating with their raised ngers how
many times you knocked.
• Repeat several times, varying the number of knocks.
Same or Different? 10 minutes
• Gather various rhythm instruments or classroom objects that make distinctive
noises.
• Familiarize students with the instruments or objects and the noises they make
by naming them and producing the noises.
• Make two noises and ask students whether the noises were the same or
different.
• Repeat until students have had signi cant practice.
• If students were successful, repeat with the instruments or objects hidden
from view.
• Extension: Arrange a number of instruments or objects so students can see
them. Have another set of these same instruments or objects hidden. Make
the noise of an instrument or object out of view and ask students to identify
the instrument or object making the same noise. Repeat and ask them to
select an instrument or object making a different noise. You could also hand
one instrument or object to each student and ask them to make the same
noise or a different noise.

Unit 1 | Lesson 2 15
© 2013 Core Knowledge Foundation
Left/Right Discrimination 5 minutes
Greeting
If students need additional
practice differentiating their
hands, you may use the
Pausing Point exercise “Left/
Right Hand Discrimination.”
• Greet one student after the other by saying hello, looking him or her in the
eyes, and rmly shaking his or her right hand.
• Say, “Hello, . We greet others by shaking their right hands. I’m using
my right hand to shake your right hand.”
• Encourage students to greet you properly: “Hello, . I’m using my right
hand to shake your right hand.”
• After shaking each student’s right hand, place a small sticker on it to remind
him or her which side is the right side.
• Tell students, “What’s left is left.”
Spatial and Bodily Awareness 10 minutes
Follow Me
If students’ need additional
gross motor skills practice, you
may use any of the Pausing
Point activities listed under
“Gross Motor Activities” and
the activities in Unit 1, Section
III of the Assessment and
Remediation Guide.
If students need additional
practice with position words,
you may use the Pausing Point
exercise “The Grand Old Duke of
York” or the activities in Unit 1,
Section III of the Assessment
and Remediation Guide.
• Give each student a beanbag, foam ball, or other small object.
• Have students stand about an arm’s length apart.
• Stand with your back to students and tell them to do what you do.
• Make sure to emphasize the position words top, bottom, over, under, right,
other side, and around by saying what you are doing.
• You should do the following actions in order before varying the game:
• Move the ball to the top of your head.
• Lift up your foot and move the ball down to the bottom of your foot.
• Raise your arm sideways and move the ball over your arm.
• Raise your arm sideways and move the ball under your arm.
• Move the ball to the right of your body.
• Move the ball to the other side of your body.
• Move the ball around your legs.
• Extension: As students master position words, increase the length of your
statements and make them more explicit. For example, say, “Move the ball
to the middle of your right arm, under your elbow.” To make this an excellent
oral language exercise, have students say what they are doing.

16 Unit 1 | Lesson 2
© 2013 Core Knowledge Foundation
Finger/Hand Awareness 10 minutes
Finger Introduction 5 minutes
Note: This exercise is important because knowing nger names is useful
for learning the tripod grip.
• Raise your thumb, and tell students you are holding up your thumb.
• Raise each of your remaining ngers (one at a time), and tell students what
they are called (pointer or index fi nger, middle fi nger, ring fi nger, pinkie).
• Tell students to touch their thumbs to the tips of their other ngers. This
movement is called nger-thumb opposition and develops nger awareness.
Having students practice
finger-thumb opposition
(touching the thumb to
each finger) is a great way
to prepare students for the
tripod grip. When students
begin writing, you may have
them practice finger-thumb
opposition for 30 seconds
before asking them to pick up
a writing utensil.
• Tell students to repeat after you, pretending their thumbs are greeting each of
their ngers.
• Touch your thumb to your pointer nger, and say, “Hello, pointer nger!
Hello, thumb!”
• Touch your thumb to your middle nger, and say, “Hello, middle nger!
Hello, thumb!”
• Touch your thumb to your ring nger, and say, “Hello, ring nger! Hello,
thumb!”
• Touch your thumb to your pinkie, and say, “Hello, pinkie! Hello, thumb!”
• Extension: Sing the song “Where Is Thumbkin?” (to the tune of “Frère
Jacques”).
Where Is Thumbkin?
“Where is thumbkin?” (hands behind back)
“Where is thumbkin?” (hands behind back)
“Here I am.” (bring left thumb from behind back)
“Here I am.” (bring right thumb from behind back)
“How are you today, sir?” (wiggle left thumb)
“Very well, I thank you.” (wiggle right thumb)
“Run away.” (move left hand behind back)
“Run away.” (move right hand behind back)
(Repeat four times, replacing “thumbkin” with “pointer finger,” then
“middle finger,” then “ring finger,” and then “pinkie.”)

Unit 1 | Lesson 2 17
© 2013 Core Knowledge Foundation
Introducing the Tripod Grip 5 minutes
Tripod Grip
To increase students’ hand-
eye coordination and exercise
their pincer muscles, have
them move water from one
test tube to another using an
eyedropper. Colored water
will keep students engaged
and provide a chance to teach
color names.
Note: The standard writing grip is the tripod grip. The tripod grip is made
by pinching the base of a writing utensil with the thumb and pointer nger
and resting the shaft of the writing utensil on the tip of the middle nger.
• Provide each student with a small piece of crayon.
• Model the tripod grip for students.
• Have students use the tripod grip to hold their crayons.
• Circulate, correcting grips. (It is important that students learn the correct way
to hold a writing utensil because a proper grip ensures ef cient, smooth, and
tension-free handwriting.)
Note: Some students might use the thumb, pointer nger, and middle
nger to pinch the crayon. The crayon then rests on the tip of the ring
nger. This alternate grip, called the quadropod grip, is ne as well.
Drawing Time 10 minutes
Drawing Vertical Lines on a Vertical Surface
If students have trouble
drawing vertical lines, you
may draw stars on the paper
to indicate where they should
start each vertical line. Tell
students to “start at the star.”
If necessary, draw dots to
indicate end points, and tell
students to “stop at the dot.”
If students need additional
practice with vertical lines,
you may use the Pausing
Point exercise “Tray Tracing”
and the activities in Unit 1,
Section IV of the Assessment
and Remediation Guide.
Note: Drawing vertical lines will prepare students to write the letters ‘a’, ‘b’,
‘d’, ‘h’, ‘i’, ‘k’, ‘l’, ‘m’, ‘n’, ‘p’, ‘q’, ‘r’, ‘t’, and ‘u’.
• Tape multiple pieces of chart paper to the wall at a height students can reach.
• Review the position words top, bottom, left, right, and middle with students,
pointing out the top, bottom, left side, right side, and middle of one of the
pieces of chart paper.
• Draw a vertical line on the board. Explain to students a vertical line is a
straight line that goes up and down; when we draw a vertical line, we start at
the top and nish at the bottom.
• Invite students to trace vertical lines on their desks (or in the air) with their
ngers.
• Have students draw vertical lines on the chart paper.
• Circulate, correcting grips and assisting students in drawing vertical lines.
Take-Home Material
Vertical Line Practice
• Have students give Worksheet 2.1 to a family member.

18 Unit 1 | Lesson 3
© 2013 Core Knowledge Foundation
The following language arts objectives are addressed in this lesson. Objectives aligning with the Common Core
State Standards are noted with the corresponding standard in parentheses. Refer to the Alignment Chart for
additional standards addressed in all lessons in this unit.
Objectives
Lesson 3
Emergent Reading and
Writing Skills
Segment spoken sentences into words by
counting fingers (RF.K.2)
Segment spoken sentences into words by
moving cubes (RF.K.2)
Identify environmental sounds using a variety
of classroom objects (RF.K.2)
Count the number of environmental sounds
heard using a variety of classroom objects
(RF.K.2)
Demonstrate understanding of
directionality by placing cubes on a mat
from left to right and by extending the right
hand to greet others (RF.K.1a)
Establish bodily and spatial awareness
by moving an object to various positions
around the body (RF.K.1a)
Use spatial words while practicing writing
strokes in the air and on paper (L.K.1e)
Hold a writing utensil with a tripod (or
pincer) grip and make marks on paper using
small crayons (L.K.1a)
At a Glance
Exercise Materials Minutes
Warm-Up
Counting with Fingers
5
Listening to
Environmental Noises
What Did You Hear?
musical instruments or
classroom objects
10
How Many Noises?
musical instruments or
classroom objects; red dots
and green star stickers; cubes
(two per student); small mats
(one per student)
10
Left/Right Discrimination
Greeting
stamp & ink pad or stickers 5
Spatial and Bodily
Awareness
Follow Me
one beanbag, foam ball, or
small object per student
10
Finger/Hand Awareness
Reviewing the Tripod Grip
crayons 5
Drawing Time
Vertical Line Practice
Worksheet 3.1; crayons;
projection system
15
Take-Home Material
Strengthening Fine Motor
Skills
Worksheet 3.2 *

Unit 1 | Lesson 3 19
© 2013 Core Knowledge Foundation
Advance Preparation
Gather various rhythm instruments or objects and prepare the mats for
students by placing a green start star on the left side of each mat and a red
dot on the right. See illustration. It might also be helpful if students had a
green star on their left hands and a red dot on their right hands.
Warm-Up 5 minutes
Counting with Fingers
• Count from one to 10, lifting one nger for each number as you count.
• Have students repeat after you.
Listening to Environmental Noises 20 minutes
What Did You Hear? 10 minutes
If students need additional
practice discriminating noises,
you may use the Pausing
Point exercise “Listening Walk”
and the activities in Unit 1,
Section I of the Assessment
and Remediation Guide.
If students need additional
practice identifying the
sources of noises, you may use
the Pausing Point exercises
“Tick-Tock, Find the Clock,”
“Listening Walk,” and “Find
the Animal.”
If students need additional
practice recreating noise
sequences, you may use the
Pausing Point exercise “Clap
the Pattern.”
Note: In this exercise students will learn to identify noise sequences. This
will prepare them for a future exercise in which they have to identify words
in phrases. Students will also identify the sources of noises by naming the
objects making the noises. This will prepare them to associate a sound
with a letter.
• Gather various rhythm instruments or classroom objects and familiarize
students with them by naming and producing a noise with the selected items.
• Hide the instruments or objects from view and have students identify them by
the noises they make. Students should name the instruments or objects.
• Make the noises of two instruments or objects, one after the other, with the
instruments or objects hidden from view.
• Have a student name the two instruments or objects and use them to copy
the noises in correct sequence.
• Repeat with several sequences of two noises until students have had
signi cant practice.
• Extension: If you have two sets of instruments, place one set where students
can see them. Play the instruments from the hidden set. Have a student play
instruments in the same order you played the hidden instruments.

20 Unit 1 | Lesson 3
© 2013 Core Knowledge Foundation
How Many Noises? 10 minutes
Instead of using the mat, you
may affix a magnetic strip
to each of your cubes and
demonstrate on the board.
Or you may demonstrate by
projecting the cubes using a
projection system.
“Feeling the Noises” might be
beneficial to some students.
Instead of placing the cubes on
the mat, let students place the
cubes in their hands.
If students need additional
practice counting sounds, you
may use the activities in Unit 1,
Section I of the Assessment and
Remediation Guide.
If students need additional
practice with left-to-right
directionality, you may use the
Pausing Point exercises “Tracing
Lines” and “Color Strips” and
the activities in Unit 1, Section
III of the Assessment and
Remediation Guide.
Note: This exercise familiarizes students with noise sequences. They will
represent a noise with an object by placing a cube on a mat for each noise
they hear. This is similar to representing a sound with a letter. Placing the
cubes left to right introduces the same directionality used when reading print.
• Place a mat and two cubes for all students to see.
• Make sure from the students’ perspective, you appear to be placing the
cubes from left to right.
• Select a student to come forward and make a noise using one instrument or
object.
• Once the student has made a noise, move one cube forward on the mat.
• Clear your mat and ask another student to come forward and make two
different noises. For each noise, slide a cube on your mat.
• Distribute one mat and two cubes to each student.
• For each noise they hear, students should place one cube on the mat.
• Tell students the green star on the mat means “Go!” or “Start!” and the red
dot means “Stop!” They should always slide their rst cube on the left side of
the mat where the green star is located. They should place the second cube
next to it, placing them in a line toward the red dot.
Note: Instead of sounding instruments or objects, you could have students
move cubes according to knocks.
first sound (bell)
second sound (drum)
(silence)
SOUNDS:
SYMBOLS:
Left/Right Discrimination 5 minutes
Greeting
Instead of greeting each
student yourself, you could
have students greet each other.
• Greet one student after the other by saying hello, looking him or her in the
eyes, and rmly shaking his or her right hand.
• Say, “Hello, . We greet others by shaking their right hands. I’m using
my right hand to shake your right hand.”

Unit 1 | Lesson 3 21
© 2013 Core Knowledge Foundation
If students need additional
practice differentiating their
hands, you may use the
Pausing Point exercise “Left/
Right Hand Discrimination”
and the activities in Unit 1,
Section III of the Assessment
and Remediation Guide.
• Encourage students to greet you properly: “Hello, . I’m using my right
hand to shake your right hand.”
• After shaking each student’s right hand, place a stamp or sticker on it to
remind them which side is the right side.
• Tell students, “What’s left is left.”
Spatial and Bodily Awareness 10 minutes
Follow Me
If students’ are struggling
with gross motor skills, you
may use any of the Pausing
Point activities listed under
“Gross Motor Activities.”
If students need additional
practice with position words,
you may use the Pausing
Point exercise “The Grand
Old Duke of York” and the
activities in Unit 1, Section III
of the Assessment and
Remediation Guide.
• Give each student a beanbag, foam ball, or another small object.
• Have students stand about an arm’s length apart.
• Stand with your back to students and tell them to do what you do. Turn your
head around to monitor the class. If another adult is in the room, have him or
her demonstrate the motions.
• Make sure to emphasize the position words top, bottom, over, under, right,
left, and around by saying what you are doing.
• You should do the following actions, in order, before varying the game:
• Move the ball to the top of your head.
• Lift up your foot and move the ball down to the bottom of your foot.
• Raise your arm sideways and move the ball over your arm.
• Raise your arm sideways and move the ball under your arm.
• Move the ball to the right of your body.
• Move the ball to the left of your body.
• Move the ball around your legs.
Finger/Hand Awareness 5 minutes
Reviewing the Tripod Grip
Tripod Grip
• Provide each student with a small piece of crayon.
• Model the tripod grip for students. (The tripod grip is made by pinching the
base of a writing utensil with the thumb and pointer nger and resting the
shaft of the writing utensil on the tip of the middle nger.)
• Have students use the tripod grip to hold their crayons.
If students need additional
practice using the tripod grip, you
may use the activities in Unit 1,
Section IV of the Assessment and
Remediation Guide.
• Circulate, correcting grips.
Note: Some students might use the thumb, pointer nger, and middle
nger to pinch the crayon. The crayon then rests on the tip of the ring
nger. This alternate grip, called the quadropod grip, is ne as well.

22 Unit 1 | Lesson 3
© 2013 Core Knowledge Foundation
Drawing Time 15 minutes
Vertical Line Practice
Worksheet 3.1
Note: When students are writing at their desks, the bottom of their feet
should touch the oor, their feet should be parallel, and their backs should
be straight. Before asking students to write, have them shake their arms
above their heads and stamp their feet. This will ensure that their posture is
suitable for writing.
• Distribute and display Worksheet 3.1 using a projection system.
• Tell students the worksheet shows a bird in a cage, but the cage is missing
its bars.
If students need additional
practice with vertical lines,
you may use the Pausing
Point exercise “Tray Tracing”
and the activities in Unit 1,
Section IV of the Assessment
and Remediation Guide.
Please select the most
convenient and effective
method of displaying the
worksheet for all students
to see. This may include
making a transparency of
the worksheet and using
an overhead projector, or
a smart board, document
camera, chart paper, etc.
• Tell students you are going to add bars to the cage so the bird cannot y
away. They should do the same on their worksheets.
• Show students how to add bars to the cage by tracing the dotted lines. As
you draw, tell students you are adding bars to the cage by drawing vertical
lines from top to bottom, starting at the stars.
• Continue demonstrating (providing guided practice) until students are ready
to work independently.
• Tell students once they have nished the front of the worksheet, they should
complete the back of the worksheet.
• If students nish early, they may color the pictures and/or draw a picture
containing at least one vertical line.
Take-Home Material
Strengthening Fine Motor Skills
• Have students give Worksheet 3.2 to a family member.

Unit 1 | Lesson 4 23
© 2013 Core Knowledge Foundation
The following language arts objectives are addressed in this lesson. Objectives aligning with the Common Core
State Standards are noted with the corresponding standard in parentheses. Refer to the Alignment Chart for
additional standards addressed in all lessons in this unit.
Objectives
Lesson 4
Emergent Reading and
Writing Skills
Segment spoken sentences into words by
counting fingers (RF.K.2)
Identify environmental sounds using a
variety of common classroom objects (RF.K. 2)
Count the number of environmental sounds
heard using a variety of classroom objects
(RF.K.2)
Segment spoken sentences into words by
moving cubes (RF.K.2)
Demonstrate understanding of directionality
by extending the right hand to greet others
(RF.K.1a)
Use spatial words while practicing writing
strokes in the air and on paper (L.K.1e)
Hold a writing utensil with a tripod (or
pincer) grip and make marks on paper using
small crayons (L.K.1a)
At a Glance
Exercise Materials Minutes
Warm-Up
Counting with Fingers
5
Listening to
Environmental Noises
What Did You Hear?
musical instruments or
classroom objects
10
How Many Noises?
musical instruments or
classroom objects; cubes
(three per student); small
mats (one per student)
10
Left/Right Discrimination
Greeting
rough or silky glove 5
Finger/Hand Awareness
Reviewing the Tripod Grip
crayons 5
Drawing Time
Drawing Horizontal Lines on a
Vertical Surface
crayons; chart paper 10
Horizontal Line Practice
Worksheets 4.1, 4.2; crayons;
projection system
15
Pretest
Blending Pretest
*
Take-Home Material
Horizontal Line Practice
Worksheet 4.3 *
24 Unit 1 | Lesson 4
© 2013 Core Knowledge Foundation
Note to Teacher
During this lesson, you will begin administering a blending subtest to
students individually. You will be able to administer the test to a few students
during this lesson, but you will continue to administer it to other students in
subsequent lessons. This blending pretest assesses ability to take isolated
oral sounds and combine them to form a word. Blending ability is highly
correlated with early reading ability; this test is being administered now to
establish a baseline for each student. You will administer the pretest to one
student at a time, while the remainder of the class completes Worksheet
4.2 or other work you deem appropriate. Display and demonstrate how to
complete Worksheet 4.2 for the entire class and then pull aside one student
at a time for the blending pretest.
A sample scoring sheet for the blending pretest is printed at the end of
this lesson. Individual scoring sheets for each student are included in the
Student Workbooks. Remove Worksheet 4.1 from each student’s workbook
prior to administering the test. Sit close to the student so he or she can
clearly hear you and see your mouth. Tell the student you are going to say
some sounds slowly. The student should listen to all of the sounds; when
you nish, the student should try to say the sounds “fast” or “all together”
so he or she is saying a real word. Explain that you can only say the sounds
one time, so students must watch and listen carefully. Demonstrate using
the examples. Say the sounds in a segmented fashion, pausing for about
one second between sounds, e.g., /m/.../ee/. Then say me. Demonstrate
again with /s/…/a/…/d/, sad, then administer the test items. If the student
misses the rst ve items, you may discontinue the test. Score each student’s
overall performance. The correct answer for each item is given in the
parentheses. Give one point for each correct answer and zero points for an
incorrect answer. At the beginning of Kindergarten, any score greater than
zero is a good outcome. A score of ve or more is very good. Such a score
indicates the student can hear discrete sounds and can blend them to make
a word. Since blending is one of the key skills required for reading (along
with knowing letter-sound correspondences), students who do well on this
pretest are likely to learn to read quickly. On the other hand, students who
cannot blend may struggle with reading—at least in the initial phases. These
students may need additional support in order to learn to blend successfully.
You will want to keep a close eye on them during the rst several units of
Kindergarten.
We strongly recommend creating an assessment portfolio for each student
and storing his or her assessments (including pretests) in it. Throughout the
year, you can refer to the folders to see how students are progressing.

Unit 1 | Lesson 4 25
© 2013 Core Knowledge Foundation
Warm-Up 5 minutes
Counting with Fingers
• Count from one to 10, lifting one nger for each number as you count.
• Have students repeat after you.
Listening to Environmental Noises 20 minutes
What Did You Hear? 10 minutes
If students need additional
practice identifying the
sources of noises, you may use
the Pausing Point exercises
“Tick-Tock, Find the Clock,”
“Listening Walk,” and “Find
the Animal” and the activities
in Unit 1, Section I of the
Assessment and Remediation
Guide.
If students need additional
practice recreating noise
sequences, you may use the
Pausing Point exercise “Clap
the Pattern.”
• Gather various rhythm instruments or classroom objects and review them for
students by naming and making a noise with them.
• Hide the instruments or objects from view and have students identify them
by the noises they make. Students should respond with the names of the
instruments or objects.
• Make the noises of two instruments or objects, one after the other, with the
instruments or objects hidden from view.
• Have a student name the two instruments or objects and use the instruments
to produce noises in correct sequence.
• Repeat with several noise sequences of up to three noises until students
have had signi cant practice.
Note: For more student involvement, have the student who correctly
identi es the instruments or objects make the next set of noises.
How Many Noises? 10 minutes
If you have a tuning fork, you
may wish to sound it and
place it on each student’s
hand. This will allow students
to actually feel the vibrations
that result in the noise.
If students need additional
practice with left-to-right
directionality, you may use the
Pausing Point exercises “Tracing
Lines” and “Color Strips” and
the activities in Unit 1, Section
III of the Assessment and
Remediation Guide.
• Gather various rhythm instruments or classroom objects and place a mat and
three cubes for students to see.
• Make sure that, from the students’ perspective, you appear to be placing the
cubes from left to right.
• Select a student to come forward and make a noise using one instrument or
object.
• Once the student has made a noise, move one cube forward on the mat.
• Clear your mat and ask a student to come forward and make up to three
noises. For each noise, slide a cube on your mat.
• Distribute one mat and three cubes to each student.
• For each noise students hear, they should place one cube on the mat.
• Repeat with several noise sequences of up to three noises.
Note: One fun way to clear the mat is to brush off the cubes while making
a whoosh sound.

26 Unit 1 | Lesson 4
© 2013 Core Knowledge Foundation
Left/Right Discrimination 5 minutes
Greeting
The rough or silky glove
stimulates students’ sense
of touch.
If students need additional
practice differentiating
their hands, you may
use the Pausing Point
exercise “Left/Right Hand
Discrimination.”
• Today, wear some sort of rough or silky glove to shake students’ right
hands.
• Greet one student after the other by saying hello, looking him or her in the
eyes, and rmly shaking his or her right hand.
• Say, “Hello, . We greet others by shaking their right hands. I’m using
my right hand to shake your right hand.”
• Encourage students to greet you properly: “Hello, . I’m using my right
hand to shake your right hand.”
• After shaking each student’s right hand, ask the student how the glove feels.
Is it rough? Is it silky?
• Ask, “What’s left?” (The left hand!)
Finger/Hand Awareness 5 minutes
Reviewing the Tripod Grip
Tripod Grip
If students need additional
practice using the tripod
grip, you may use the
activities in Unit 1, Section IV
of the Assessment and
Remediation Guide.
• Provide each student with a small piece of crayon.
• Model the tripod grip for students. (The tripod grip is made by pinching the
base of a writing utensil with the thumb and pointer nger and resting the
shaft of the writing utensil on the tip of the middle nger.)
• Have students use the tripod grip to hold their crayons.
• Circulate, correcting grips.
Note: Some students might use the thumb, pointer nger, and middle
nger to pinch the crayon. The crayon then rests on the tip of the ring
nger. This alternate grip, called the quadropod grip, is ne as well.

Unit 1 | Lesson 4 27
© 2013 Core Knowledge Foundation
Drawing Time 25 minutes
Drawing Horizontal Lines on a Vertical Surface 10 minutes
Note: Drawing horizontal lines will prepare students to write the letters ‘e’,
‘f’, ‘t’, and ‘z’.
• Tape multiple pieces of chart paper to the wall at a height students can reach.
• Review the position words top, bottom, left, right, and middle with students,
pointing out the top, bottom, left side, right side, and middle of one of the
pieces of chart paper.
If students have trouble
drawing horizontal lines, you
can draw stars on the paper
to indicate where they should
start each horizontal line. Tell
students to “start at the star.”
If necessary, draw dots to
indicate end points, and tell
students to “stop at the dot.”
If students need additional
practice with horizontal lines,
you may use the Pausing
Point exercise “Tray Tracing”
and the activities in Unit 1,
Section IV of the Assessment
and Remediation Guide.
• Draw a horizontal line on the board. Explain to students that a horizontal line
is a straight line that goes from side to side; to draw a horizontal line, start on
the left and nish on the right.
• Invite students to trace horizontal lines on their desks (or in the air) with their
ngers.
• Have students draw horizontal lines on the chart paper.
• Circulate, correcting grips and assisting students in drawing horizontal lines.
• Remind students how to draw a vertical line.
• Have students draw vertical lines on the chart paper.
• Then have them alternate horizontal and vertical lines on the chart paper.
• Extension: Have two students draw two long horizontal lines on a piece of
chart paper. Have the other students draw short vertical lines across the
two horizontal lines. The students have created train tracks! If there is time,
students may draw trains on the track.
Horizontal Line Practice 15 minutes
Worksheets 4.1, 4.2
Note: When students are writing at their desks, the bottoms of their feet
should touch the oor, their feet should be parallel, and their backs should
be straight. Before asking students to write, have them shake their arms
above their heads and stamp their feet. This will ensure their posture is
suitable for writing.
• Distribute and display Worksheet 4.2 using your preferred projection system.
• Explain to students that the worksheet shows a student and a ladder, but the
ladder is missing its steps.
• Tell students you are going to add steps to the ladder so the student can
reach the top. They should do the same on their worksheets.
• Show students how to add steps to the ladder by tracing the dotted lines.
As you draw, explain that you are adding steps to the ladder by drawing
horizontal lines from left to right, starting at the stars.
• Continue demonstrating (providing guided practice) until students are ready
to work independently.

28 Unit 1 | Lesson 4
© 2013 Core Knowledge Foundation
• Tell students once they have nished the front of the worksheet, they should
complete the back of the worksheet.
• If students nish early, they may color the picture and/or draw a picture
containing at least one horizontal line.
Pretest
Blending Pretest
• If students are able to work independently, administer the blending pretest
(Worksheet 4.1) to individual students. If they are not, look for other
opportunities to administer the pretest.
Take-Home Material
Horizontal Line Practice
• Have students give Worksheet 4.3 to a family member.

Unit 1 | Lesson 4 29
© 2013 Core Knowledge Foundation
Blending Pretest
Scoring Sheet
Examples: /m/ . . . /ee/—me /s/ . . . /a/ . . . /d/—sad
1. /s/ . . . /ae/ (say) ______
2. /n/ . . . /oe/ (no) ______
3. /f/ . . . /i/ . . . /sh/ ( sh) ______
4. /s/ . . . /u/ . . . /n/ (sun) ______
5. /s/ . . . /i/ . . . /t/ (sit) ______
6. /m/ . . . /a/ . . . /t/ (mat) ______
7. /t/ . . . /e/ . . . /n/ (ten) ______
8. /b/ . . . /a/ . . . /d/ (bad) ______
9. /f/ . . . /l/ . . . /i/ . . . /p/ ( ip) ______
10. /sh/ . . . /i/ . . . /p/ (ship) ______
Notes:
Interpretation:
8 or more correct: Strong
5–7 correct: Fair to Good
4 or fewer: Weak
Total Correct:________________________________
Date
Name

30 Unit 1 | Lesson 4
© 2013 Core Knowledge Foundation
Class Record Sheet: Blending
Name say no fish sun sit mat ten bad flip ship Total

Unit 1 | Lesson 5 31
© 2013 Core Knowledge Foundation
The following language arts objectives are addressed in this lesson. Objectives aligning with the Common Core
State Standards are noted with the corresponding standard in parentheses. Refer to the Alignment Chart for
additional standards addressed in all lessons in this unit.
Objectives
Segment spoken sentences into words by
counting fingers (RF.K.2)
Count the number of environmental sounds
heard using a variety of classroom objects
(RF.K.2)
Segment spoken sentences into words by
moving cubes for every word spoken (RF.K.2)
Demonstrate understanding of directionality
by manipulating cubes right to left and by
extending the right hand to greet others
(RF.K.1a)
Demonstrate understanding of directionality
by manipulating playdough (L.K.1a)
Use spatial words while practicing writing
strokes in the air and on paper (L.K.1e)
Hold a writing utensil with a tripod (or
pincer) grip and make marks on paper using
small crayons (L.K.1a)
Demonstrate understanding of directionality
by tracking pictures from left to right (RF.K.1a)
At a Glance
Exercise Materials Minutes
Warm-Up
Counting with Fingers
5
Listening to
Environmental Noises
How Many Noises?
musical instruments or
classroom objects; cubes
(three per student); small
mats (one per student)
10
Listening to Words
Hearing Words in Phrases and
Sentences
cubes (three per student);
small mats (one per student)
10
Left/Right Discrimination
Greeting
small red dot stickers 5
Fine Motor Skills
Making Vertical Lines,
Horizontal Lines, and Circles
with Playdough
playdough 10
Drawing Time
Drawing Circles to the Left on
a Vertical Surface
crayons; chart paper 10
Tracking from Left to
Right and Top to Bottom
Tracking Practice
Worksheet 5.1 10
Take-Home Material
Circle Practice
Worksheet 5.2 *
Lesson 5
Emergent Reading and
Writing Skills

32 Unit 1 | Lesson 5
© 2013 Core Knowledge Foundation
Warm-Up 5 minutes
Counting with Fingers
• Count from one to 10, lifting one nger for each number as you count.
• Have students repeat after you.
Listening to Environmental Noises 10 minutes
How Many Noises?
If students need additional
practice discriminating noises,
you may use the Pausing
Point exercise “Listening Walk”
and the activities in Unit 1,
Section I of the Assessment
and Remediation Guide.
If students need additional
practice with left-to-right
directionality, you may use
the Pausing Point exercises
“Tracing Lines” and “Color
Strips” and the activities in Unit
1, Section III of the Assessment
and Remediation Guide.
• Gather various rhythm instruments or classroom objects and give one mat
and three cubes to each student.
• Explain that for each noise they hear, they should place one cube on the mat.
• Make the noise of one instrument or object and have students move one
cube forward on the mat.
• Have students clear their mats.
• Repeat this process several times, making up to three noises.
Listening to Words 10 minutes
Hearing Words in Phrases and Sentences
If students need additional
practice in awareness of
words, you may use the
Pausing Point exercise
“Grocery Shopping” and the
activities in Unit 1, Section II
of the Assessment and
Remediation Guide.
If students need additional
practice representing words
with objects, you may use
the Pausing Point exercise
“Counting with Cubes.”
If students need additional
practice with left-to-right
directionality, you may use
the Pausing Point exercises
“Tracing Lines” and “Color
Strips.”
Note: In this exercise students move away from environmental noises and
learn to break phrases and sentences into words. This process sets the
stage for breaking words into sounds. Students will learn this skill in Unit
2. Placing the cubes from left to right reinforces the directionality used in
reading. Again, students will represent a noise, in this case a word, with
an object (cube). This will prepare them to associate a sound with a sound
picture or letter.
• Position your mat and cubes so students can see them.
• Explain to the class that phrases and sentences are made up of words. Tell
the class you want them to try to hear the individual words in the phrases and
sentences you are going to say.
• Say, “Hit the ball.” twice—the rst time at a normal speaking pace and the
second time with an exaggerated pause between the words. Count the words
with your ngers.
• Say the phrase a third time and move one cube onto the mat for each word
you speak, counting the words with your ngers as you go.

Unit 1 | Lesson 5 33
© 2013 Core Knowledge Foundation
• Make sure from the students’ perspective, you appear to be placing the
cubes from left to right.
You may wish to have
students clap out the
words in each sentence,
or you may wish to have
them use a gross motor
movement for each word.
For example, you could
have them stomp their feet
or touch their noses.
• Ask an individual student to move the cubes and count the words.
• Distribute one mat and three cubes to each student.
• Complete the remaining phrases and sentences, or create your own using the
names of students in your class, such as “Susan’s red shirt.” Make sure to
only use phrases and sentences with three words.
1. Hit the ball.
2. a cold day
3. He hugs Mom.
4. Chocolate is sweet.
5. Dogs can bark.
6. Cats can purr.
Left/Right Discrimination 5 minutes
Greeting
If students need additional
practice differentiating their
hands, you may use the
Pausing Point exercise “Left/
Right Hand Discrimination.”
• Greet one student after the other by saying hello, looking him or her in the
eyes, and rmly shaking his or her right hand.
• Say, “Hello, . We greet others by shaking their right hands. I’m using
my right hand to shake your right hand.”
• Encourage students to greet you properly: “Hello, . I’m using my right
hand to shake your right hand.”
• After shaking each student’s right hand, place a red dot sticker on his or her
right hand.
• Ask, “What’s left?” The left hand.
Fine Motor Skills 10 minutes
Making Vertical Lines, Horizontal Lines, and Circles with Playdough
If students need additional
practice with fine motor
skills, you may use any of the
Pausing Point “Fine Motor
Activities” and the activities
in Unit 1, Section IV of the
Assessment and Remediation
Guide.
Note: This exercise is designed to strengthen ne motor muscles and
reinforce the concept of vertical and horizontal lines. It also introduces
students to circles.
• Provide each student with a piece of playdough. Keep a piece for yourself, too.
• Using the playdough, show students how to make a line: roll the playdough
into a ball, and then place the ball on a at surface and roll it into a line.
• Explain to students that you can make a vertical line by positioning the line
vertically and a horizontal line by positioning the line horizontally.
• Have students make vertical and horizontal lines using playdough.

34 Unit 1 | Lesson 5
© 2013 Core Knowledge Foundation
• Demonstrate forming a playdough line into a circle.
• Have students make playdough circles.
Drawing Time 10 minutes
Drawing Circles to the Left on a Vertical Surface
If students have trouble
drawing circles, you can draw
stars on the paper to indicate
where they should start each
circle. Draw a dot inside of
each star to indicate where
students should stop each
circle. Tell students circles are
special because they start and
stop at the same spot. Instruct
students to “start at the star
and stop at the dot.”
If students need additional
practice with circles, you
may use the Pausing Point
exercise “Tray Tracing” and the
activities in Unit 1, Section IV
of the Assessment and
Remediation Guide.
Note: Drawing circles to the left will prepare students to write the letters
‘a’, ‘c’, ‘d’, ‘e’, ‘g’, ‘o’, and ‘q’.
• Tape multiple pieces of chart paper to the wall at a height students can reach.
• Review the position words top, bottom, left, right, and middle with students,
pointing out the top, bottom, left side, right side, and middle of one of the
pieces of chart paper.
• Give each student a small piece of crayon.
• Draw a circle to the left on the board. Explain to students that when we draw
a circle to the left, we start near the top and move to the left.
• Invite students to trace circles to the left on their desks (or in the air) with
their ngers.
• Have students draw circles to the left on the chart paper.
• Circulate, correcting grips and assisting students in drawing circles to the left.
• Extension: Invite students to name some objects that are circle shaped, e.g.,
cookies, soccer balls, oranges, plates, the moon, etc. Have students draw
something that is circle shaped.

Unit 1 | Lesson 5 35
© 2013 Core Knowledge Foundation
Tracking from Left to Right and Top to Bottom 10 minutes
Tracking Practice
Worksheet 5.1
Note: This worksheet teaches students left-to-right tracking, which is
crucial for reading and writing. It is also an excellent whole group oral
exercise.
To help students with left-to-right directionality, you may wish to have them
color each star green and have them add a red stop dot to the end of each
row.
• Distribute Worksheet 5.1.
• Tell students to place their pointer ngers on the rst star.
If students need additional
tracking practice, you may use
the Pausing Point exercises
“Tracing Lines” and “Color
Strips” and the activities
in Unit 1, Section III of the
Assessment and Remediation
Guide.
• Ask students, “What is the next picture?”
• Once the class has provided the correct answer (a bird), ask students to
place their pointer ngers on the bird.
• Repeat with each of the remaining pictures in the rst row.
• Complete the items in the second, third, and fourth rows in the same fashion
as the rst row. Then complete the back of the worksheet.
Take-Home Material
Circle Practice
• Have students give Worksheet 5.2 to a family member.

36 Unit 1 | Lesson 6
© 2013 Core Knowledge Foundation
The following language arts objectives are addressed in this lesson. Objectives aligning with the Common Core
State Standards are noted with the corresponding standard in parentheses. Refer to the Alignment Chart for
additional standards addressed in all lessons in this unit.
Objectives
Segment spoken sentences into words by
counting fingers (RF.K.2)
Count the number of environmental sounds
heard using a variety of classroom objects
(RF.K.2)
Segment spoken sentences into words by
moving a cube for every word spoken
(RF.K.2)
Demonstrate understanding of
directionality by placing cubes on a mat
from left to right (RF.K.1a)
Use spatial words while practicing writing
strokes on paper (L.K.1e)
Hold a writing utensil with a tripod (or
pincer) grip and make marks on paper using
small crayons (L.K.1a)
At a Glance
Exercise Materials Minutes
Warm-Up
Counting with Fingers
5
Listening to
Environmental Noises
How Many Noises?
musical instruments or
classroom objects; cubes
(four per student); small mats
(one per student)
10
Listening to Words
Hearing Words in Phrases and
Sentences
cubes (four per student);
small mats (one per student)
10
Pretest
Writing Strokes Pretest
Worksheets 6.1, 6.2; crayons 20
Drawing Time
Circle to the Left Practice
Worksheet 6.3; crayons;
projection system
15
Take-Home Material
Increasing Sound and Word
Awareness
Worksheet 6.4 *
Note to Teacher
Continue to administer the blending pretest (from Lesson 4) to individual
students while the class is completing Worksheet 6.3 or doing other work you
deem appropriate.
Lesson 6
Emergent Reading and
Writing Skills
Student Performance
Task Assessment

Unit 1 | Lesson 6 37
© 2013 Core Knowledge Foundation
Students will also take a writing strokes pretest during this lesson. This
pretest assesses ne motor skills and prewriting abilities. The results will
indicate which students are almost ready to begin writing letters and which
students may need extra support over the course of this and the following
unit. This pretest is to be administered to the entire class as a group.
Collect the completed pretests, and evaluate them using the scoring guide
provided at the end of this lesson. Students who receive a “Progressing” or
“Ready” evaluation for most of the strokes are probably ready to attempt to
write letters, a task introduced in Unit 3. Handwriting will improve as students
practice drawing the strokes covered in Units 1 and 2. Students who receive
a “Not Yet Ready” evaluation on several of the strokes will probably need
additional support as they work through the ne motor exercises and writing
stroke exercises in Units 1 and 2. These students will need to improve
signi cantly during Units 1 and 2 in order to succeed in Unit 3 and beyond.
You may want to encourage the families of these students to practice the
activities on Worksheet 3.2 from Lesson 3.
Keep the results of this test in your assessment portfolio.
Warm-Up 5 minutes
Counting with Fingers
• Count from one to 10, lifting one nger for each number as you count.
• Have students repeat after you.
Listening to Environmental Noises 10 minutes
How Many Noises?
If students need additional
practice discriminating
noises, you may use the
Pausing Point exercise
“Listening Walk” and the
activities in Unit 1, Section
I of the Assessment and
Remediation Guide.
If students need additional
practice with left-to-right
directionality, you may use
the Pausing Point exercises
“Tracing Lines” and “Color
Strips” and the activities
in Unit 1, Section III of the
Assessment and Remediation
Guide.
• Gather various rhythm instruments or classroom objects and distribute one
mat and four cubes to each student.
• For each noise students hear, they should place one cube on the mat.
• Make one noise and have students move one cube forward on the mat.
• Have students clear their mats.
• Repeat this process several times, making up to four noises.
• Make sure students line up the cubes from left to right.

38 Unit 1 | Lesson 6
© 2013 Core Knowledge Foundation
Listening to Words 10 minutes
Hearing Words in Phrases and Sentences
Additional practice in
awareness of words can be
found in the Pausing Point
exercise, “Grocery Shopping.”
If students need additional
practice representing words
with objects, you may use
the Pausing Point exercise
“Counting with Cubes” and
the activities in Unit 1,
Section II of the Assessment
and Remediation Guide.
• Position your mat and cubes so students can see them.
• Tell the class you want them to learn to hear the individual words in the
phrases and sentences you are going to say.
• Say, “the green plant,” twice—the rst time at a normal speaking pace and
the second time with an exaggerated pause between the words. Count the
words with your ngers.
• Say the phrase a third time and move one cube onto the mat for each word
you speak, counting the words with your ngers as you go.
• Make sure from the students’ perspective, you appear to be placing the
cubes from left to right.
• Ask an individual student to move the cubes and count the words.
• Distribute one mat and four cubes to each student.
• Complete the remaining phrases and sentences, or create your own using the
names of students in your class.
Note: The examples below contain three or four words. Start with three-
word phrases and sentences and extend to four words.
1. the green plant
2. Practice makes perfect.
3. The sun is hot.
4. A car goes fast.
5. Red is a color.
6. A phone can ring.
Pretest 20 minutes
Writing Strokes Pretest
Worksheets 6.1, 6.2
• Distribute Worksheets 6.1 and 6.2.
• Provide each student with a small piece of crayon.
• Instruct students to copy each stroke in the box provided. (Feel free to
demonstrate on the board using strokes not being tested, e.g., a triangle, a
square, a heart, etc.)
Unit 1 | Lesson 6 39
© 2013 Core Knowledge Foundation
Drawing Time 15 minutes
Circle to the Left Practice
Worksheet 6.3
Note: When students are writing at their desks, the bottoms of their feet
should touch the oor, their feet should be parallel, and their backs should
be straight. Before asking students to write, have them shake their arms
above their heads and stamp their feet. This will ensure their posture is
suitable for writing.
• Distribute and display Worksheet 6.3.
• Explain to students the worksheet shows some snowmen, but each snowman
is missing three snowballs.
If students need additional
practice with circles, you
may use the Pausing
Point exercise “Tray
Tracing” and the activities
in Unit 1, Section IV
of the Assessment and
Remediation Guide.
• Tell students you are going to add three snowballs to each snowman. They
should do the same on their worksheets.
• Show students how to add snowballs to one of the snowmen by tracing
the dotted circles. As you draw, explain you are adding snowballs to the
snowman by drawing circles to the left, starting at the stars.
• Continue demonstrating (providing guided practice) until you feel students
are ready to work independently.
• Tell students once they have nished the front of the worksheet, they should
complete the back of the worksheet.
• If students nish early, they may color the pictures and/or draw a picture
containing at least one circle.
Take-Home Material
Increasing Sound and Word Awareness
• Have students give Worksheet 6.4 to a family member.

40 Unit 1 | Lesson 6
© 2013 Core Knowledge Foundation
Writing Strokes Scoring Guide:
Rate each student’s attempt to copy each writing stroke as Not Yet Ready (NYR), Progressing (P), or Ready (R).
Not Yet Ready (NYR): No attempt or mark on paper
whatsoever.
__________________________________________
Progressing (P):
__________________________________________
Ready (R):
NYR: No attempt or mark on paper whatsoever.
__________________________________________
P:
__________________________________________
R:
NYR: No attempt or mark on paper whatsoever.
__________________________________________
P:
__________________________________________
R:

Unit 1 | Lesson 6 41
© 2013 Core Knowledge Foundation
Writing Strokes Scoring Guide Continued
NYR:
__________________________________________
P:
__________________________________________
R:
NYR:
__________________________________________
P:
__________________________________________
R:
NYR:
__________________________________________
P:
__________________________________________
R:

42 Unit 1 | Lesson 6
© 2013 Core Knowledge Foundation
Writing Strokes Scoring Guide Continued
NYR:
__________________________________________
P:
__________________________________________
R:
NYR:
__________________________________________
P:
__________________________________________
R:
NYR:
__________________________________________
P:
__________________________________________
R:
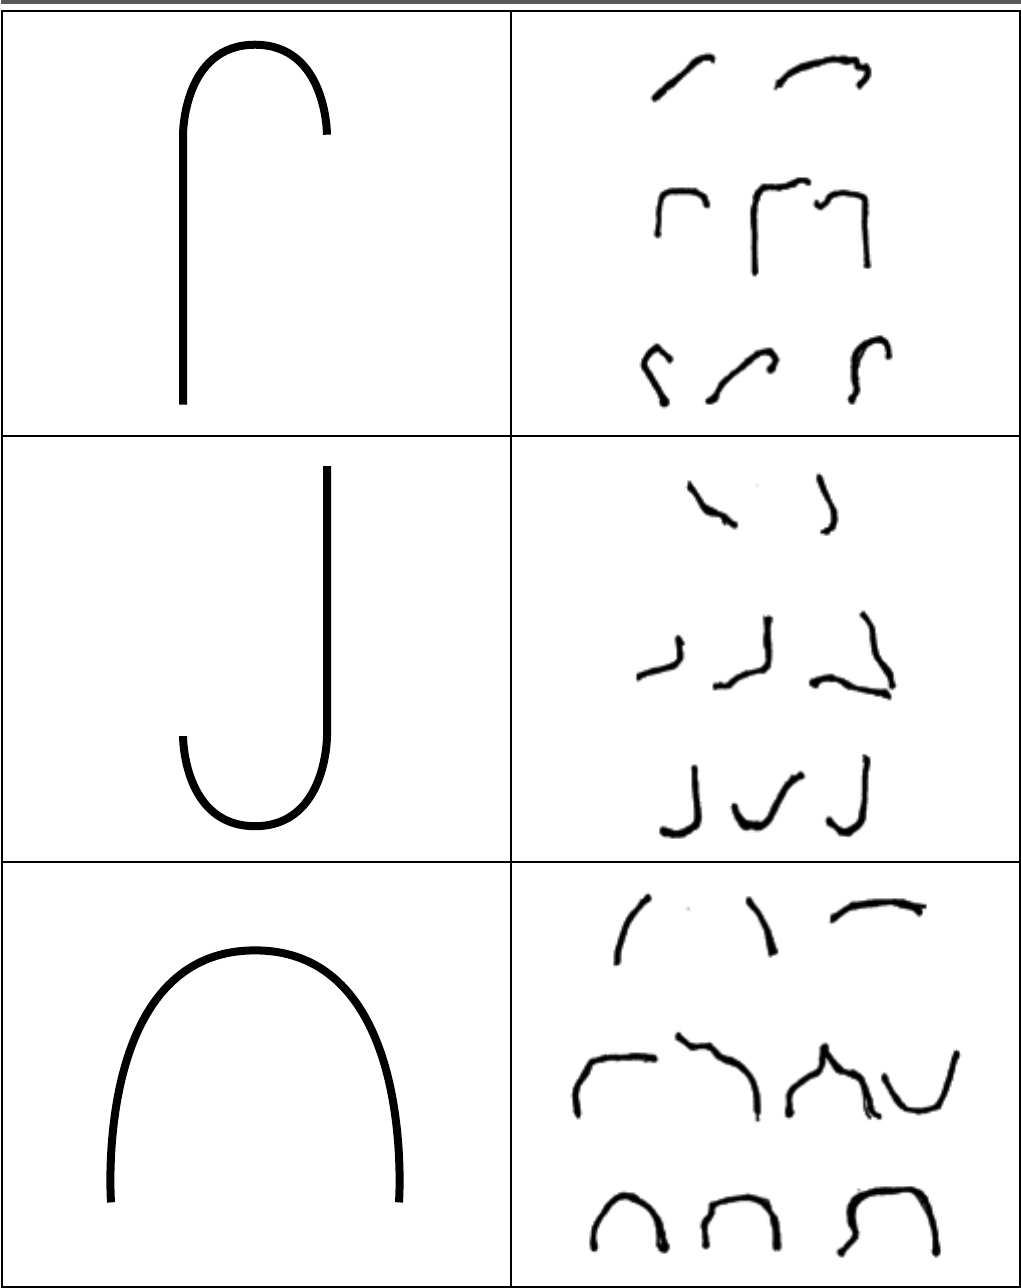
Unit 1 | Lesson 6 43
© 2013 Core Knowledge Foundation
Writing Strokes Scoring Guide Continued
NYR:
__________________________________________
P:
__________________________________________
R:
NYR:
__________________________________________
P:
__________________________________________
R:
NYR:
__________________________________________
P:
__________________________________________
R:

44 Unit 1 | Lesson 6
© 2013 Core Knowledge Foundation
NYR:
__________________________________________
P:
__________________________________________
R:
Writing Strokes Scoring Guide Continued
NYR:
__________________________________________
P:
__________________________________________
R:
NYR:
__________________________________________
P:
__________________________________________
R:

Unit 1 | Lesson 6 45
© 2013 Core Knowledge Foundation
Writing Strokes Scoring Guide Continued
Assign the following points for each rating:
NYR 0
P0.5
R1
Interpretation:
12 or more points Strong
8–11 points Good to Fair
7 or fewer points Weak
Note: Students will continue to practice Writing Strokes throughout Units 1
and 2 and should demonstrate progress by the end of Unit 2.
NYR:
__________________________________________
P:
__________________________________________
R:

46 Unit 1 | Lesson 6
© 2013 Core Knowledge Foundation
Writing Strokes: Class Summary Sheet
Name
horizontal
line
vertical line
dot
circle
spiral
diagonal lines
zigzag
moon
plus sign
cane
hook
hump
cup
wavy line
X
star
Total

Unit 1 | Lesson 7 47
© 2013 Core Knowledge Foundation
The following language arts objectives are addressed in this lesson. Objectives aligning with the Common Core
State Standards are noted with the corresponding standard in parentheses. Refer to the Alignment Chart for
additional standards addressed in all lessons in this unit.
Objectives
Segment spoken sentences into words by
counting fingers (RF.K.2)
Count the number of environmental sounds
heard, stepping forward each time a sound is
produced (RF.K.2)
Segment spoken sentences into words by
clapping hands (RF.K.2)
Use spatial words while practicing writing
strokes in the air and on paper (L.K.1e)
Demonstrate understanding of directionality
by tracking pictures from left to right (RF.K.1a)
Hold a writing utensil with a tripod (or
pincer) grip and make marks on paper using
small crayons (L.K.1a)
At a Glance
Exercise Materials Minutes
Warm-Up
Counting with Fingers
5
Listening to
Environmental Noises
Stepping Forward for Noises
musical instruments or
classroom objects
10
Listening to Words
Teacher-Student Echo
10
Drawing Time
Drawing Diagonal Lines on a
Vertical Surface
crayons; chart paper 10
Diagonal Line Practice
Worksheet 7.1; crayons;
projection system
15
Tracking from Left to
Right and Top to Bottom
Tracking Practice
Worksheet 7.2; crayons 10
Take-Home Material
Diagonal Line Practice
Worksheet 7.3 *
Note to Teacher
Continue to administer the blending pretest (from Lesson 4) to individual
students while the class is completing Worksheet 7.1 or doing other work you
deem appropriate.
Lesson 7
Emergent Reading and
Writing Skills

48 Unit 1 | Lesson 7
© 2013 Core Knowledge Foundation
Warm-Up 5 minutes
Counting with Fingers
• Count from one to 10, lifting one nger for each number as you count.
• Have students repeat after you.
Listening to Environmental Noises 10 minutes
Stepping Forward for Noises
To help the class with left-
to-right directionality, place
a large green “start star” to
the left of the line of students
and a large red “stop dot” to
the right.
• Gather various rhythm instruments or classroom objects which produce
noises.
• Select four students and have them line up facing the class.
• Make noise sequences with up to four noises. Have one student step forward
for each noise.
• Make sure students step forward from left to right.
• Repeat until all class members have had a turn.
(first noise)
(second noise)
(start)
Listening to Words 10 minutes
Teacher-Student Echo
Additional practice with
awareness of words may be
found in the Pausing Point
exercise “Grocery Shopping.”
If students need additional
practice representing words
with movements, you
may use the Pausing Point
exercises “Leap Frog” and
“Head, Shoulders, Knees,
and Toes” and the activities
in Unit 1, Section II of the
Assessment and Remediation
Guide.
Note: This exercise will help students develop the skills needed to break
phrases and sentences into words.
• Say a phrase or sentence, clap for each word, and then signal the number of
claps with your ngers.
• Have the class or a student repeat the phrase or sentence and clap for each
word.
Unit 1 | Lesson 7 49
© 2013 Core Knowledge Foundation
• Complete the remaining phrases and sentences or create your own using the
names of students or other things familiar to students (events, places, etc.).
Note: The examples below contain three to ve one-syllable words. Start
with three-word phrases and sentences and then extend to ve words.
1. the big cat
2. the small house
3. I love you.
4. It is hot.
5. We can play games.
6. We are in class.
7. The girls can clap.
8. The desks are all clear.
9. The books are all here.
10. The room is so clean.
Drawing Time 25 minutes
Drawing Diagonal Lines on a Vertical Surface 10 minutes
If students have trouble
drawing diagonal lines, you
can draw stars on the paper
to indicate where they should
start each diagonal line. Tell
students to “start at the star.”
If necessary, draw dots to
indicate end points, and tell
students to “stop at the dot.”
If students need additional
practice with diagonal lines,
you may use the Pausing Point
exercise “Tray Tracing” and the
activities in Unit 1, Section
IV of the Assessment and
Remediation Guide.
Note: Drawing diagonal lines will prepare students to write the letters ‘k’,
‘v’, ‘w’, ‘x’, ‘y’, and ‘z’.
• Tape multiple pieces of chart paper to the wall at a height students can reach.
• Review the position words top, bottom, left, right, and middle with students,
pointing out the top, bottom, left side, right side, and middle of one of the
pieces of chart paper.
• Give each student a small piece of crayon.
• Draw a diagonal line from top to bottom and left to right on the board. Explain
to students that a diagonal line is a slanted line; we can draw a diagonal line
by starting at the top left and nishing at the bottom right.
• Ask students to trace diagonal lines from top to bottom and left to right on
their desks (or in the air) with their ngers.
• Have students draw diagonal lines from top to bottom and left to right on the
chart paper.
• Draw a diagonal line from top to bottom and right to left on the board. Tell
students a diagonal line can also be drawn by starting at the top right and
nishing at the bottom left.
• Ask students to trace diagonal lines from top to bottom and right to left on
their desks (or in the air) with their ngers.
• Have students draw diagonal lines from top to bottom and right to left on the
chart paper.
• Circulate, correcting grips and assisting students as they draw diagonal lines.
• Extension: Ask students to nd vertical, horizontal, and diagonal lines in the
classroom.

50 Unit 1 | Lesson 7
© 2013 Core Knowledge Foundation
Diagonal Line Practice 15 minutes
Worksheet 7.1
Note: When students are writing at their desks, the bottoms of their feet
should touch the oor, their feet should be parallel, and their backs should
be straight. Before asking students to write, have them shake their arms
above their heads and stamp their feet. This will ensure their posture is
suitable for writing.
• Distribute and display Worksheet 7.1.
• Explain to students the worksheet shows some houses, but each house is
missing its roof.
• Tell students you are going to add a roof to each house. They should do the
same on their worksheets.
• Show students how to add a roof to each house by tracing the dotted lines.
As you draw, explain that you are adding a roof to each house by drawing
one diagonal line from top to bottom and right to left and another diagonal
line from top to bottom and left to right, starting at the star.
• Continue demonstrating (providing guided practice) until students are ready
to work independently.
• Tell students once they have nished the front of the worksheet, they should
complete the back of the worksheet.
• If students nish early, they may color the pictures and/or draw a picture
containing at least one diagonal line.
Tracking from Left to Right and Top to Bottom 10 minutes
Tracking Practice
Worksheet 7.2
If students need additional
tracking practice, you may
use the Pausing Point
exercises “Tracing Lines”
and “Color Strips” and the
activities in Unit 1, Section
III of the Assessment and
Remediation Guide.
• Distribute Worksheet 7.2.
• Tell students to place their pointer ngers on the rst star.
• Ask students, “What is the next picture?”
• Once the class has provided the correct answer (a mouse), tell students to
place their pointer ngers on the mouse.
• Repeat with each of the remaining pictures in the rst row.
• Complete the items in the second, third, and fourth rows in the same fashion
as the rst row. Complete the rows on the back of the worksheet.

Unit 1 | Lesson 7 51
© 2013 Core Knowledge Foundation
Take-Home Material
Diagonal Line Practice
• Have students give Worksheet 7.3 to a family member.

52 Unit 1 | Lesson 8
© 2013 Core Knowledge Foundation
The following language arts objectives are addressed in this lesson. Objectives aligning with the Common Core
State Standards are noted with the corresponding standard in parentheses. Refer to the Alignment Chart for
additional standards addressed in all lessons in this unit.
Objectives
Lesson 8
Emergent Reading and
Writing Skills
Segment spoken sentences into words by
counting fingers (RF.K.2)
Count the number of environmental sounds
heard, stepping forward each time a sound
is produced (RF.K.2)
Segment sentences into words by clapping
for each word spoken (RF.K.2)
Use spatial words while practicing writing
strokes in the air and on paper (L.K.1e)
Hold a writing utensil with a tripod (or
pincer) grip and make marks on paper using
small crayons (L.K.1a)
At a Glance
Exercise Materials Minutes
Warm-Up
Counting with Fingers
5
What is This?
crayons; chart paper 5
Listening to
Environmental Noises
Stepping Forward for Noises
muscial instruments or
classroom objects
10
Listening to Words
Teacher-Student Echo
10
Drawing Time
Drawing Squares on a Vertical
Surface
crayons; chart paper 15
Reviewing Vertical and
Horizontal Lines
Worksheet 8.1; crayons;
projection system
15
Note to Teacher
Continue administering the blending pretest (from Lesson 4) to individual
students while the class is completing Worksheet 8.1 or doing other work you
deem appropriate.
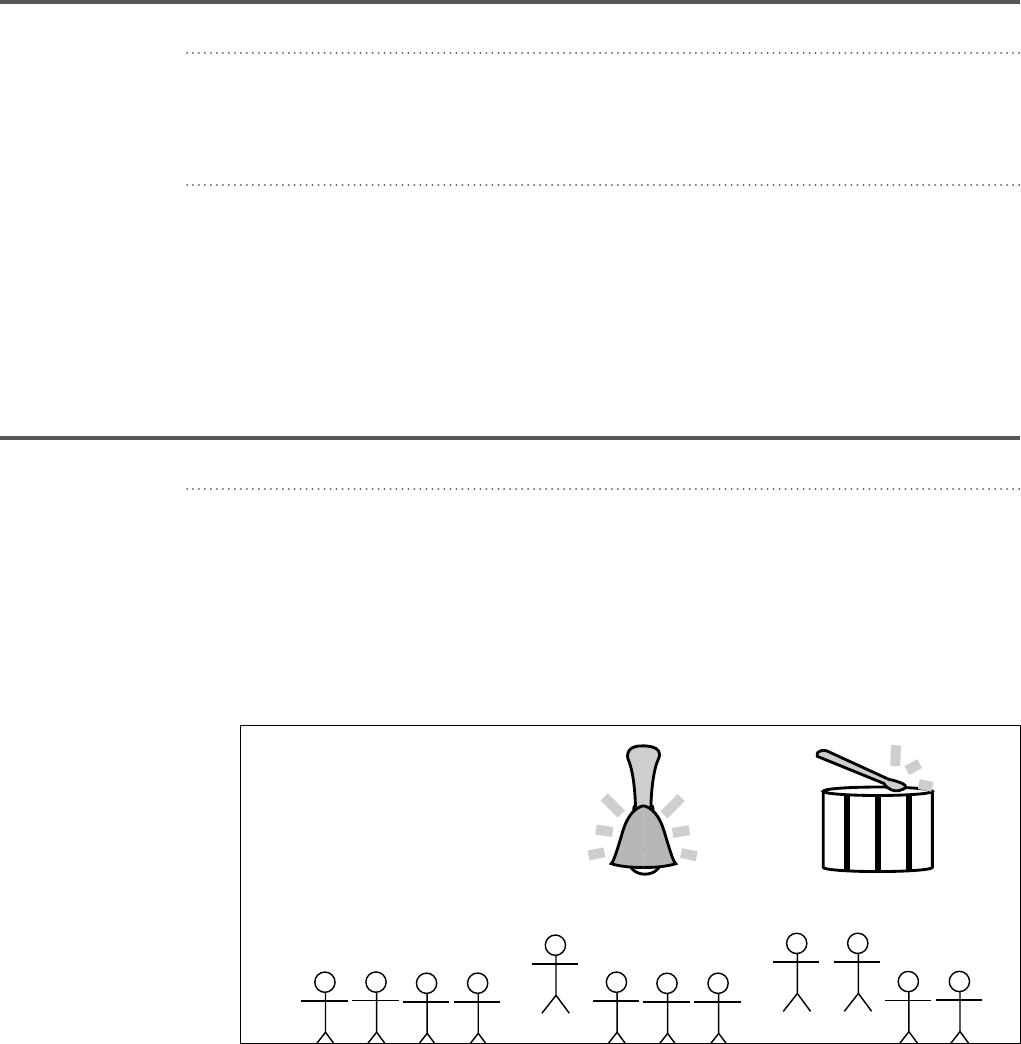
Unit 1 | Lesson 8 53
© 2013 Core Knowledge Foundation
Warm-Up 10 minutes
Counting with Fingers 5 minutes
• Count from one to ten, lifting one nger for each number as you count.
• Have students repeat after you.
What Is This? 5 minutes
• Draw a vertical line on chart paper, and ask students to identify it.
• Repeat with a horizontal line, a circle, a diagonal line from top to bottom and
left to right, and a diagonal line from top to bottom and right to left.
Note: Students should simply answer “diagonal line” for both diagonal
lines.
Listening to Environmental Noises 10 minutes
Stepping Forward for Noises
If students need additional
practice with left-to-right
directionality, you may use
the Pausing Point exercises
“Tracing Lines” and “Color
Strips” and the activities
in Unit 1, Section III of the
Assessment and Remediation
Guide.
• Gather various instruments or objects which make noises.
• Select four students and have them line up facing the class.
• Make one to four noises with the instruments or objects. Have one student
step forward for each noise.
• Make sure students step forward from left to right.
• Repeat until students have had signi cant practice.
(first noise)
(second noise)
(start)

54 Unit 1 | Lesson 8
© 2013 Core Knowledge Foundation
Listening to Words 10 minutes
Teacher-Student Echo
If students need additional
practice representing words
with movements, you may use
the Pausing Point exercises
“Leap Frog” and “Head,
Shoulders, Knees, and Toes”
and the activities in Unit 1,
Section II of the Assessment
and Remediation Guide.
One way to increase students’
attention span for language
is by having them memorize
nursery rhymes, e.g., “Jack Be
Nimble.”
• Say a sentence, clap for each word, and then signal the number of claps with
your ngers.
• Have the class or a student repeat the sentence and clap for each word.
• Complete the remaining sentences or create your own sentences with
classroom examples.
Note: The examples below contain three to six words. Start with three-
word phrases and sentences and then extend to six words.
1. Dogs are pets.
2. Milk is white.
3. I like cats and dogs.
4. One, two, three, look at me.
5. We eat lunch in the room.
Drawing Time 30 minutes
Drawing Squares on a Vertical Surface 15 minutes
1
2
3
4
Note: This exercise is important because understanding that writing
strokes can be combined to create a shape is similar to understanding that
writing strokes can be combined to create a letter.
• Tape multiple pieces of chart paper to the wall at a height students can reach.
If students have trouble
drawing squares, you can
draw stars on the paper to
indicate where they should
start each square. Draw
a dot inside of each star.
Tell students squares start
and stop at the same spot.
Instruct students to “Start at
the star and stop at the dot.”
If students need even more
support, draw a dot for each
of the remaining three corners
and tell students to “Turn at
each dot.”
If students need additional
practice with squares, you may
use the Pausing Point exercise
“Tray Tracing” and the activities
in Unit 1, Section IV of the
Assessment and Remediation
Guide.
• Review the position words top, bottom, left, right, and middle with students,
pointing out the top, bottom, left side, right side, and middle of one of the
pieces of chart paper.
• Give each student a small piece of crayon.
• Draw a square on the board, starting at its upper right corner. Explain to
students a square is made up of four lines: a horizontal line, then a vertical
line, then another horizontal line, and then another vertical line. Encourage
students to draw these squares without picking up their crayons (as shown).
• Ask students to trace squares on their desks or in the air with their ngers.
• Have students draw squares on the chart paper.
• Circulate, correcting grips and assisting students as they draw squares.
• Extension: Ask students to name some objects that are the shape of a
square, e.g., boxes, windows, tiles, etc. Have students draw something that
is in the shape of a square.

Unit 1 | Lesson 8 55
© 2013 Core Knowledge Foundation
Reviewing Vertical and Horizontal Lines 15 minutes
Worksheet 8.1
Note: When students are writing at their desks, the bottom of their feet
should touch the oor, their feet should be parallel, and their backs should
be straight. Before asking students to write, have them shake their arms
above their heads and stamp their feet. This will ensure their posture is
suitable for writing.
• Distribute and display Worksheet 8.1.
• Explain to students that the front of the worksheet has four hats and four
people.
• Tell students you are going to draw a line from each hat to the person below.
They should do the same on their worksheets.
• Show students how to trace the dotted lines. As you draw, tell students you
are connecting each hat to its owner by drawing a vertical line from top to
bottom, starting at the star.
• Have students turn Worksheet 8.1 over.
• Display the back of Worksheet 8.1.
• Explain to students that the back of the worksheet has ve animals and ve
homes.
• Tell students you are going to draw a line from each animal on the left to its
home on the right. They should do the same on their worksheets.
• Show students how to trace the dotted lines. As you draw, tell students you
are connecting each animal to its home by drawing a horizontal line from left
to right, starting at the star.
• Continue demonstrating (providing guided practice) until you feel students
are ready to work independently.
• Students nishing early, may color the pictures and/or draw a picture containing
at least one vertical line and at least one horizontal line if time permits.

56 Unit 1 | Lesson 9
© 2013 Core Knowledge Foundation
The following language arts objectives are addressed in this lesson. Objectives aligning with the Common Core
State Standards are noted with the corresponding standard in parentheses. Refer to the Alignment Chart for
additional standards addressed in all lessons in this unit.
Objectives
Lesson 9
Emergent Reading and
Writing Skills
Segment spoken sentences into words by
counting fingers (RF.K.2)
Count the number of environmental sounds
heard, stepping forward each time a sound is
produced (RF.K.2)
Segment spoken sentences into words by
stepping forward for each word in a phrase
or sentence (RF.K.2)
Demonstate understanding of directionality
by stepping forward from left to right (RF.K.1a)
Demonstrate understanding of
directionality by manipulating playdough
(RF.K.1a)
Use spatial words while practicing writing
strokes in the air and on paper (L.K.1e)
Hold a writing utensil with a tripod (or
pincer) grip and make marks on paper using
small crayons (L.K.1a)
At a Glance
Exercise Materials Minutes
Warm-Up
Counting with Fingers
5
Listening to Words
Stepping Forward for Words
10
Circle the Cubes
Worksheet 9.1; crayons;
projection system
10
Fine Motor Skills
Making Circles and Triangles
with Playdough
playdough 10
Drawing Time
Drawing Triangles on a
Vertical Surface
crayons; chart paper 10
Reviewing Circles and
Diagonal Lines
Worksheet 9.2; crayons;
projection system
15
Take-Home Material
Understanding Position
Words
Worksheet 9.3 *
Note to Teacher
Continue to administer the blending pretest (from Lesson 4) to individual
students while the class is completing other work you deem appropriate.

Unit 1 | Lesson 9 57
© 2013 Core Knowledge Foundation
Warm-Up 5 minutes
Counting with Fingers
• Count from one to 10, lifting one nger for each number as you count.
• Have students repeat after you.
Listening to Words 20 minutes
Stepping Forward for Words 10 minutes
To help the class with left-to-
right directionality, place a
large green “start dot” to the
left of the line of students
and a large red “stop dot” to
the right.
If students need additional
practice with left-to-right
directionality, you may use
the Pausing Point exercises
“Tracing Lines” and “Color
Strips” and the activities
in Unit 1, Section III of the
Assessment and Remediation
Guide.
• Select six students and have them line up facing the class.
• Have students count from one to six from left to right, each student stepping
forward as he or she says his or her number. Repeat until the students can do
this uently.
• Say the rst sentence, counting the number of words with your ngers.
• Repeat the sentence and have students step forward from left to right. One
student steps forward for each word.
• Select another six students and repeat the process with the next sentence.
• Continue until all students have had a turn.
1. The black cat is a friend.
2. The sad cat is not black.
3. A cat sat on the rug.
4. The small gray cat is glad.
5. Gray and black cats are fun.
6. The cats are in the box.
Circle the Cubes 10 minutes
Worksheet 9.1
If students are struggling
with awareness of words, you
may use the Pausing Point
exercise “Grocery Shopping”
and the activities in Unit 1,
Section II of the Assessment
and Remediation Guide.
• Distribute and display Worksheet 9.1 and provide each student with a small
piece of crayon.
• Tell students you are going to say a sentence and they should indicate how
many words are in the sentence by circling a cube on Worksheet 9.1 for each
word.
• Ask students to look at the rst row of cubes.
• Slowly say the rst sentence from the following box. Model the activity and
have students do the same on their worksheets.
• Complete the remaining sentences.
1. Mike is tall.
2. She laughed.
3. I like hot days.
4. The flower grew.

58 Unit 1 | Lesson 9
© 2013 Core Knowledge Foundation
Motor Skills 10 minutes
Making Circles and Triangles with Playdough
If students are struggling with
fine motor skills, you may use
the Pausing Point exercise
“Fine Motor Activities” and
the activities in Unit 1, Section
IV of the Assessment and
Remediation Guide.
• Provide each student with a piece of playdough.
• Using the playdough, show students how to make a line: roll the playdough
into a ball, and then place the ball on a at surface and roll it into a line.
• Have students make their own playdough lines.
• Demonstrate forming a playdough line into a circle.
• Have students make playdough circles.
• Demonstrate combining three playdough lines to make a triangle.
• Have students make playdough triangles.
Drawing Time 25 minutes
Drawing Triangles on a Vertical Surface 10 minutes
If students have trouble
drawing triangles, you may
draw stars on the paper to
indicate where they should
start each triangle. Draw
a dot inside of each star to
indicate where students
should stop each triangle.
Tell students triangles start
and stop at the same spot.
Instruct students to “start
at the star and stop at the
dot.” If students need even
more support, draw a small
triangle for each of the
remaining two corners and
tell students to “turn at the
triangles.”
Note: This exercise is important because understanding that writing
strokes can be combined to create a shape is similar to understanding that
writing strokes can be combined to create a letter.
• Tape multiple pieces of chart paper to the wall at a height students can reach.
• Review the position words top, bottom, left, right, and middle with students,
pointing out the top, bottom, left side, right side, and middle of one of the
pieces of chart paper.
• Give each student a small piece of crayon.
• Draw a triangle on the board. Explain to students a triangle is made up of
three lines: a diagonal line, a horizontal line, and another diagonal line.
• Ask students to trace triangles on their desks (or in the air) with their ngers.
• Have students draw triangles on the chart paper.
• Circulate, correcting grips and assisting students as they draw triangles.

Unit 1 | Lesson 9 59
© 2013 Core Knowledge Foundation
Reviewing Circles and Diagonal Lines 15 minutes
Worksheet 9.2
Note: When students are writing at their desks, the bottoms of their feet
should touch the oor, their feet should be parallel, and their backs should
be straight. Before asking students to write, have them shake their arms
above their heads and stamp their feet. This will ensure their posture is
suitable for writing.
• Distribute and display Worksheet 9.2.
• Explain to students that the front of the worksheet has six cars and six
garages, but the cars cannot enter the garages because there are no
driveways.
If students need additional
practice with triangles,
circles, or diagonal lines,
you may use the Pausing
Point exercise “Tray Tracing”
and the activities in Unit 1,
Section IV of the Assessment
and Remediation Guide.
• Tell students you are going to draw a circular driveway for each car. They
should do the same on their worksheets.
• Show students how to trace the dotted circles. As you draw, tell students you
are giving each car a driveway by drawing a circle to the left.
• Display the back of Worksheet 9.2.
• Explain to students that the back of the worksheet has four animals and four
homes.
• Tell students you are going to draw a line from each animal to its home. They
should do the same on their worksheets.
• Show students how to trace the dotted lines. As you draw, explain that you
are connecting each animal to its home by drawing a diagonal line, starting at
the star.
• Continue demonstrating (guided practice) until students are ready to work
independently.
• If students nish early, they may color the pictures and/or draw a picture
containing at least one circle and at least one diagonal line if time permits.
Take-Home Material
Understanding Position Words
• Have students give Worksheet 9.3 to a family member.

60 Unit 1 | Lesson 10
© 2013 Core Knowledge Foundation
The following language arts objectives are addressed in this lesson. Objectives aligning with the Common Core
State Standards are noted with the corresponding standard in parentheses. Refer to the Alignment Chart for
additional standards addressed in all lessons in this unit.
Objectives
Lesson 10
Student Performance
Task Assessment
Segment spoken sentences into words by
counting fingers (RF.K.2)
Segment sentences into words by counting
and moving cubes for each word spoken
(RF.K.2)
Demonstrate understanding of directionality
by stepping forward from left to right (RF.K.1a)
Hold a writing utensil with a tripod (or
pincer) grip and make marks on paper using
small crayons (L.K.1a)
At a Glance
Exercise Materials Minutes
Warm-Up
Counting with Fingers
5
What is This?
crayons; chart paper 5
Listening to Words
Hearing Words in Phrases and
Sentences
cubes (five per student); small
mats (one per student)
10
Stepping Forward for Words
10
Student Performance
Task Assessment
Unit 1 Student Performance
Task Assessment
Worksheets 10.1, 10.2; crayons 30
Take-Home Material
Tracking Practice
Worksheet 10.3 *
Note to Teacher
This is the last lesson in Unit 1. During this lesson, you will assess students to
ascertain their understanding of the material presented in Unit 1.
Worksheets 10.1 and 10.2 are assessment worksheets. The front of Worksheet
10.1 evaluates students’ ability to draw a vertical line, a horizontal line, a circle,
a diagonal line from top to bottom and left to right, and a diagonal line from
top to bottom and right to left. The back of Worksheet 10.1 tests students’
understanding of the position words left, right, top, middle, and bottom.
Worksheet 10.2 assesses students’ ability to hear separate words in sentences.
Collect the completed worksheets, and record a “writing strokes” score and
a “position words” score on the back of Worksheet 10.1. Record a “word
discrimination” score on the front of Worksheet 10.2.

Unit 1 | Lesson 10 61
© 2013 Core Knowledge Foundation
When evaluating the front of Worksheet 10.1, please refer to the Writing Strokes
Scoring Guide located at the end of Lesson 6. If a student’s writing stroke falls
into the “Not Yet Ready” category, mark it wrong.
When evaluating the back of Worksheet 10.1, check to see if the left box is
colored green, the right box is colored red, the top box is colored yellow, the
middle box is colored orange, and the bottom box is colored blue. If a box is
the wrong color or if it is not colored, mark it wrong.
When evaluating Worksheet 10.2, check to see if two cubes are circled for
item1, four cubes are circled for item 2, three cubes are circled for item 3,
and four cubes are circled for item 4.
Interpretation and Analysis
There are 14 items in the Unit 1 assessment. Students who miss three items
or less overall are performing well. However, a score of 2 or less in any one
section (Part One, Two, or Three) may be an indication students would bene t
from additional practice in the given area.
We recommend you use the Record Sheet for Unit 1 Assessment found at
the end of this lesson to record every student’s performance on each section.
Once this Record Sheet is complete, you should be able to scan it quickly
to determine whether there are groups of students who might bene t from
additional practice in a given area. There are numerous activities included
in the Unit 1 Pausing Point that may be used to provide additional practice
if there are students who would bene t from more practice. In this case, we
recommend that you pause—no more than one week—before continuing
to Unit 2. If there are only one or two speci c students who seem to be
experiencing dif culty, you may decide to continue to Unit 2 without pausing.
Be sure to look for opportunities to work with these individual students one-
on-one to provide additional practice in weak areas.
If students perform poorly on Part One, provide additional practice, especially
Pausing Point Sections “Develop Fine Motor Skills” and “Draw/Trace.”
You may also use the activities in Unit 1, Section IV of the Assessment and
Remediation Guide.
If students perform poorly on Part Two, provide additional practice from
Pausing Point sections “Develop an Understanding of Directionality,”
“Develop Bodily and Spatial Awareness,” and “Recognize Position Words.”
You may also use the activities in Unit 1, Section III of the Assessment and
Remediation Guide.
If students perform poorly on Part Three, provide additional practice using
various activities included in the Pausing Point. You may also use the activities
in Unit 1, Sections I and II of the Assessment and Remediation Guide.
There have only been three lessons since the writing strokes pretest was
given, so it is quite likely some students will not show a great deal of

62 Unit 1 | Lesson 10
© 2013 Core Knowledge Foundation
improvement. Students will continue to work on writing strokes throughout
Unit 2. The assessment at the end of that unit will offer another indication of
handwriting skills.
Keep the results of this assessment in the students’ assessment portfolios.
Warm-Up 10 minutes
Counting with Fingers 5 minutes
• Count from one to 10, lifting one nger for each number as you count.
• Have students repeat after you.
What is This? 5 minutes
• Draw a vertical line on chart paper, and ask students to identify it.
• Repeat with a horizontal line, a circle, a diagonal line from top to bottom and
left to right, and a diagonal line from top to bottom and right to left.
Note: Students should simply answer “diagonal line” for both diagonal lines.
Listening to Words 20 minutes
Hearing Words in Phrases and Sentences 10 minutes
If students are struggling
with awareness of words, you
may use the Pausing Point
exercise “Grocery Shopping”
and the activities in Unit 1,
Section II of the Assessment
and Remediation Guide.
If students need additional
practice representing words
with objects, you may use
the Pausing Point exercise
“Counting with Cubes” and
the activities in Unit 1,
Section II of the Assessment
and Remediation Guide.
If students need additional
practice with left-to-right
directionality, you may use
the Pausing Point exercises
“Tracing Lines” and “Color
Strips” and the activities
in Unit 1, Section III of the
Assessment and Remediation
Guide.
• Position your mat and cubes so students can see them.
• Tell the class you want them to try to hear the individual words in some
sentences you are going to say.
• Say, “We sit on chairs,” twice—the rst time at a normal speaking pace and
the second time with an exaggerated pause between the words.
• Say the sentence a third time and move one cube onto the mat for each word
you speak, counting the words.
• Make sure from the students’ perspective, you appear to be placing the
cubes from left to right.
• Ask an individual student to move the cubes and count the words.
• Give each student a small mat and ve cubes.
• Complete the remaining sentences or create your own sentences.
Note: The examples below contain four to ve words. Start with four-word
sentences and extend to ve words.
1. We sit on chairs.
2. The plant has leaves.
3. Each girl has five grapes.
4. The boys like to swing.
5. Pears and plums are fruit.
6. I eat hotdogs for lunch.

Unit 1 | Lesson 10 63
© 2013 Core Knowledge Foundation
Stepping Forward for Words 10 minutes
If students need additional
practice representing words
with movements, you
may use the Pausing Point
exercises “Leap Frog” and
“Head, Shoulders, Knees,
and Toes” and the activities
in Unit 1, Section II of the
Assessment and Remediation
Guide.
• Select six students and have them line up facing the class.
• Have students count from one to six from left to right, each student stepping
forward as he or she says his or her number. Repeat until students can do
this uently.
• Say the rst sentence, counting the number of words with your ngers.
• Repeat the sentence and have students step forward from left to right. One
student steps forward for each word.
• Select another six students and repeat the process with the next sentence.
• Continue until all students have had their turn.
1. Birds can sing and lay eggs.
2. Cats like to play and purr.
3. Dogs like to bark and lick.
4. Cats run up trees really fast.
5. Cows eat grass and give milk.
6. Some bears like to eat bugs.
Student Performance Task Assessment 30 minutes
Unit 1 Student Performance Task Assessment
Worksheet 10.1
Part One
• Distribute Worksheet 10.1.
• Provide each student with a green crayon, a red crayon, a yellow crayon, an
orange crayon, and a blue crayon.
• Instruct students to copy each shape on the front of the worksheet.
Part Two
• Once students have completed the front of the worksheet, have them turn
Worksheet 10.1 over.
• Hold up a green crayon, and tell students to quickly color the box on the left
green.
• Wait for students to nish coloring.
• Hold up a red crayon, and tell students to quickly color the box on the right
red.
• Wait for students to nish coloring.
• Hold up a yellow crayon, and tell students to quickly color the top box yellow.
• Wait for students to nish coloring.
• Hold up an orange crayon, and tell students to quickly color the middle box
orange.
• Wait for students to nish coloring.

64 Unit 1 | Lesson 10
© 2013 Core Knowledge Foundation
• Hold up a blue crayon, and tell students to quickly color the bottom box
blue.
• Wait for students to nish coloring and collect papers.
Part Three
Worksheet 10.2
• Distribute Worksheet 10.2.
• Tell students you are going to say a sentence. Explain to students they should
indicate how many words are in the sentence by circling a cube for each
word.
• Direct students’ attention to the rst row of cubes.
• Slowly say the rst sentence from the following box. Tell students to circle a
cube for each word in the sentence.
• If necessary, repeat the sentence.
• Complete the activity using the remaining sentences.
1. I smiled.
2. They found a bug.
3. He has toys.
4. She has a cat.
Take-Home Material
Tracking Practice
• Have students give Worksheet 10.3 to a family member.
Unit 1 | Lesson 10 65
© 2013 Core Knowledge Foundation
Record Sheet for Unit 1 Assessment
Name Part One Part Two Part Three Notes

66 Unit 1 | Lesson 10
© 2013 Core Knowledge Foundation
Students Needing Additional Instruction at the End of Unit 1
A. Students who scored 2 or less on
Part One
B. Students who scored 2 or less on
Part Two
C. Students who scored 2 or less on
Part Three

Unit 1 | Lesson 10 67
© 2013 Core Knowledge Foundation
Next Steps
For students in Column A
• Provide practice from the following Pausing Point sections:
• Draw/Trace
• Develop Fine Motor Skills
• Additional practice activities may also be found in Unit 1, Section IV of the
Assessment and Remediation Guide.
For students in Column B
• Provide practice from the following Pausing Point sections:
• Develop an Understanding of Directionality
• Develop Bodily and Spatial Awareness
• Recognize Position Words
• Additional practice activities may also be found in Unit 1, Section III of the
Assessment and Remediation Guide.
For students in Column C
• Provide practice from the following Pausing Point sections:
• Develop Awareness of Noises
• Discriminate Noises
• Represent a Word with a Movement/Object
• Additional practice activities may also be found in Unit 1, Sections I and II of
the Assessment and Remediation Guide.

68 Unit 1 | Pausing Point
© 2013 Core Knowledge Foundation
With the conclusion of Unit 1, if a signi cant number of students are having
dif culty with any of the objectives, pause here and spend additional
days reviewing the material presented in this unit. You may have students
complete any combination of the exercises listed below, in any order. The
exercises are listed under the unit objectives they satisfy. Procedures are not
reprinted for exercises included in the Unit 1 lessons. Instead, we simply list
the lessons where these exercises can be found. Exercises not included in
the Unit 1 lessons, however, have procedures printed here.
If individual students are having trouble with speci c skills, you can provide
pullout instruction and/or targeted homework assignments.
Pausing Point Topic Guide
Develop Awareness of Noises
Knocking and Counting Lessons 1, 2
Same or Different? Lessons 1, 2
What Did You Hear? Lessons 3, 4
How Many Noises? Lessons 3–6
Stepping Forward for Noises Lessons 7, 8
Discriminate Noises
Knocking and Counting Lessons 1, 2
Same or Different? Lessons 1, 2
What Did You Hear? Lessons 3, 4
How Many Noises? Lessons 3–6
Stepping Forward for Noises Lessons 7, 8
Listening Walk Page 71
Identify the Source of a Noise
What Did You Hear? Lessons 3, 4
Tick-Tock, Find the Clock Page 71
Find the Animal Page 71
Recreate a Noise Sequence
What Did You Hear? Lessons 3, 4
Clap the Pattern Page 72
Represent a Noise with a Movement/Object
Knocking and Counting Lessons 1, 2
How Many Noises? Lessons 3–6
Unit 1 Pausing Point

Unit 1 | Pausing Point 69
© 2013 Core Knowledge Foundation
Stepping Forward for Noises Lessons 7, 8
Develop Awareness of Words
Hearing Words in Phrases and Sentences Lessons 5, 6, 10
Teacher-Student Echo Lessons 7, 8
Stepping Forward for Words Lessons 9, 10
Grocery Shopping Page 72
Represent a Word With a Movement/Object
Counting with Fingers Lessons 1–10
Hearing Words in Phrases and Sentences Lessons 5, 6, 10
Teacher-Student Echo Lessons 7, 8
Stepping Forward for Words Lessons 9, 10
Counting with Cubes Page 73
Leap Frog Page 73
Head, Shoulders, Knees, and Toes Page 74
Develop an Understanding of Directionality/Track
from Left to Right and Top to Bottom
Counting with Fingers Lessons 1–10
How Many Noises? Lessons 3–6
Stepping Forward for Noises Lessons 7, 8
Hearing Words in Phrases and Sentences Lessons 5, 6, 10
Stepping Forward for Words Lessons 9, 10
Greeting Lessons 1–5
Left/Right Hand Discrimination Page 75, Worksheet PP1
Tracking Practice Page 75,
Worksheets 5.1, 7.2
Tracing Lines Page 75,
Worksheet 4.2
Color Strips Page 75
Develop Fine Motor Skills
Fine Motor Activities Page 75
Playdough Shapes Page 75
Develop Bodily and Spatial Awareness
Follow Me Lessons 1–3
Gross Motor Activities Page 76
Recognize Position Words
Follow Me Lessons 1–3
The Grand Old Duke of York Page 76

70 Unit 1 | Pausing Point
© 2013 Core Knowledge Foundation
Identify Shapes
What is This? Lessons 8, 10
Draw/Trace
Drawing on a Vertical Surface Page 77
Drawing on a Horizontal Surface Page 77
Coloring Sheets Worksheets PP2, PP3, PP4,
PP5
Tracing and Copying Shapes Worksheet PP6
Tracing Lines Worksheet PP6
Tray Tracing Page 77
Develop Awareness of Noises
Knocking and Counting
• See Lessons 1 and 2.
Same or Different?
• See Lessons 1 and 2.
What Did You Hear?
• See Lessons 3 and 4.
How Many Noises?
• See Lessons 3–6.
Stepping Forward for Noises
• See Lessons 7 and 8.
Discriminate Noises
Knocking and Counting
• See Lessons 1 and 2.
Same or Different?
• See Lessons 1 and 2.
What Did You Hear?
• See Lessons 3 and 4.
How Many Noises?
• See Lessons 3–6.

Unit 1 | Pausing Point 71
© 2013 Core Knowledge Foundation
Stepping Forward for Noises
• See Lessons 7 and 8.
Listening Walk
You can introduce this
exercise by reading “The
Listening Walk” (by Paul
Showers) to the class.
Note: This is an excellent transition exercise. You may use this exercise
when the class is outside or walking to and from the classroom.
• Take a walk with students.
• Tell students to raise their hands and wait to be called on if they would like to
identify a noise they hear.
• Call on students to share.
Note: If you like, you can adapt the question-and-answer structure found
in “Brown Bear, Brown Bear, What Do You See?” For example, “Brandon,
Brandon, what do you hear?” Answer: “I hear a bird chirping in my ear.”
• Extension: Have students point to the sources of the sounds they hear.
• After the walk, ask students which noise they heard rst/last and which noise
was the quietest/loudest.
• Extension: Have students draw something they heard during the walk. Make
a class book with the drawings.
Identify the Source of a Noise
What Did You Hear?
• See Lessons 3 and 4.
Tick-Tock, Find the Clock
• Let students listen to the noise made by a kitchen timer or a wind-up toy.
• Have students close their eyes.
• Hide the object somewhere in the classroom.
• Have students open their eyes.
• Ask a student to locate the object by “following its sound.”
• Once the student has found the object, let him or her hide it.
Find the Animal
• Have the class sit in a circle.
• Select one student to sit blindfolded in the center of the circle.
• Select a second student to go somewhere in the classroom and make an
animal sound.

72 Unit 1 | Pausing Point
© 2013 Core Knowledge Foundation
• Ask the blindfolded student what animal his or her classmate is pretending to
be and point to the location of the sound.
• After the blindfolded student gives the correct answers, he or she becomes the
next animal impersonator and a new student moves to the center of the circle.
Recreate a Noise Sequence
What Did You Hear?
• See Lessons 3 and 4.
Clap the Pattern
• Tell students you are going to clap out a pattern for them to repeat.
• Start with one or two claps, and gradually increase to ve claps.
• Variation: Have students clap their knees, head, etc.
Represent a Noise with a Movement/Object
Knocking and Counting
• See Lessons 1 and 2.
How Many Noises?
• See Lessons 3–6.
Stepping Forward for Noises
• See Lessons 7 and 8.
Develop Awareness of Words
Hearing Words in Phrases and Sentences
• See Lessons 5, 6, and 10.
Teacher-Student Echo
• See Lessons 7 and 8.
Stepping Forward for Words
• See Lessons 9 and 10.
Grocery Shopping
• Gather ve pictures of items that can be purchased at a grocery store.
• Have the class identify each item.

Unit 1 | Pausing Point 73
© 2013 Core Knowledge Foundation
• Display one of the pictures, and tell the class, “Tonight, I am going to buy
[name of item] from the grocery store.”
• Have students repeat the sentence.
• Display a second picture alongside the rst, and tell the class, “Tonight, I am
going to buy [name of rst item] and [name of second item] from the grocery
store.”
• Have students repeat the sentence.
• Continue until all ve pictures are displayed and all ve items are included in
the sentence.
• Remove the pictures and see if students can repeat the nal sentence without
the picture clues.
• Extension: Use this exercise to strengthen counting skills by having students
count the items.
Represent a Word with a Movement/Object
Counting with Fingers
• See Lessons 1–10.
Hearing Words in Phrases and Sentences
• See Lessons 5, 6, and 10.
Teacher-Student Echo
• See Lessons 7 and 8.
Stepping Forward for Words
• See Lessons 9 and 10.
Counting with Cubes
• Give each student a mat and 10 cubes.
• Have each student position his or her mat with the green star on the left and
the red dot on the right.
• Have students count from one to 10, placing one cube on their mat for each
number.
Note: Students should place each cube between the green star and the
red dot, with each additional cube getting closer and closer to the red dot.)
Leap Frog
• Make three “lily pads” out of construction paper.
• Place the three lily pads in a row on the oor. You may wish to tape the lily
pads in place.

74 Unit 1 | Pausing Point
© 2013 Core Knowledge Foundation
• Say a three-word sentence and have a student jump on the rst pad for the
rst word, the second pad for the second word, and the third pad for the third
word.
• If students are ready for longer sentences, tape down as many as ve lily
pads and say sentences containing up to ve words.
• Variation: Instead of having students jump from lily pad to lily pad, have them
jump on a hopscotch board.
Head, Shoulders, Knees, and Toes
• Sing the song “Head, Shoulders, Knees, and Toes” as a class.
• Each time you say the name of a body part, touch that body part.
• Sing the song a second time, increasing the tempo.
Head, shoulders, knees, and toes
Knees and toes
Head, shoulders, knees, and toes
Knees and toes
Eyes and ears and mouth and nose
Head, shoulders, knees, and toes
Knees and toes
Develop an Understanding of Directionality/Track from Left to Right and
Top to Bottom
Counting with Fingers
• See Lessons 1–10.
How Many Noises?
• See Lessons 3–6.
Stepping Forward for Noises
• See Lessons 7 and 8.
Hearing Words in Phrases and Sentences
• See Lessons 5, 6, and 10.
Stepping Forward for Words
• See Lessons 9 and 10.
Unit 1 | Pausing Point 75
© 2013 Core Knowledge Foundation
Greeting
• See Lessons 1–5.
Left/Right Hand Discrimination
Worksheet PP1
• Distribute Worksheet PP1.
• Provide each student with a red and a green crayon.
• Tell students to place their hands on top of the hands on the worksheet.
• Have students determine which hand is the left hand and which hand is the
right hand.
• Tell students to color the left hand green and the right hand red.
• If time permits, students may decorate the hands with patterns.
Tracking Practice
• See Lessons 4, 5, and 7
Tracing Lines
• Draw a horizontal line, a vertical line, and a diagonal line on a sheet of paper.
• Give each student a photocopy of the sheet and a small piece of crayon.
• Tell students to trace each line from left to right. (If necessary, model this on
the board.)
Note: You can place a green “start star” on the left of each sheet and a red
“stop dot” on the right to help students with left-to-right directionality.
Color Strips
• Give each student a strip of paper that has a row of colored dots on it. The
dot on the far left should be green and the dot on the far right should be red.
Between the green and red dots, place dots of other colors. The colors need
to be in the same order on all student strips.
• Tell students you are going to say the names of the colors on the strip from
left to right. Students should touch each color as you say its name.
• Say the color names from left to right.
• Repeat multiple times.
Develop Fine Motor Skills
Fine Motor Activities
• The following activities are excellent for strengthening ne motor skills: building
with blocks, pouring water from a pitcher to a cup, cutting and pasting, hole
punching, stringing beads onto thread, lacing hole-punched cards.

76 Unit 1 | Pausing Point
© 2013 Core Knowledge Foundation
Playdough Shapes
• Have students use playdough to make the strokes and shapes covered in Unit1.
Develop Bodily and Spatial Awareness
Follow Me
• See Lessons 1–3.
Gross Motor Activities
• The following activities are excellent for strengthening gross motor skills:
throwing a ball overhand, hopping on one foot, playing tag, kicking a ball,
marching, dancing to a song.
Recognize Position Words
Follow Me
• See Lessons 1–3.
The Grand Old Duke of York
• Recite the following poem, emphasizing the position words up, top, and down.
• As you recite the poem, invite the class to act it out.
The grand old Duke of York,
He had ten thousand men.
He marched them up to the top of the hill,
And he marched them down again.
When they were up, they were up.
And when they were down, they were down.
And when they were only halfway up,
They were neither up nor down.
Identify Shapes
What is This?
• See Lessons 8 and 10.
• Variation: Have students take turns drawing shapes on the board for the class
to identify.
Unit 1 | Pausing Point 77
© 2013 Core Knowledge Foundation
Draw/Trace
Drawing on a Vertical Surface
• Have students draw vertical lines (see Lesson 2), horizontal lines (see Lesson
4), circles (see Lesson 5), diagonal lines (see Lesson 7), squares (see Lesson
8), or triangles (see Lesson 9) on pieces of chart paper which have been
af xed to the wall.
Drawing on a Horizontal Surface
• Have students sit at their desks and draw vertical lines (see Lesson 2),
horizontal lines (see Lesson 4), circles (see Lesson 5), diagonal lines (see
Lesson 7), squares (see Lesson 8), or triangles (see Lesson 9) on sheets of
paper.
Coloring Sheets
If you prefer, you may have
students draw and color their
own pictures.
Worksheets PP2, PP3, PP4, PP5
• Distribute Worksheet PP2, PP3, PP4, or PP5.
• Provide students with crayons.
• Instruct students to outline the gure several times using different colored
crayons. Students may decorate the gure using the strokes they have
learned in this unit if time permits.
• Extension: Have students decorate the gure with speci c patterns of writing
strokes.
Tracing and Copying Shapes
Worksheet PP6
• Distribute Worksheet PP6.
• Provide each student with a small piece of crayon.
• Have students trace and draw each shape.
Tracing Lines
• See Tracing and Copying Shapes.
Tray Tracing
• Give each student a shallow tray containing sand or rice.
• Have students trace any of the Unit 1 shapes in the sand or rice.

78 Unit 1 | Appendix A
© 2013 Core Knowledge Foundation
Appendix A: About This Program
The Core Knowledge Language Arts Program
The Core Knowledge Language Arts program is unlike most reading programs
with which you are familiar. It has been developed by the Core Knowledge
Foundation, a non-pro t, non-partisan educational foundation based in
Charlottesville, Virginia. The foundation’s mission is to offer all children a
better chance in life and create a fairer and more literate society by educating
America’s youth in a solid, specifi c, sequenced, and shared curriculum. This
program is an attempt to realize that mission. Speci cally, the program aims
to combine excellent decoding instruction with frequent reading-aloud in order
to ensure that students can translate letters into words and make sense of the
words they are decoding.
About Core Knowledge
E. D. Hirsch, Jr.
Core Knowledge was founded in the late 1980s by E. D. Hirsch, Jr., a professor
at the University of Virginia. In the 1980s, Hirsch’s research focused on the
question of why one piece of writing is easier to read than another. As part
of this research, he created two versions of the same passage for college
students to read. One version was considered well written because it followed
principles of clarity and style laid out in style books such as Strunk and White’s
Elements of Style. The other version did not follow those principles and
was considered poorly written. Hirsch then asked a large number of college
students to read the passages. He recorded the time it took them to read the
passages and how well they were able to answer comprehension questions
about the passages. He wanted to see if the well-written passages would be
read more rapidly and understood more fully than the poorly written ones. He
found that they were, but he also found another factor that was even more
important for comprehension than the clarity of the writing. He found that
readers who possessed a wide base of background knowledge were able to
make sense of a wide range of passages, whereas students who lacked this
knowledge were not.
Hirsch conducted his tests at the University of Virginia and a nearby community
college. He found that students at the community college could decode well
enough and could read and understand passages on everyday topics like
roommates and manners. Many of the community college students struggled
when the passages treated historical and scienti c subjects. One passage on
two Civil War generals, Ulysses S. Grant and Robert E. Lee, was especially
dif cult for many of them. It turned out that many of the community college
students tested knew little about the Civil War. They did not know who Grant
and Lee were, and, as a result, they struggled to make sense of the passage,
even though they could decode the words Grant and Lee. Hirsch realized these
students were struggling to make sense of the passages, even though their
decoding skills were good. It was obvious, then, that reading comprehension
required something more than just basic decoding skills.
Unit 1 | Appendix A 79
© 2013 Core Knowledge Foundation
Cultural Literacy
Hirsch wrote about his insights in a 1987 bestseller, Cultural Literacy. He
argued that full literacy requires not just decoding skills but also knowledge of
words, concepts, persons, places, and ideas writers tend to take for granted.
Schools must take the responsibility of imparting this body of knowledge,
which Hirsch called “cultural literacy.” Hirsch went on to found the Cultural
Literacy Foundation in order to promote the teaching of cultural literacy in
American elementary schools. The foundation later changed its name to the
Core Knowledge Foundation (CKF), but its mission has never changed. CKF
publishes curriculum materials for Pre-K through Grade 8, provides teacher
training, and hosts conferences for educators teaching in Core Knowledge
schools across the country.
The Core Knowledge Language Arts (CKLA) program is an early reading
program based on the work of E. D. Hirsch. It combines his insights with 50
years of reading research, as summarized in the report of the National Reading
Panel.
The Simple View of Reading
Hirsch’s insight about the necessity of background knowledge has been
con rmed in many experiments. Virtually everyone who writes about reading
now recognizes that reading comprehension requires more than just decoding
ability. Many reading researchers now subscribe to a view of reading that is
known as “the simple view of reading.” This view, which is associated with
reading researchers Philip Gough and William Tunmer, holds that there are two
chief elements that are crucially important to reading comprehension: decoding
skills and language comprehension ability.
To achieve reading comprehension, a person needs to be able to decode the
words on the page and then make sense of those words. The rst task is made
possible by decoding skills and the second by language comprehension ability.
If the person cannot decode the words on the page, she will not be able to
achieve reading comprehension, no matter how much oral language she can
understand. Even if the person can decode the words on the page, that in and
of itself is still no guarantee of reading comprehension (as Hirsch discovered
in his experiments). If the sentences the person is attempting to read are
sentences she could not understand if they were read aloud to her, then there
is not much hope that she will understand them during independent reading.
Supporters of the simple view—and there are a growing number of them
among reading researchers—argue that a person’s reading comprehension
ability can be predicted, with a high degree of accuracy, based on two basic
measures. The rst is a measure of decoding skills, e.g., a test of single-
word reading or pseudoword reading. The second is a measure of listening
comprehension. Researchers who hold to the simple view say, “Tell me a
person’s decoding ability, as ascertained by a word-reading task, and tell me
that person’s language comprehension ability, as ascertained by a listening
comprehension task, and I can make a very accurate prediction of that
person’s reading comprehension ability.” If the person is a rapid and accurate

80 Unit 1 | Appendix A
© 2013 Core Knowledge Foundation
decoder and also able to understand a wide range of oral language—for
instance, classroom presentations, news items on the radio or TV, books on
tape, etc.—then it is a safe bet the person will also do well on tests of reading
comprehension.
An interesting thing about the simple view of reading is that it can be expressed
as an equation:
R = D x C
In this equation, each of the letters is a variable that stands for a specific skill:
R is a measure of reading comprehension ability.
D is a measure of decoding skills.
C is a measure of language comprehension ability as measured using a listening
task.
Each of these skills can be quanti ed as a numerical value between 0 and 1,
where zero stands for no ability whatsoever and 1 stands for perfect, not-to-
be-improved-upon ability. Obviously most people have a skill level that falls
somewhere between these two extremes.
The equation says that if you have some decoding ability (D > 0) and you
also have some language comprehension ability (C > 0), you will probably
also have some reading comprehension ability (R > 0). How much reading
comprehension ability you have will depend on the exact values of D and C.
What does it mean to have no decoding ability (D = 0)? It means you cannot
turn printed words back into spoken words. A person who cannot decode
letters on a page cannot read. The person is illiterate.
What does it mean to have no language comprehension ability (C = 0)? Basically,
it means you do not know the language, and you cannot understand any of it
when you hear other people speaking or reading aloud in that language.
John Milton
It is not very common for a person to have decoding ability (D > 0) but not
language comprehension ability (C = 0). Why would you learn to read and write
a language you cannot understand? It does happen. One famous example
involves the English poet John Milton, the author of Paradise Lost and other
well-known poems. Milton went blind late in life. Since Braille had not yet been
invented, this meant he could not read for himself. Nevertheless, Milton found
a way to keep learning from books: he had friends and relatives read the books
aloud for him. However, he was not always able to nd a scholar who had the
free time and the ability needed to read to him in Hebrew, Greek, Latin, and
other ancient languages. The solution? Milton taught his daughters to decode
these languages so they could read books in those languages aloud to him.
Milton did not teach his daughters the actual languages—the thousands of
words and tens of thousands of meanings. That would have been a dif cult,
time-consuming task. He only taught them the rules they would need to turn
letters into sounds. Thus, his daughters acquired solid decoding skills for

Unit 1 | Appendix A 81
© 2013 Core Knowledge Foundation
these languages (D > 0), but they would have scored a zero on any measure
of language comprehension (C = 0). They could turn symbols into sounds, but
they had no idea what the sounds meant. Milton, on the other hand, due to
his blindness, had no functional decoding skills (D = 0). However, by virtue of
his great learning, he was able to understand Hebrew, Latin, and Greek when
they were read aloud to him (C > 0). Between Milton and his daughters, you
might say, there was reading comprehension (R), but the younger generation
brought the decoding skills (D) and the elderly poet brought the language
comprehension (C).
The Milton example is an unusual one, but it is possible to give a less unusual
one. A decent teacher can teach you to decode Russian letters (or the letters
used in many other writing systems) in the course of a couple days of intensive
work. Since you already know a lot about reading, all you would need to learn
is which sound values the unfamiliar letters stand for. Once you learned that,
you would be able to sound out most of the words in the language, but nobody
would claim that you are reading Russian. You would have some rudimentary
decoding skills (D > 0), but you would be lacking language comprehension (C =
0). You would be able to pronounce words, but you would not be able to make
sense of them. Essentially, you would be doing what Milton’s daughters did.
How These Ideas Inform This Program
Although this may seem very abstract and theoretical, there are two ideas
here that are very important for reading instruction and for understanding this
program. The rst important idea is that reading comprehension depends
crucially on both decoding skills (D) and language comprehension ability
(C); the second is that language comprehension ability takes much longer to
acquire than decoding skills.
Milton chose to teach his daughters decoding skills because he could teach
those relatively quickly. It would have taken him much, much longer to build up
their language comprehension abilities. Likewise, in the hypothetical example
just given, a decent teacher could teach you to decode Russian print in a
few days of intensive instruction, but he or she would need to keep working
with you for many weeks—possibly even many years—to teach you enough
Russian words and phrases to understand a movie, make sense of a radio
report, or read a short story.
You are facing a similar situation as a teacher in the early grades. You want your
students to learn to read. A crucial rst step is to teach them decoding skills.
Strong decoding skills can be taught to most young children over the course of
Grades K–2. It takes longer to teach decoding skills to young children who are
learning to read for the rst time than it does to teach the same skills to adults
who have already learned to read in another language, and it takes longer to
teach decoding skills in English-speaking countries because English spelling is
rather complex; but even so, most students can acquire basic decoding ability
in the early grades. The children will continue to automatize their decoding
skills, learn new spelling patterns, and build uency for many more years, but the
basics can be taught in Grades K–2.
82 Unit 1 | Appendix A
© 2013 Core Knowledge Foundation
That is not the case with language comprehension ability. It is going to take
you and your school system a long time to build up your students’ language
comprehension ability because this is not a job you can accomplish in the course
of a single school year. Rather, language comprehension ability is acquired over
many years. Your students began to develop a rudimentary ability to understand
language even before they could speak and continued to increase their language
comprehension abilities throughout the preschool years. They will make even
more gains in your classroom and the classrooms they join after yours. With each
new sentence they read or hear, and each new subject they study in school,
they will be building up background knowledge, vocabulary, and cultural literacy,
and thus increasing the range of materials they are equipped to understand; rst
orally and later via reading. The more you teach them and the more you expose
them to, the more they will be able to understand. It takes a long time to build
up the vocabulary and knowledge needed to make sense of most stories in a
newspaper or magazine, but this buildup is crucial for your students’ reading
abilities: for no matter how good their decoding skills may be, they will not
understand what they read unless they have the language comprehension ability
to make sense of the words they decode.
The Core Knowledge Language Arts program includes two strands of
instruction, and these strands correspond with the elements of reading
isolated in the simple view of reading. The Skills Strand is meant to build
students’ decoding skills (D), while the Listening & Learning Strand is meant
to build students’ language comprehension ability (C) by exposing them to
vocabulary, concepts, and ideas through frequent reading aloud. It is important
to understand that both strands are crucial for reading comprehension in later
grades. You may feel the decoding skills taught in the Skills Strand are more
important to teach in the early grades, and certainly this is the area where you
can expect to have the most immediate impact, but it is important that you
not neglect language comprehension ability. Remember, it takes many years
to build up enough vocabulary and general knowledge to understand a wide
range of printed materials. The building of background knowledge needs to
begin in Kindergarten (if not before) and continue throughout the elementary
and middle school years.
If students are not building their language comprehension ability in the early
grades, their reading scores are likely to begin to begin to fall off in Grade 4
and later. This has been called the “fourth-grade slump,” and it occurs because
material assessed on reading tests changes over time. As students progress
through the grades, test questions focus less on rudimentary decoding skills
and more on comprehension—and comprehension depends on having suf cient
vocabulary, background knowledge, and cultural literacy to understand the
words you are decoding. Thus, the importance of language comprehension
ability increases with time. A weakness in this area may not show up on tests in
early grades, but it will show up in later elementary grades.
This has been well documented in research. In one very interesting study,
researchers at the University of Kansas looked at measurements of
reading comprehension (R), decoding/word recognition (D), and listening

Unit 1 | Appendix A 83
© 2013 Core Knowledge Foundation
comprehension (C) for the same 570 students in second, fourth, and eighth
grade. They found the two factors D and C accurately predicted R in each
grade, but that C became more important, in the sense that it explained more
of the variation among students over time. The measure of decoding (D) was
extremely important in the second-grade results. Twenty-seven percent of the
variance in reading comprehension in second grade could be explained by
decoding skills (D) alone. Only 9 percent of the variance could be explained by
listening comprehension (C) alone. By fourth grade, however, the measure of
listening comprehension had begun to account for more variance: the unique
contribution of C rose to 21 percent while the equivalent number for D fell. By
eighth grade, fully 36 percent of the variance in reading comprehension scores
could be explained with reference to the children’s listening comprehension
ability. The unique contribution of D sank even further. In other words, while
reading comprehension depended on D and C at every stage, as the simple
view would predict, C explained more and more of the variation among
students as time went by. What this tells us is that, once the intricacies
of decoding are mastered (and in English this takes some time), reading
comprehension depends more and more heavily on language comprehension.
Language comprehension depends on background knowledge, vocabulary,
and cultural literacy.
If you understand Hirsch’s insight into the importance of background
knowledge, and you understand the simple view of reading, you can
understand why this program has two strands of instruction, and why both
strands are very important. The next several sections of this appendix will tell
you about the Skills Strand of CKLA.
Two Misconceptions About Reading and Writing
The Skills Strand of CKLA teaches the mechanics of both reading and writing.
It is based on the most current research on reading and writing, but at the
same time it has been written in opposition to some ideas that have been very
in uential in elementary education in recent decades. Two of those ideas are:
• Learning to read and write is natural.
• Learning to read and write is easy.
Both of these ideas have great emotional appeal. Unfortunately, both of them
are wrong.
Learning to Read and Write is Not Natural
Many scholars have argued that spoken language is natural for human
beings. The cognitive scientist Stephen Pinker, for example, has argued that
human beings have a language instinct, meaning that humans are born with
an innate capacity for learning language. This may turn out to be true. It is at
least a plausible theory since historians, linguists, and anthropologists have
never found a human culture that does not use language. When something is
universal, it may turn out to be natural.

84 Unit 1 | Appendix A
© 2013 Core Knowledge Foundation
What is true of oral language is not necessarily true of written language. In fact,
with written language, we know we are dealing with something that is not natural
or innate because we know when and where writing was invented, and we
know that, even today, not all languages have a system of writing. There are still
hundreds of languages in the world that are spoken, but not written or read.
Ten thousand years ago this was the norm, rather than an exception. At that
time, there were probably no human beings who knew how to read or write.
According to the linguist Florian Coulmas, the idea of writing down language
was probably developed independently by three ancient cultures: the Egyptians,
the Phoenicians, and the Chinese. Each used a slightly different system, and the
mechanisms these pioneers developed for recording speech then spread from
one culture to another, evolving as they went. If these initial inventors had not
come up with schemes for writing down speech, we might all be illiterate today.
Writing is many things. It is an art that can be taught and learned. It is an
invention—one of the greatest inventions in human history. It is a technology
enabling us to do things we could not do without it—a technology every bit as
exciting and amazing as airplane ight or electric power. But it is not natural.
The same is true of reading, which is simply the process of unpacking, or
decoding, what somebody else has written.
Reading and writing are both highly artifi cial. We tend to recoil at that word. We
have internalized the idea that natural is good and artifi cial is bad. Therefore,
we think, reading must be natural. In fact, as the reading researcher Philip
Gough has written, reading is a highly unnatural act.
The rst step toward good reading and writing instruction is to understand that
reading and writing are artifi cial—but not necessarily in a bad sense. We need
to remind ourselves the word artifi cial derives from the word art. To say reading
and writing are forms of art that had to be invented and need to be taught to
children does not make reading and writing any less wonderful or important.
On the contrary, it makes these things more wonderful and precious, and it
also emphasizes the importance of your job as a teacher. There is no job more
important than teaching young children the magni cent, valuable, and highly
unnatural arts of reading and writing.
Learning to Read and Write is Not Easy
The second idea noted earlier, that learning to read and write is easy, is also
mistaken. Reading and writing are complex behaviors, and they are more
complex in English than in many other languages because English has a
fairly complicated spelling system. In Spanish, for example, the relationships
between letters and sounds are mostly one to one, meaning each sound is
usually written with one spelling, and each spelling unit is usually pronounced
one way. This is not the case in English. In order to read and write English with
a high degree of accuracy, there is quite a lot that students need to learn.
As a way of demonstrating the complexity involved in learning to read and write
in English, suppose we attempted to list all of the discrete bits of information
a person needs to know in order to be able to read and write in English. As a

Unit 1 | Appendix A 85
© 2013 Core Knowledge Foundation
starting point, we might begin with the 26 letters and argue that these are the
26 things one really needs to learn to read and write English. However, for each
letter, one eventually needs to learn not only the letter shape but also the letter
name (in order to be able to read abbreviations and initials). So that is 52 bits of
information.
That is a good start, but we must not stop there. In English, all letters can be
written in uppercase and lowercase forms, and the uppercase forms are not
always the same as the lowercase forms. Compare B to b, D to d, H to h, R to
r, Q to q. At least 16 uppercase letters have a slightly different form than the
matching lowercase letters. So we must raise our estimate of the complexity of
the English writing system to 68 bits of information.
We are not done yet. Students must also know the 44 sounds these letters
stand for. That raises our estimate of the complexity to 112.
If there were a simple one-to-one relationship between letters and sounds, that
might be a fairly good estimate of the complexity of the code. Unfortunately,
the relationships between sounds and letters in English are quite complicated.
The 44 sounds of English can be spelled many different ways. In our work on
this program we have identi ed 150 spellings that are frequent enough to be
worth teaching in the early grades. That boosts our estimate of the complexity
of the code to 262.
In addition, students need to learn to track from left to right, to blend sounds
into words (when reading), and segment words into sounds (when writing and
spelling). They need to learn a handful of symbols used in writing, including
the period, comma, exclamation point, question mark, quotation mark, and
apostrophe. That raises our estimate of code complexity to about 270 bits of
information.
We could boost the estimate even higher by adding Tricky Words and unusual
spellings or by pointing out that there are many letters in English that can be
pronounced different ways. We could also point out that reading a word like
thin requires the students to group the rst two letters and attach them to one
sound, and reading a word like cake requires students to scan ahead, see the
‘e’, and realize it controls the pronunciation of the ‘a’ earlier.
Even without these additions it is clear that the English writing system is quite
complicated.
The Problem with Whole Language
On a conservative estimate, there are 270 bits of knowledge a person needs
to be able to read and write English. It is unwise to ask students to tackle all
of this complexity at once and hope they will gure it out. Yet that is precisely
what is done in so-called “Whole Language” approaches. Whole Language
instruction is based on the assumption that learning to read is natural, and
not dif cult, so reading skills can be allowed to develop gradually, without
much explicit instruction. Lots of students in Whole Language classrooms
do manage to gure out the English writing system, but many others do not.

86 Unit 1 | Appendix A
© 2013 Core Knowledge Foundation
Whole Language ideas have tremendous emotional appeal, but the Whole
Language approach is actually a recipe for leaving many children behind. It is
an especially risky strategy for disadvantaged children.
A much better strategy is to introduce the English spelling code explicitly,
beginning with the easiest, least ambiguous, and most frequently used parts of
the code and then adding complexity gradually. That is the central strategy on
which this program is based.
The strategy adopted in this program is the same strategy that successful
coaches use when teaching children a sport such as tennis. The successful
coach does not ask students to learn “Whole Tennis” and soak up the
necessary skills all at once by trying to hit all different kinds of shots the rst
day on the court. Instead, the successful coach teaches the student to hit a
forehand ground stroke and provides lots of practice hitting forehands. Then
the coach moves on to teach a backhand ground stroke, then a forehand
volley, then a backhand volley, then a serve, then an overhead smash, then a
drop shot, etc. With each element taught, the student becomes a stronger and
more complete player. In the same way, this program begins by teaching the
most common and least ambiguous spellings for sounds and then moves on to
introduce the more complex parts of the writing system.
Key Aspects of the Skills Strand
Some key aspects of the Skills Strand of CKLA are listed below.
• CKLA teaches reading and writing in tandem, since they are inverse processes.
English writing involves making pictures of sounds; reading involves translating
those pictures back into sounds and blending the sounds to make words.
• CKLA rejects the Whole Language notion that exposure to rich language and
lots of environmental print is suf cient to ensure mastery of the writing system.
• CKLA explicitly teaches letter-sound correspondences as opposed to leaving
students to gure these out on their own or deduce them by analyzing familiar
whole words (as in some forms of “analytic” phonics).
• CKLA focuses on sounds, or phonemes, as the primary organizing principle of
the program, rather than letters.
• CKLA includes phonics instruction, but the instruction differs from the phonics
usually taught in the United States in that it begins with sounds and then
attaches those sounds to spellings. In a typical phonics lesson in the United
States, the teacher writes the letter ‘m’ on the board and says, “This is the letter
‘em’. It says /m/.” As a teacher using this program, you will be asked to present
your lessons in a different way. You will be asked to begin with the sound. At the
beginning of the lesson you will tell the class: “Today’s sound is /m/.” You will
lead the class in some engaging oral language exercises that will allow students
to say and hear the sound /m/. Once students are familiar with the sound, you
will show them how to draw a “picture of the sound.” You will write the letter ‘m’
on the board and explain that this is how we make a picture of the /m/ sound.
Unit 1 | Appendix A 87
© 2013 Core Knowledge Foundation
• CKLA focuses consistently on the phoneme, or single sound, and not on larger
units; students learn to read words that contain onsets, rimes, and consonant
clusters, but they learn to view and process these larger units as combinations
of smaller phoneme-level units. Rimes like –ick and initial clusters like st– are
not taught as units but as combinations.
• CKLA uses a synthetic phonics approach that teaches students to read by
blending through the whole word; it does not teach multiple cueing strategies,
use of pictures as a primary resource in decoding, or part-word guessing.
• CKLA begins by teaching the most common or least ambiguous spelling for a
sound (the basic code spelling); later it teaches spelling alternatives for sounds
that can be spelled several different ways. Thus, the system is kept simple
at rst and complexity is added bit by bit as students gain con dence and
automatize their reading and writing skills.
• CKLA includes words, phrases, and stories for students to read and
worksheets for them to complete that allow for focused, distributed practice
working with the letter-sound correspondences students have been taught.
• CKLA does not require students to read words that go beyond the letter-sound
correspondences they have been taught. In other words, all words students
are asked to read as part of the program are decodable, either because
they are composed entirely of letter-sound correspondences students have
been taught or because they are Tricky Words that have been taught. This
means students have a chance to begin reading words and stories that are
completely decodable before tackling words and stories that are full of spelling
alternatives.
• CKLA does not require students to write words that go beyond the letter-
sound correspondences they have been taught. In other words, students are
only asked to write words that can be spelled (at least plausibly if not always
correctly) using the code knowledge they have been taught.
• CKLA avoids Tricky Words and exception words in the rst part of
Kindergarten, preferring to have students learn to read and write with regular
words that can be blended and spelled in accordance with the letter-sound
correspondences taught.
• CKLA avoids letter names in the early lessons of Kindergarten, because what is
important for reading is not the letter name but the sound value the letter stands
for. To read the word cat, it is essential to know /k/ /a/ /t/, not “see aay tee.”
• CKLA teaches lowercase letters rst and introduces the uppercase letters later.

88 Unit 1 | Appendix B
© 2013 Core Knowledge Foundation
Appendix B: Kindergarten Scope and Sequence
Scope and Sequence of Kindergarten Skills Instruction
The Skills Strand for Kindergarten is divided into 10 units. In the course of
these 10 units you will introduce 10 vowel sounds and 25 consonant sounds
and teach students the most common, or least ambiguous, spelling for each
sound. You will teach students to read words by blending through the word and
to spell words by segmenting them into sounds and writing a spelling for each
sound. You will lead the class in various chaining exercises that help build word
decoding skills and supervise the completion of worksheets. Once students’
word reading skills are strong, you will introduce them to book reading. In the
later units you will introduce a handful of high-frequency Tricky Words that do
not play by the rules.
Although the main focus in Kindergarten is to teach blending and the basic
code, you will also introduce a small number of spelling alternatives—the ‘c’, ‘k’,
and ‘ck’ spellings for /k/ (cat, kit, black), the ‘s’ spelling for /z/ (is, has, dogs), a
number of double-letter spellings for consonant sounds (dress, sell, stuff), and a
few spellings for /d/ and /t/ in past-tense words (played, walked). We think you
will be pleasantly surprised by how well your Kindergarten students are reading
by the end of the year. This was a reaction we encountered many times when
these materials were rst piloted between 2007 and 2010.
The rst two units set the stage for the eight that follow. In these two units you
will teach students to hear words and phonemes in words. You will also teach
students to hold a writing utensil (initially a crayon) and make marks on paper.
The oral language and handwriting skills are presented separately in Units 1 and
2, but these two streams of instruction are combined beginning in Unit 3 when
the students begin to use handwriting skills to make pictures of sounds (letters).
In Unit 3, you will introduce eight sounds, and a single-letter spelling for each
sound, e.g., /m/ spelled ‘m’, /a/ spelled ‘a’, /t/ spelled ‘t’, etc. Students will learn
to read and spell two- and three-letter words that can be constructed using
these eight spellings. More sounds and single-letter spellings are introduced in
Units 4 and 5. Students continue to read, spell, copy, and write words that can
be made with the spellings they have learned.
The rst story is presented in Big Book form at the end of Unit 4. There is another
Big Book in Unit 5. By Unit 6, the students will be reading stories in Readers.
As you move through the sequence, students will learn more sounds and
spellings and will begin to blend and read longer words. In Unit 6, they will
learn to read consonant clusters in words like spot and desk; they will also
learn the letter names. In Unit 7, they will learn consonant sounds written with
digraphs like the ‘ch’ spelling for the /ch/ sound. In Unit 8, the rst Tricky Words
are introduced. More high-frequency Tricky Words are taught in Unit 9. Unit 10
covers the “long” vowel sounds, each with its basic code spelling. The outline
below gives a more detailed breakdown of what is covered in each unit.
Unit 1 | Appendix B 89
© 2013 Core Knowledge Foundation
Much of the instruction in the early units of Kindergarten is whole-group
instruction. However, if some members of the class begin to fall behind, you
may need to supplement the whole-group instruction and add one to three
small-group sessions per week.
Unit 1
• phonological awareness (hearing environmental sounds, hearing words in
phrases and sentences)
• prewriting skills (tripod grip, lines, circles, etc.)
Unit 2
• phonemic awareness (hearing sounds in words)
• oral blending of sounds, e.g., given /f/ . . . /i/ . . . /sh/, the student can blend the
sounds to make the word fi sh
• prewriting skills
Unit 3
• rst letter-sound correspondences: /m/ spelled ‘m’, /a/ spelled ‘a’, /t/ spelled
‘t’, /d/ spelled ‘d’, /o/ spelled ‘o’, /k/ spelled ‘c’, /g/ spelled ‘g’, and /i/ spelled ‘i’
• reading and writing one-syllable words containing up to three letters (VC and
CVC words)
• word-building and chaining exercises
Unit 4
• more letter-sound correspondences: /n/ spelled ‘n’, /h/ spelled ‘h’, /s/ spelled
‘s’, /f/ spelled ‘f’, /v/ spelled ‘v’, /z/ spelled ‘z’, /p/ spelled ‘p’, and /e/ spelled ‘e’
• reading and writing one-syllable words containing up to three letters (VC and
CVC words)
• reading short phrases
• rst story (a phrase story in Big Book format)
• word-building and chaining exercises
• dictation exercises
Unit 5
• more letter sound-correspondences: /b/ spelled ‘b’, /l/ spelled ‘l’, /r/ spelled ‘r’,
/u/ spelled ‘u’, /w/ spelled ‘w’, /j/ spelled ‘j’, /y/ spelled ‘y’, /x/ spelled ‘x’, and
/k/ spelled ‘k’
• reading and writing one-syllable words containing up to three letters (VC and
CVC words)
• reading short phrases and sentences beginning with uppercase letters that
look like the lowercase letters (C, F, K, M, O, P, S, T, U, V, W, X, Z)
• reading stories (a Big Book)

90 Unit 1 | Appendix B
© 2013 Core Knowledge Foundation
• introduce punctuation (period)
• word-building and chaining exercises
• dictation exercises
Unit 6
• initial and nal consonant clusters (e.g., clip and task)
• reading and writing one-syllable words containing up to ve letters (CVCC,
CCVC, CCVCC)
• /z/ spelled ‘s’; plural words ending in the letter ‘s’ sounded /s/ or /z/
• letter names and “The Alphabet Song”
• punctuation (period, question mark, exclamation point, comma, apostrophe,
quotation marks)
• reading decodable stories
Unit 7
• consonant sounds spelled with digraphs: /ch/ spelled ‘ch’, /sh/ spelled ‘sh’,
/th/ spelled ‘th’, /th/ spelled ‘th’, /qu/ spelled ‘qu’, and /ng/ spelled ‘ng’
• reading and writing one-syllable words containing up to seven letters
• reading decodable stories
Unit 8
• the Tricky Words the, a, of, all, one, from, and was
• double-letter spellings for consonant sounds: /b/ spelled ‘bb’, /d/ spelled
‘dd’, /f/ spelled ‘ff’, /g/ spelled ‘gg’, /k/ spelled ‘cc’ and ‘ck’, /l/ spelled ‘ll’, /m/
spelled ‘mm’, /n/ spelled ‘nn’, /p/ spelled ‘pp’, /r/ spelled ‘rr’, /s/ spelled ‘ss’, /t/
spelled ‘tt’, and /z/ spelled ‘zz’
• reading decodable stories
Unit 9
• the Tricky Words word, to, I, no, when, where, why, what, which, so, once, said,
says, are, were, here, and there
• uppercase letters (A, B, C, D, E, F, G, H, I, J, K, L, M, N, O, P, Q, R, S, T, U, V,
W, X, Y, and Z)
• reading decodable stories
• answering questions about stories in written form

Unit 1 | Appendix C 91
© 2013 Core Knowledge Foundation
Unit 10
• letter-sound correspondences for the e-controlled vowels: /ee/ spelled ‘ee’,
/ae/ spelled ‘a_e’, /ie/ spelled ‘i_e’, /oe/ spelled ‘o_e’, and /ue/ spelled ‘u_e’
• the Tricky Words he, she, we, be, me, they, their, my, by, you, and your
• reading decodable stories
• answering questions about stories in written form
• Units 1–10 Comprehensive Student Performance Task Assessments
Appendix C: Components of Program
Components
The components for the Skills Strand for Kindergarten are as follows:
Teacher Guides
Kindergarten
Teacher Guide
Kindergarten
Unit 6 Reader
Kindergarten
Workbook
• The Teacher Guides outline the lessons. There is one Teacher Guide for each
unit.
Workbooks
• The Workbooks contain worksheets for students to complete as part of the
lessons. There is one Workbook for each unit. When it is possible to include
100% decodable instructions, they are printed on the top of the worksheet.
When it is not possible to do this, family member/teacher instructions are
printed vertically along the left side. Each student should have a Workbook.
Readers
• The Readers contain 100% decodable texts for students to read in Units 6–10.
There is a Reader for each of the units listed, and new spellings taught in the
unit are printed in bold throughout the Reader to help students master new
material. The last few stories in each Reader are stories for the Pausing Point,
which can be either assigned or omitted depending on the needs of students
in the class. Ideally, each student should have his or her own Reader. The
Workbooks include take-home copies of each story for further practice.
Big Books
• The Big Books are exact replicas of the readers, but larger. They can be used
for “demonstration stories” as you model reading for students. In Kindergarten,
the stories for Units 4 and 5 are available only in Big Books. The stories for
Units 6, 7, and 8 are available in both Readers and Big Books.

92 Unit 1 | Appendix C
© 2013 Core Knowledge Foundation
Media Disks
• The Media Disks allow you to present a Skills story as a demonstration story,
using a computer and a projector or a Smartboard, instead of the Big Book.
Using projection allows for much larger images and print size, but it requires
some equipment. If you wish to use the media disk, you will need a computer
with at least a 19-inch monitor, or a projector system, or a Smartboard. You can
use either the Big Book or the Media Disk to present a demonstration story.
Only a few Readers will be made available as Big Books; all of the Readers will
be available on the Media Disks. In other words, if you want to present a story
as a demonstration story, and there is no Big Book for your unit, you will need
to use a computer projection system, or copy the story onto transparencies for
display with an overhead projector.
Pocket Chart
Pocket Chart
Large Cards
Sound Poster with
Sound Card affixed
• We expect that you have or can obtain a pocket chart for use in chaining
exercises. We ask that you make letter cards out of index cards and use the
cards to build words on the chart.
Large Cards
• This set of cards is used for teaching and reviewing sounds and spellings,
especially during the Large Card Chaining exercise. The cards are used
throughout Kindergarten.
Mirrors
• Handheld mirrors allow students to see the shape of the mouth when a sound
is produced. We expect that you have or can obtain a small handheld mirror for
each student in your class.
Sound Posters
• The Sound Posters allow you to display code knowledge on the walls of your
classroom as it is taught. When a sound is taught for the rst time, the Teacher Guide
will prompt you to mount the poster for that sound on the wall of the classroom,
along with the Sound Card representing the basic code spelling, e.g., the ‘m’ spelling
for /m/. The Teacher Guide will also prompt you to post the Sound Cards for spelling
alternatives when they are taught. We suggest you post the vowel posters on one
wall and the consonant posters on another to emphasize the differences between
these two categories of sounds. The Sound Posters will be very useful for students
as they begin to spell words on their own. If they are not sure how to spell the /k/
sound, they can look at the posters, nd /k/ and see that four possibilities are ‘c’ as
in cat, ‘k’ as in kid, ‘cc’ as in soccer, and ‘ck’ as in clock.
Chaining Folders
• Students use these folders to practice building words with Small Cards. The
folders are used whenever the Teacher Guide calls for the Student Chaining or
the Chain and Copy exercises. During Student Chaining you call out words and
students arrange letter cards on their Chaining Folders to spell the words. Each
student should have his or her own folder. The folder has pockets so the Small
Cards can be stored between lessons.

Unit 1 | Appendix C 93
© 2013 Core Knowledge Foundation
Small Cards
• These cards are to be used in tandem with the Chaining Folders just described.
We suggest you keep the cards in envelopes or in an organizer or caddy. As
new sounds and spellings are introduced, you can either distribute Small
Cards for students to use during Student Chaining exercises, or change the
cards before the lessons. Students will store their cards in the pockets of their
Chaining Folders between lessons.
Assessment and Remediation Guide
• This resource guide consists of both assessment and remediation materials that
go beyond the Pausing Point materials typically included at the end of each unit.
The URL for the Assessment and Remediation Guide is given in the introduction
of each unit. Selected materials may be printed and used for reteaching and/or
additional practice for students who are experiencing dif culty.
Students using chaining folders
Lesson Structure
The lessons in the program are laid out in the Teacher Guides.
Each lesson begins with an Objectives header. This speci es the sounds,
spellings, Tricky Words, and/or concepts students are expected to learn during
the lesson. The focus here is generally on new letter-sound correspondences
and new Tricky Words.
The At a Glance Chart gives an overview of the lesson. This chart lists the
name of each exercise in the lesson along with the materials needed to teach
that exercise and the time allotted to each exercise.

94 Unit 1 | Appendix C
© 2013 Core Knowledge Foundation
The remainder of the lesson plan is devoted to a detailed description of the
procedures for each of the exercises listed in the At a Glance chart.
Those exercises that represent good opportunities for assessment are marked
with a Tens icon. For more on the Tens system of assessment, see the next
section.
Tens Scores
In order to identify struggling students and keep track of student progress, we
recommend you use the Tens system of assessment.
With the Tens system of assessment, raw scores are converted to numbers
between 0 and 10 using the Tens Conversion Chart (printed in Teacher
Resources section). To use the chart to determine a student’s Tens score, rst
locate the number of answers the student answered correctly (along the top
of the chart) and then locate the number of “test items” (along the left side of
the chart). Next, nd the square where the column with the correct number
of answers and the row with the number of items meet. This square contains
the student’s Tens score. By using the Tens Conversion Chart, you can easily
convert any raw score, from 0 to 30, into a Tens score.
You may wish to record the students’ Tens scores on the Tens Recording
Chart (printed on the page after the Tens Conversion Chart). To do this, list
the students’ names in the rst row and the various exercises in each column.
Record a student’s Tens score for a particular exercise in the square where the
column with the student’s name and the row with the exercise meet.
Once you have recorded a number of Tens scores, it will be very easy to get an
overview of student progress because all of the scores are comparable.
We hope you will calculate Tens scores for students each time you encounter
an exercise marked with a Tens icon. Note that many exercises not marked
with a Tens icon are also suitable for calculating Tens scores.
If a student appears to be doing poorly, your rst course of action should be
to provide the student with more support, either during the regular period of
instruction or during a small-group session. Often this will be enough to get
the student back on track. If a student continues to post low Tens scores
for a longer period of time, despite additional instruction, please refer to the
Assessment and Remediation Guide.
To Learn More
To learn more about the program, visit the website:
www.coreknowledge.org/reading
To learn more about sounds, spellings, and the general approach to reading
instruction used here, we highly recommend that you read and study Diane
McGuinness, Why Our Children Can’t Read.
Unit 1 | Teacher Resources 95
© 2013 Core Knowledge Foundation
Teacher Resources

96 Unit 1 | Teacher Resources
© 2013 Core Knowledge Foundation
Assessments
There are many opportunities for informal assessment throughout each
Skills unit. You may choose to assign a given workbook page for individual,
independent completion to use as an assessment. It may be useful to use the
Tens Conversion Chart and the Tens Recording Chart to collect and analyze
all assessment data.
Tens Conversion Chart
Number Correct
01234567891011121314151617181920
Number of Questions
1010
20 510
30 3 710
4035810
50246810
602357810
7013467910
80134568910
901234678910
10012345678910
110123455678910
1201233456788910
13012234556788910
140112344566789910
1501123345567789910
16011233445667889910
170112234456677889910
1801122334456677889910
19011223344556677889910
2001122334455667788991010
Simply nd the number of correct answers along the top of the chart and the
total number of questions on the worksheet or activity along the left side.
Then nd the cell where the column and the row converge. This indicates
the Tens score. By using the Tens Conversion Chart, you can easily convert
any raw score, from 0 to 20, into a Tens score. You may choose to use the
Tens Recording Chart following to provide an at-a-glance overview of student
performance.

Unit 1 | Teacher Resources 97
© 2013 Core Knowledge Foundation
Tens Recording Chart
Use the following grid to record students’ Tens scores. Refer to the previous page
for the Tens Conversion Chart.
Name

98 Unit 1 | Workbook Answer Key
© 2013 Core Knowledge Foundation
35
Name
Unit 1 35
© 2013 Core Knowledge Foundation
9.1
Directions: For each sentence, ask students to circle one cube for each word in the sentence read aloud.
1.
2.
3.
4.
41
Unit 1 41
© 2013 Core Knowledge Foundation
10.1
Name
Directions: Ask students to copy each item.
Part One
42
42 Unit 1
© 2013 Core Knowledge Foundation
Directions: Ask students to color the box on the left green, the box on the right red, the top box yellow, the middle box orange,
and the bottom box blue.
Part A, Writing Strokes Score: _____
Part B, Position Words Score: _____
Part Two
Yellow
Green
Orange
Red
Blue
43
Unit 1 43
© 2013 Core Knowledge Foundation
10.2
Name
Part Three
Part C, Word Discrimination Score: _____
Directions: For each sentence, ask students to circle one cube for each word in the sentence read aloud.
1.
2.
3.
4.

Unit 1 | Workbook Answer Key 99
© 2013 Core Knowledge Foundation
47
Unit 1 47
© 2013 Core Knowledge Foundation
PP1
Name
Directions: Ask students to color the left hand green and the right hand red. Students may decorate the hands (optional).
Green
Red

Unit 1 | Acknowledgments 101
© 2013 Core Knowledge Foundation
CORE KNOWLEDGE LANGUAGE ARTS
SERIES EDITOR-IN-CHIEF
E. D. Hirsch, Jr.
PRESIDENT
Linda Bevilacqua
EDITORIAL STAFF
Carolyn Gosse, Senior Editor - Preschool
Khara Turnbull, Materials Development Manager
Michelle L. Warner, Senior Editor - Listening & Learning
Mick Anderson
Robin Blackshire
Maggie Buchanan
Paula Coyner
Sue Fulton
Sara Hunt
Erin Kist
Robin Luecke
Rosie McCormick
Cynthia Peng
Liz Pettit
Ellen Sadler
Deborah Samley
Diane Auger Smith
Sarah Zelinke
DESIGN AND GRAPHICS STAFF
Scott Ritchie, Creative Director
Kim Berrall
Michael Donegan
Liza Greene
Matt Leech
Bridget Moriarty
Lauren Pack
CONSULTING PROJECT MANAGEMENT SERVICES
ScribeConcepts.com
ADDITIONAL CONSULTING SERVICES
Ang Blanchette
Dorrit Green
Carolyn Pinkerton
ACKNOWLEDGMENTS
These materials are the result of the work, advice, and encouragement of numerous individuals over many years. Some of those singled out here already
know the depth of our gratitude; others may be surprised to nd themselves thanked publicly for help they gave quietly and generously for the sake of
the enterprise alone. To helpers named and unnamed we are deeply grateful.
CONTRIBUTORS TO EARLIER VERSIONS OF THESE MATERIALS
Susan B. Albaugh, Kazuko Ashizawa, Nancy Braier, Kathryn M. Cummings, Michelle De Groot, Diana Espinal, Mary E. Forbes, Michael L. Ford,
TedHirsch, DanielleKnecht, James K. Lee, DianeHenryLeipzig, MarthaG.Mack, Liana Mahoney, Isabel McLean, Steve Morrison, Juliane K. Munson,
ElizabethB.Rasmussen, Laura Tortorelli, RachaelL.Shaw, SivanB.Sherman, Miriam E. Vidaver, Catherine S. Whittington, JeannetteA. Williams
We would like to extend special recognition to Program Directors Matthew Davis and Souzanne Wright who were instrumental to the early
development of this program.
SCHOOLS
We are truly grateful to the teachers, students, and administrators of the following schools for their willingness to eld test these materials and for
their invaluable advice: Capitol View Elementary, Challenge Foundation Academy (IN), Community Academy Public Charter School, Lake Lure Classical
Academy, Lepanto Elementary School, New Holland Core Knowledge Academy, Paramount School of Excellence, Pioneer Challenge Foundation
Academy, New York City PS 26R (The Carteret School), PS 30X (Wilton School), PS 50X (Clara Barton School), PS 96Q, PS 102X (Joseph O. Loretan),
PS104Q (The Bays Water), PS 214K (Michael Friedsam), PS 223Q (Lyndon B. Johnson School), PS 308K (Clara Cardwell), PS 333Q (Goldie Maple Academy),
Sequoyah Elementary School, South Shore Charter Public School, Spartanburg Charter School, Steed Elementary School, Thomas Je erson Classical
Academy, Three Oaks Elementary, West Manor Elementary.
And a special thanks to the CKLA Pilot Coordinators Anita Henderson, Yasmin Lugo-Hernandez, and Susan Smith, whose suggestions and day-to-day
support to teachers using these materials in their classrooms was critical.
102 Unit 1 | Acknowledgments
© 2013 Core Knowledge Foundation
CREDITS
Every e ort has been taken to trace and acknowledge copyrights. The editors tender their apologies for any accidental infringement where
copyright has proved untraceable. They would be pleased to insert the appropriate acknowledgment in any subsequent edition of this
publication. Trademarks and trade names are shown in this publication for illustrative purposes only and are the property of their respective
owners. The references to trademarks and trade names given herein do not a ect their validity.
All photographs are used under license from Shutterstock, Inc. unless otherwise noted.
ILLUSTRATORS AND IMAGE SOURCES
17: Core Knowledge Staff; 20: Core Knowledge Staff; 21: Core Knowledge Staff; 22: Shutterstock; 26: Core Knowledge Staff; 27: Shutterstock; 34: Core
Knowledge Staff; 35: Shutterstock; 38: Shutterstock; 39: Shutterstock; 48: Core Knowledge Staff; 50: Shutterstock; 53: Core Knowledge Staff; 54: Core
Knowledge Staff; 55: Shutterstock; 57: Shutterstock; 59: Shutterstock; 63: Shutterstock; 64: Shutterstock; 75: Shutterstock; 77: Shutterstock; 78: Photo
by Timothy Greenfield-Sanders; 79: Core Knowledge Staff; 80: public domain; 91 (top): Core Knowledge Staff; 91 (middle): Shutterstock; 91 (bottom):
Kristin Kwan; 92: Core Knowledge Staff; 93: Core Knowledge Staff
Regarding the Shutterstock items listed above, please note: No person or entity shall falsely represent, expressly or by way of reasonable
implication, that the content herein was created by that person or entity, or any person other than the copyright holder(s) of that content.

Unit 1
Teacher Guide
Skills Strand
KINDERGARTEN
The Core Knowledge Foundation
www.coreknowledge.org
